OptionTrigger Desktop Complete Setup Guide
Step-by-step guide to install and configure OptionTrigger Desktop, connect to Interactive Brokers for options trading
This guide will walk you through the complete installation and configuration process of OptionTrigger Desktop, including software installation, SSL certificate setup, connecting to Interactive Brokers TWS, and verifying all components are working properly.
Estimated Time: 15-20 minutes Supported Platforms: macOS / Windows Prerequisites: Interactive Brokers TWS or IB Gateway installed
Part 1: Installing OptionTrigger Desktop
Download and Install OptionTrigger Desktop
Visit the Downloads page to get the installer for your operating system. Double-click to run the installer.
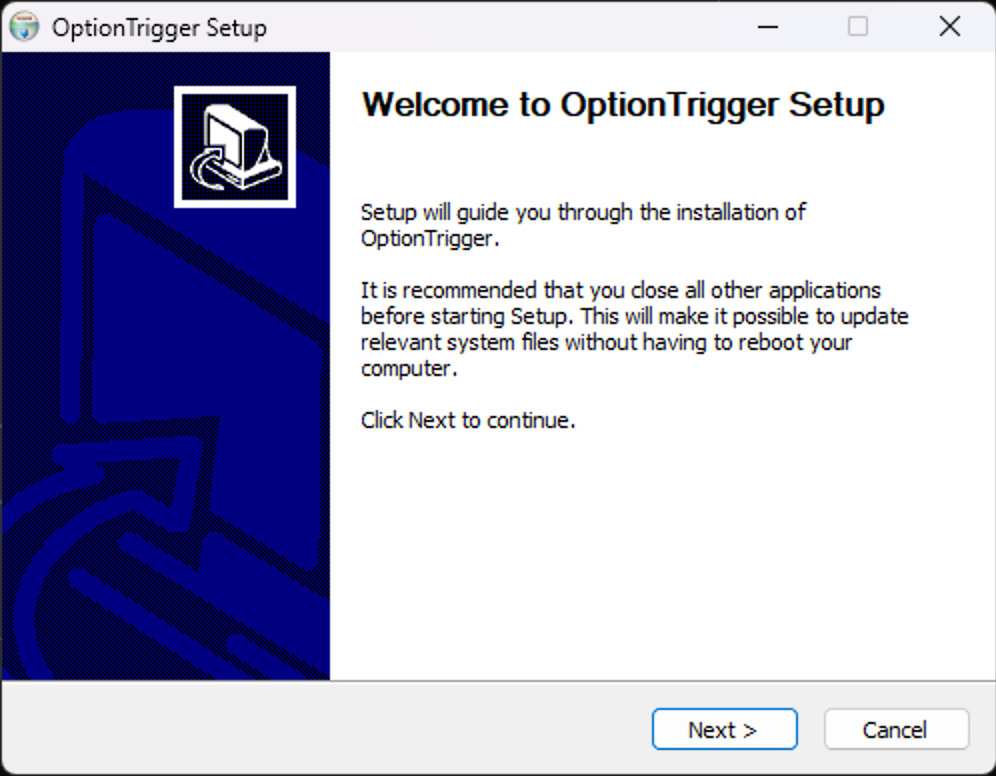
macOS users may see "Cannot verify developer" warning on first launch. Go to System Preferences → Security & Privacy and click "Open Anyway".
Install SSL Certificate
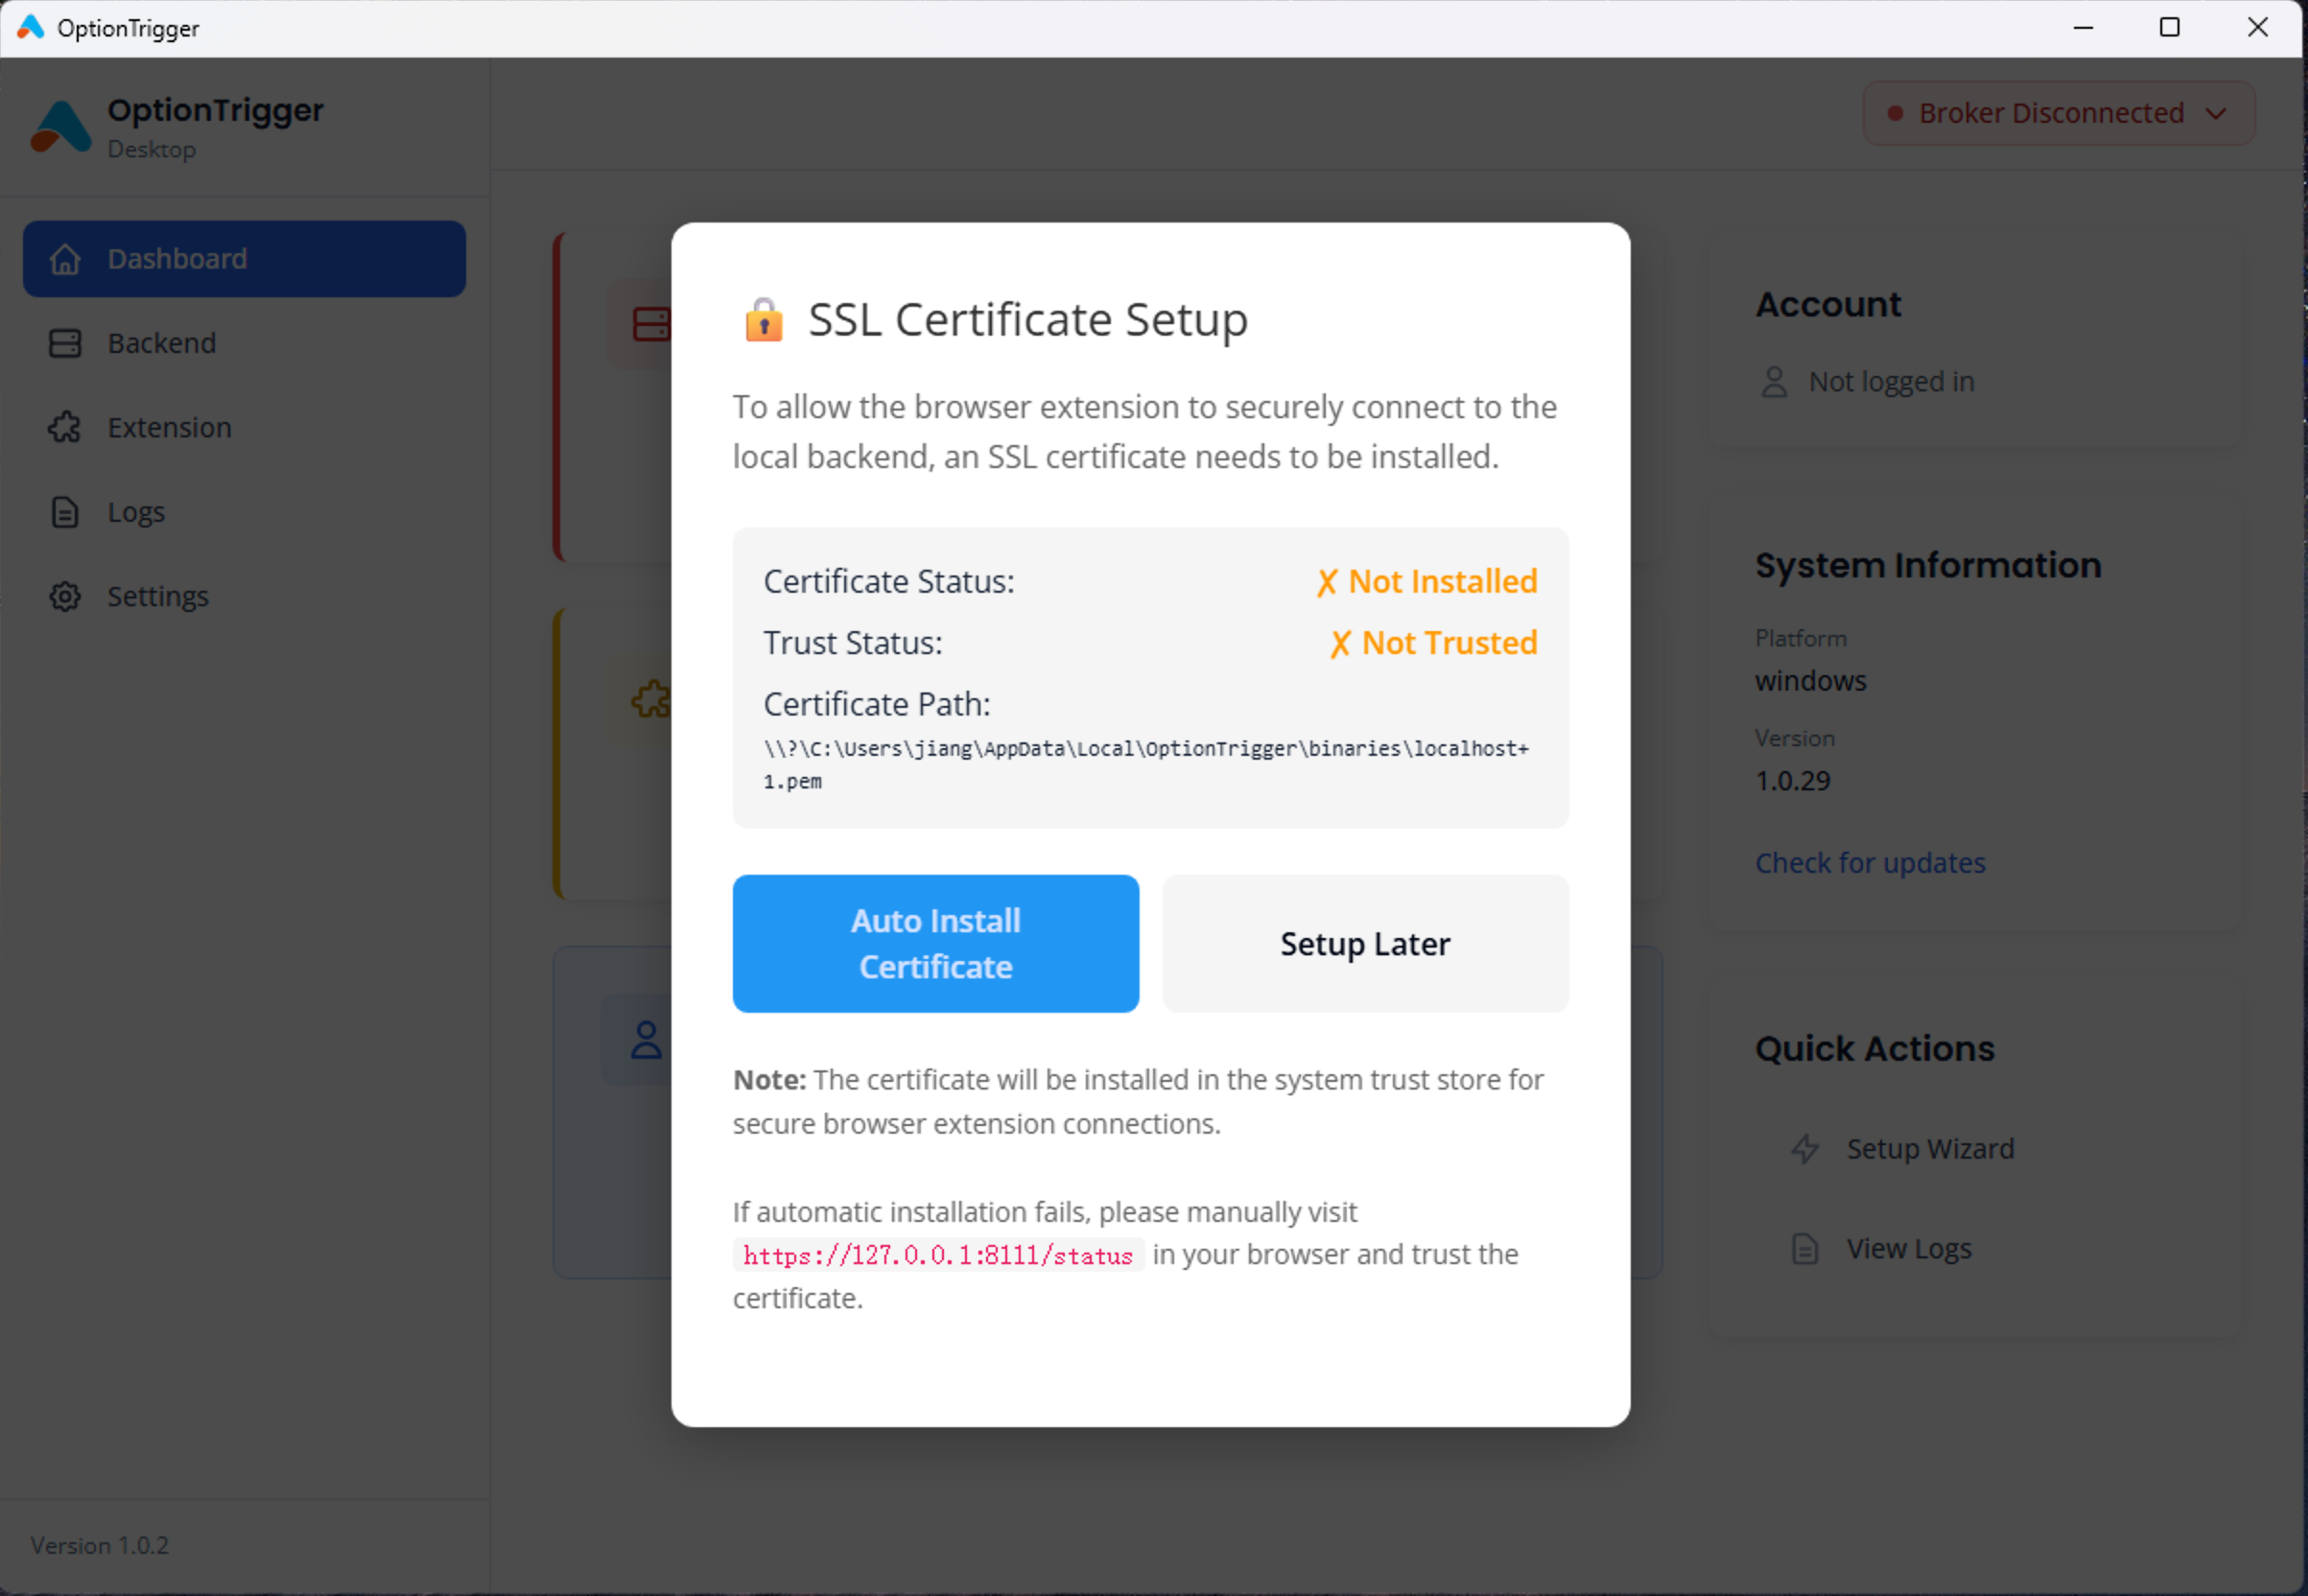
When you first launch OptionTrigger Desktop, you'll be prompted to install an SSL certificate. This allows the browser extension to securely communicate with the local backend.
Click the Install SSL Certificate button:
Wait for Certificate Installation
A permission dialog will appear. Enter your system password to authorize the certificate installation.
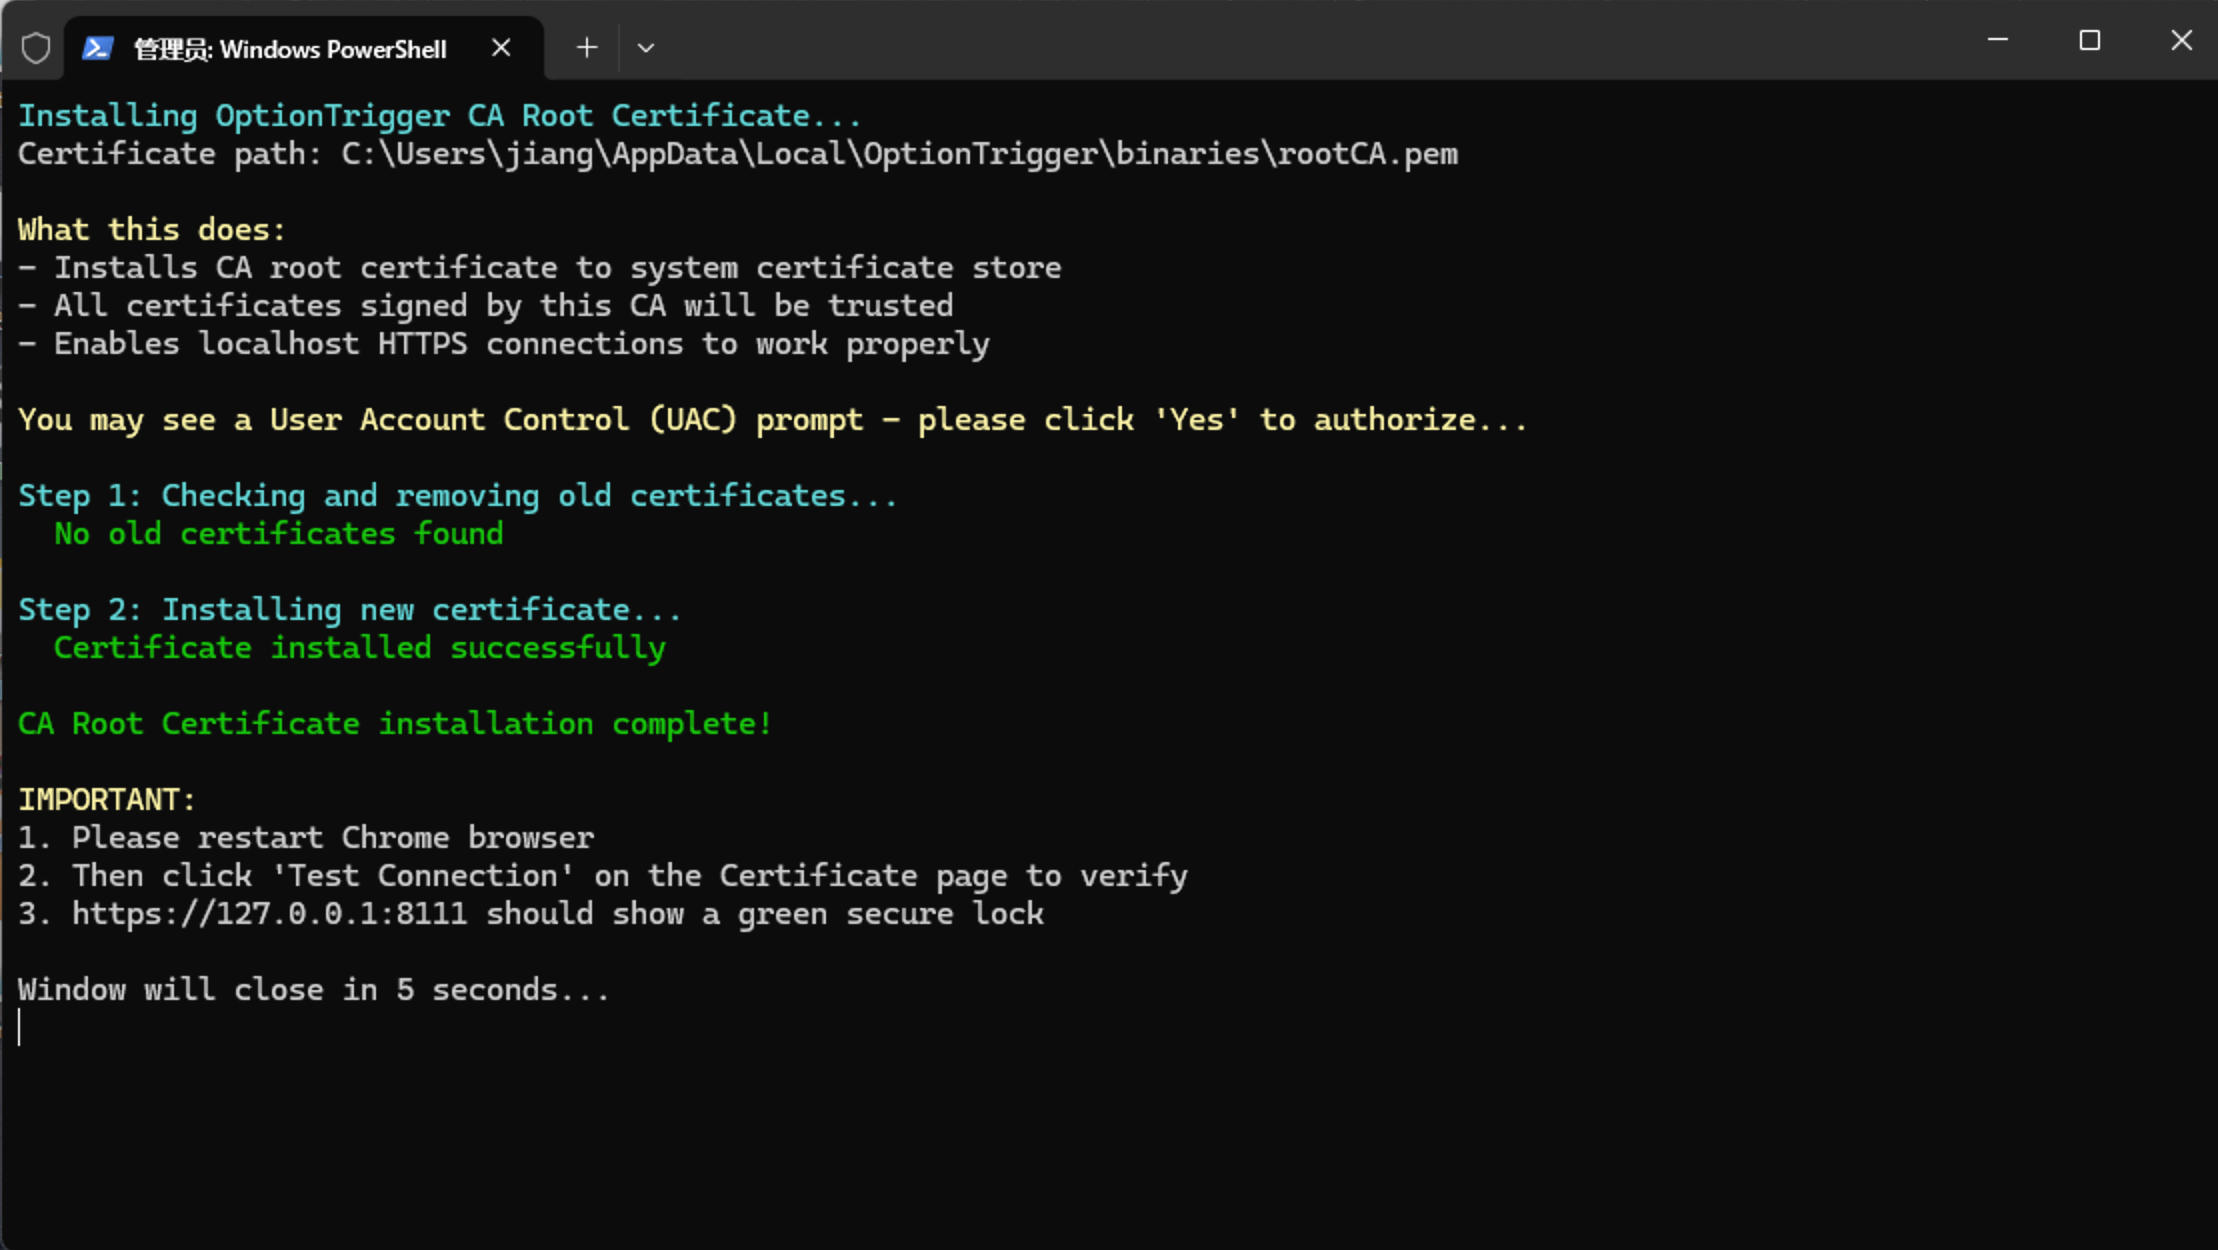
Windows users may need to select "Trusted Root Certification Authorities" in the Certificate Import Wizard.
Verify Certificate Installation
After installation completes, you'll see a success message. Click the Check button to verify the certificate is properly installed.
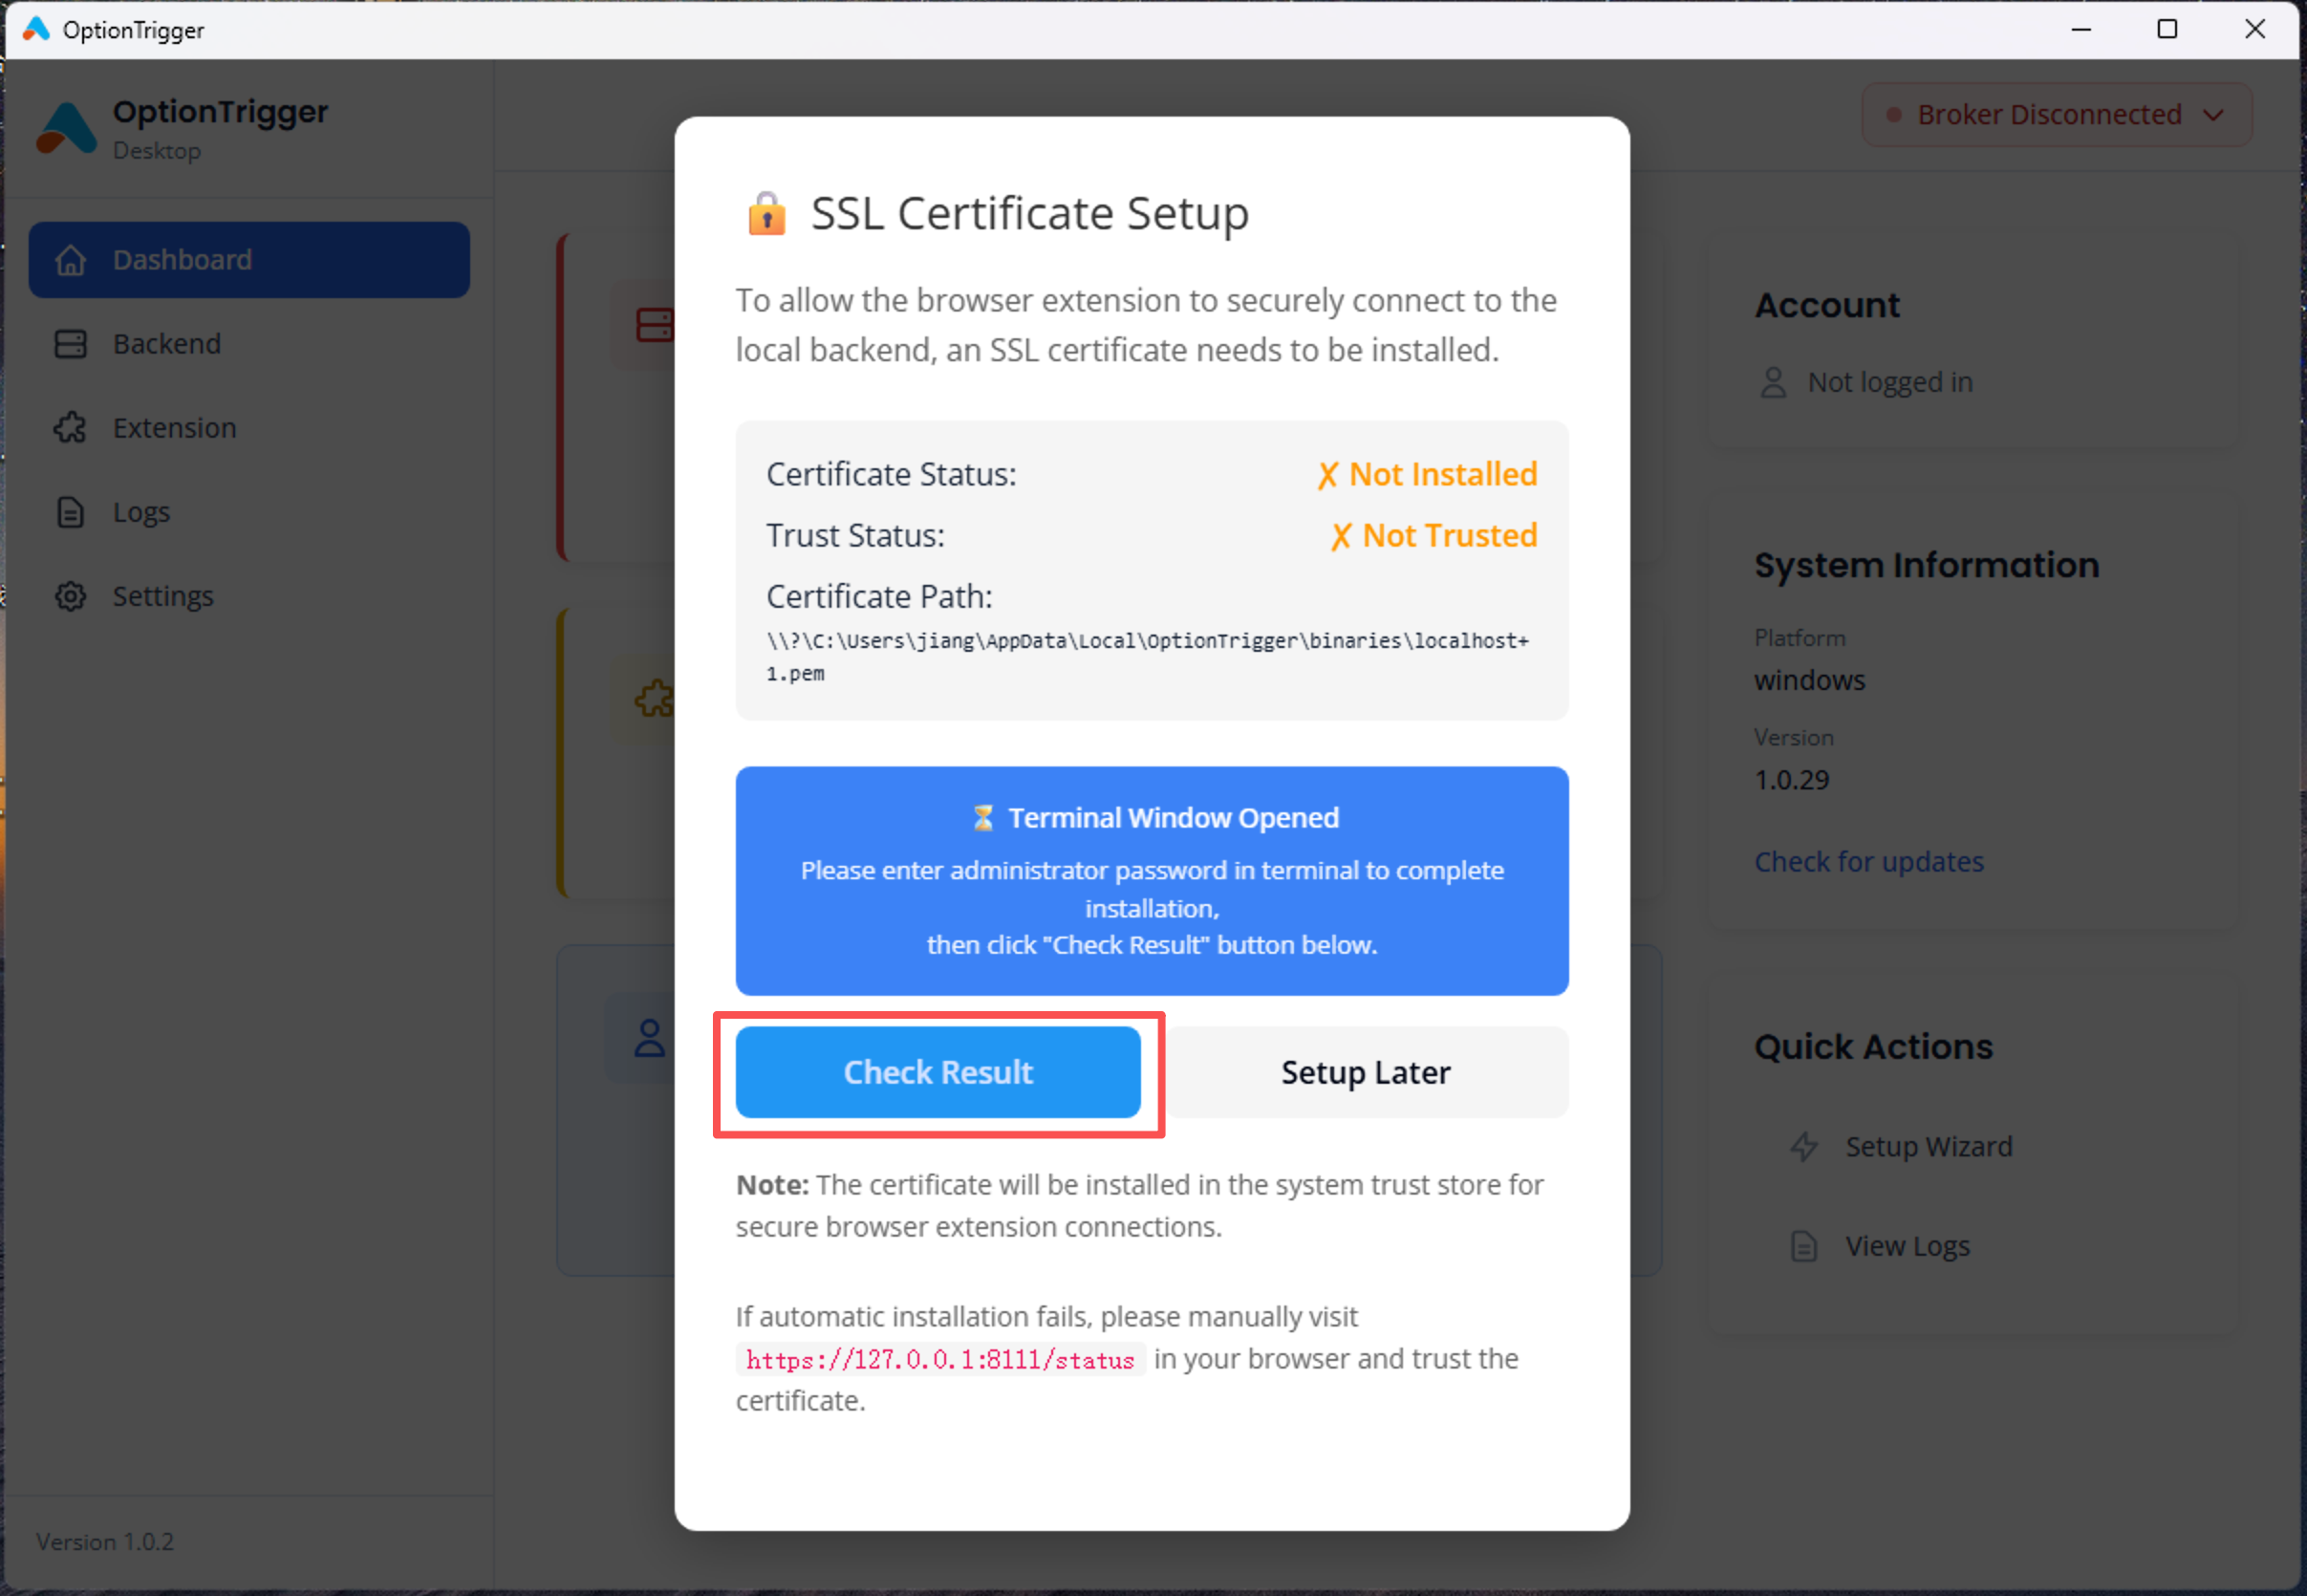
A green checkmark indicates successful installation.
Part 2: Starting the Broker Backend
Start Backend Service
In the OptionTrigger Desktop main interface, click the Start Backend button to launch the Broker Backend service.
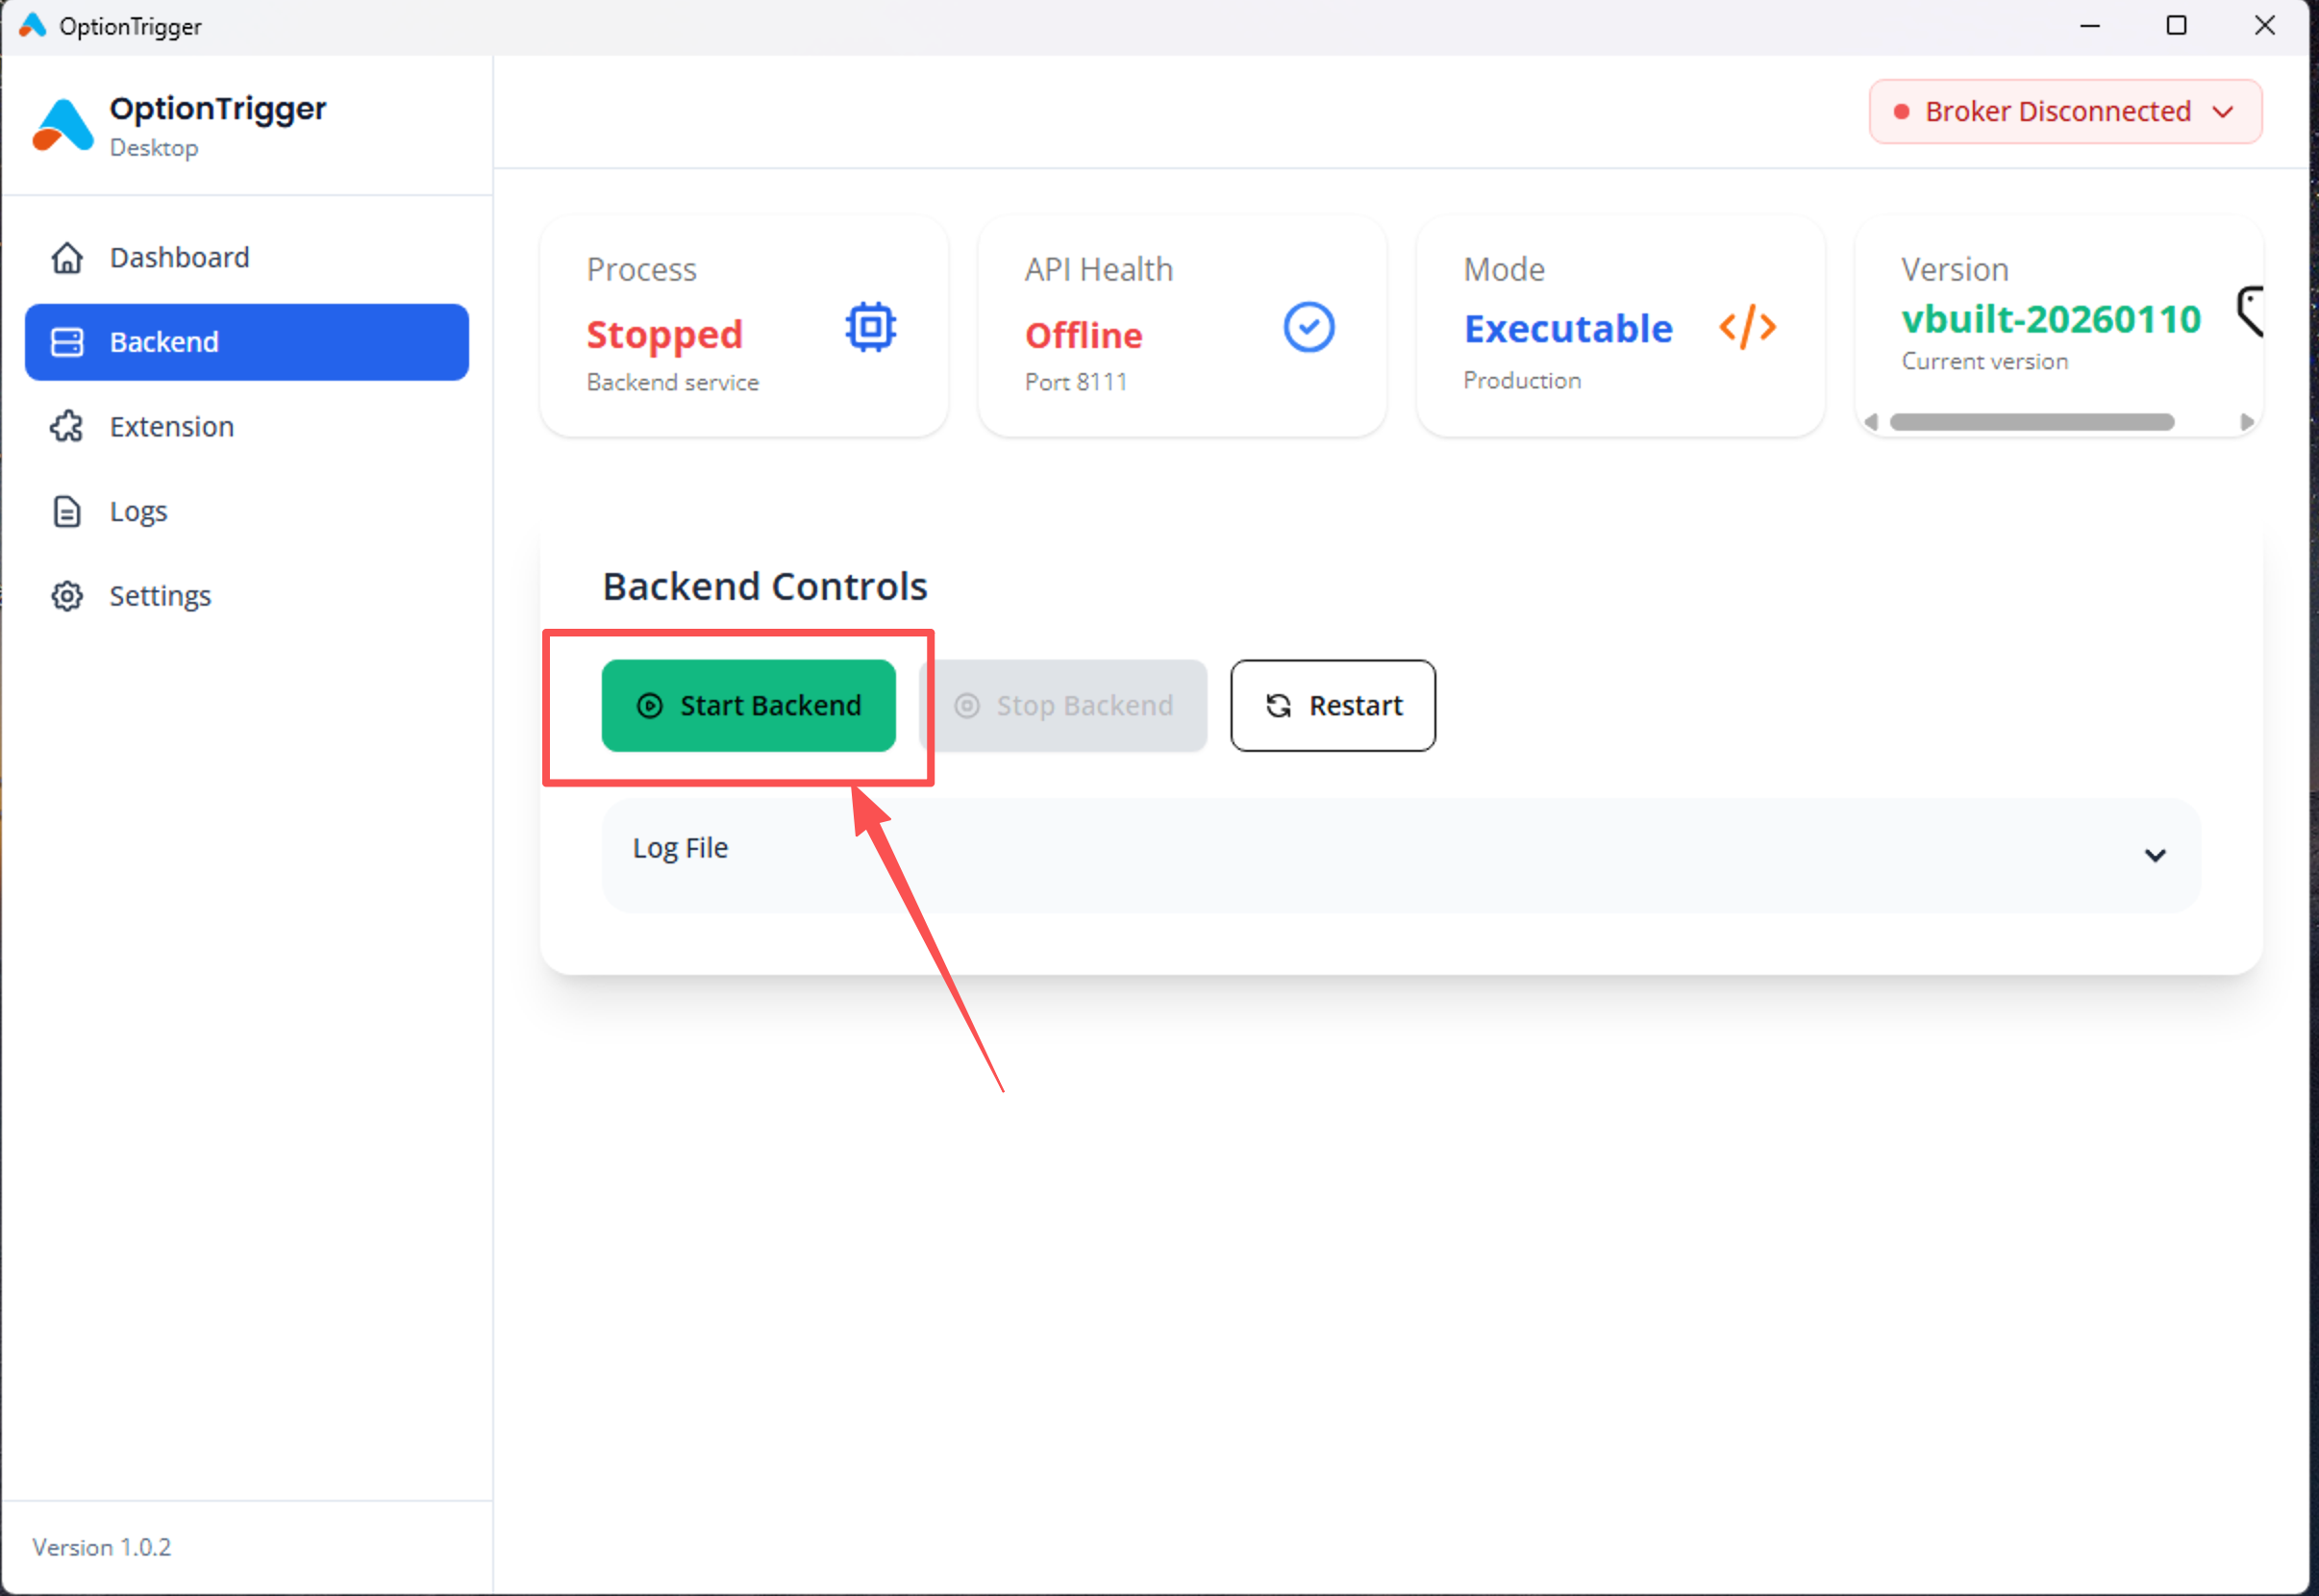
The Backend acts as a bridge to the Interactive Brokers API, handling all trading requests.
Ensure the Backend port (default 8111) is not occupied by other programs.
Part 3: Injecting Extension into TradingView Desktop
Inject Chrome Extension
Click the Inject Extension to TradingView Desktop button to inject the OptionTrigger extension into the TradingView Desktop application.
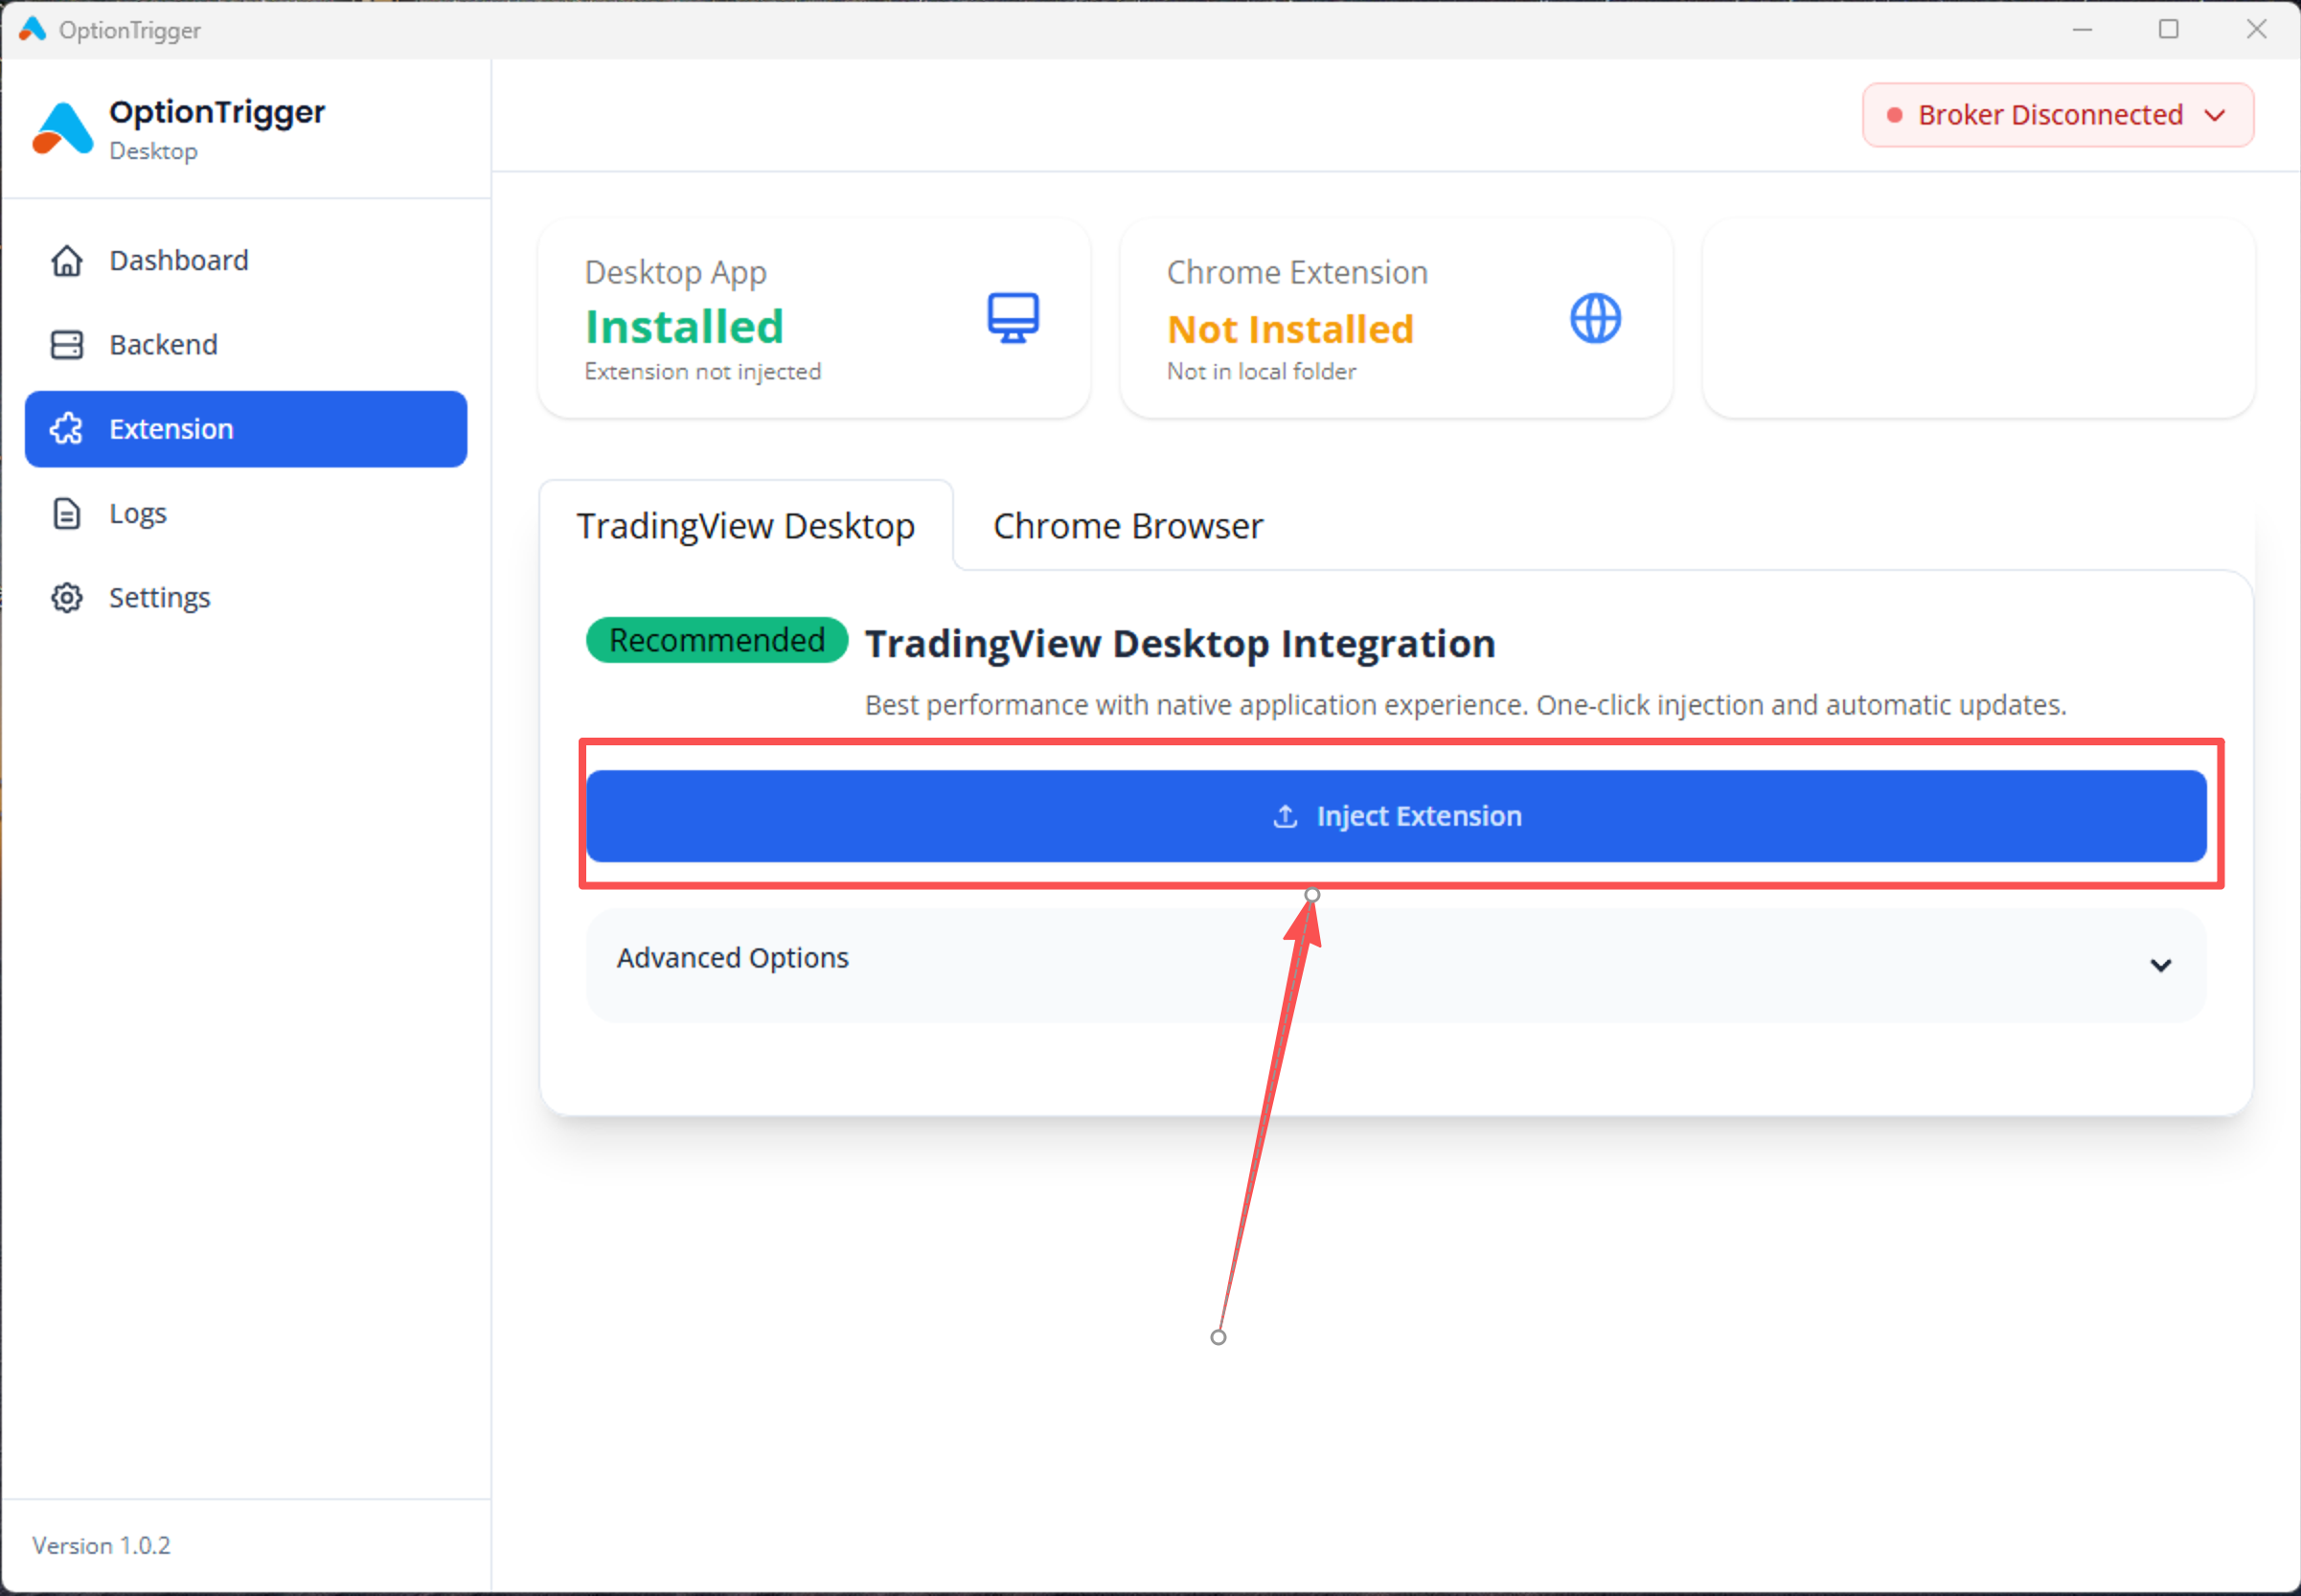
If you're using TradingView in a browser, please refer to the Chrome Extension Setup Guide.
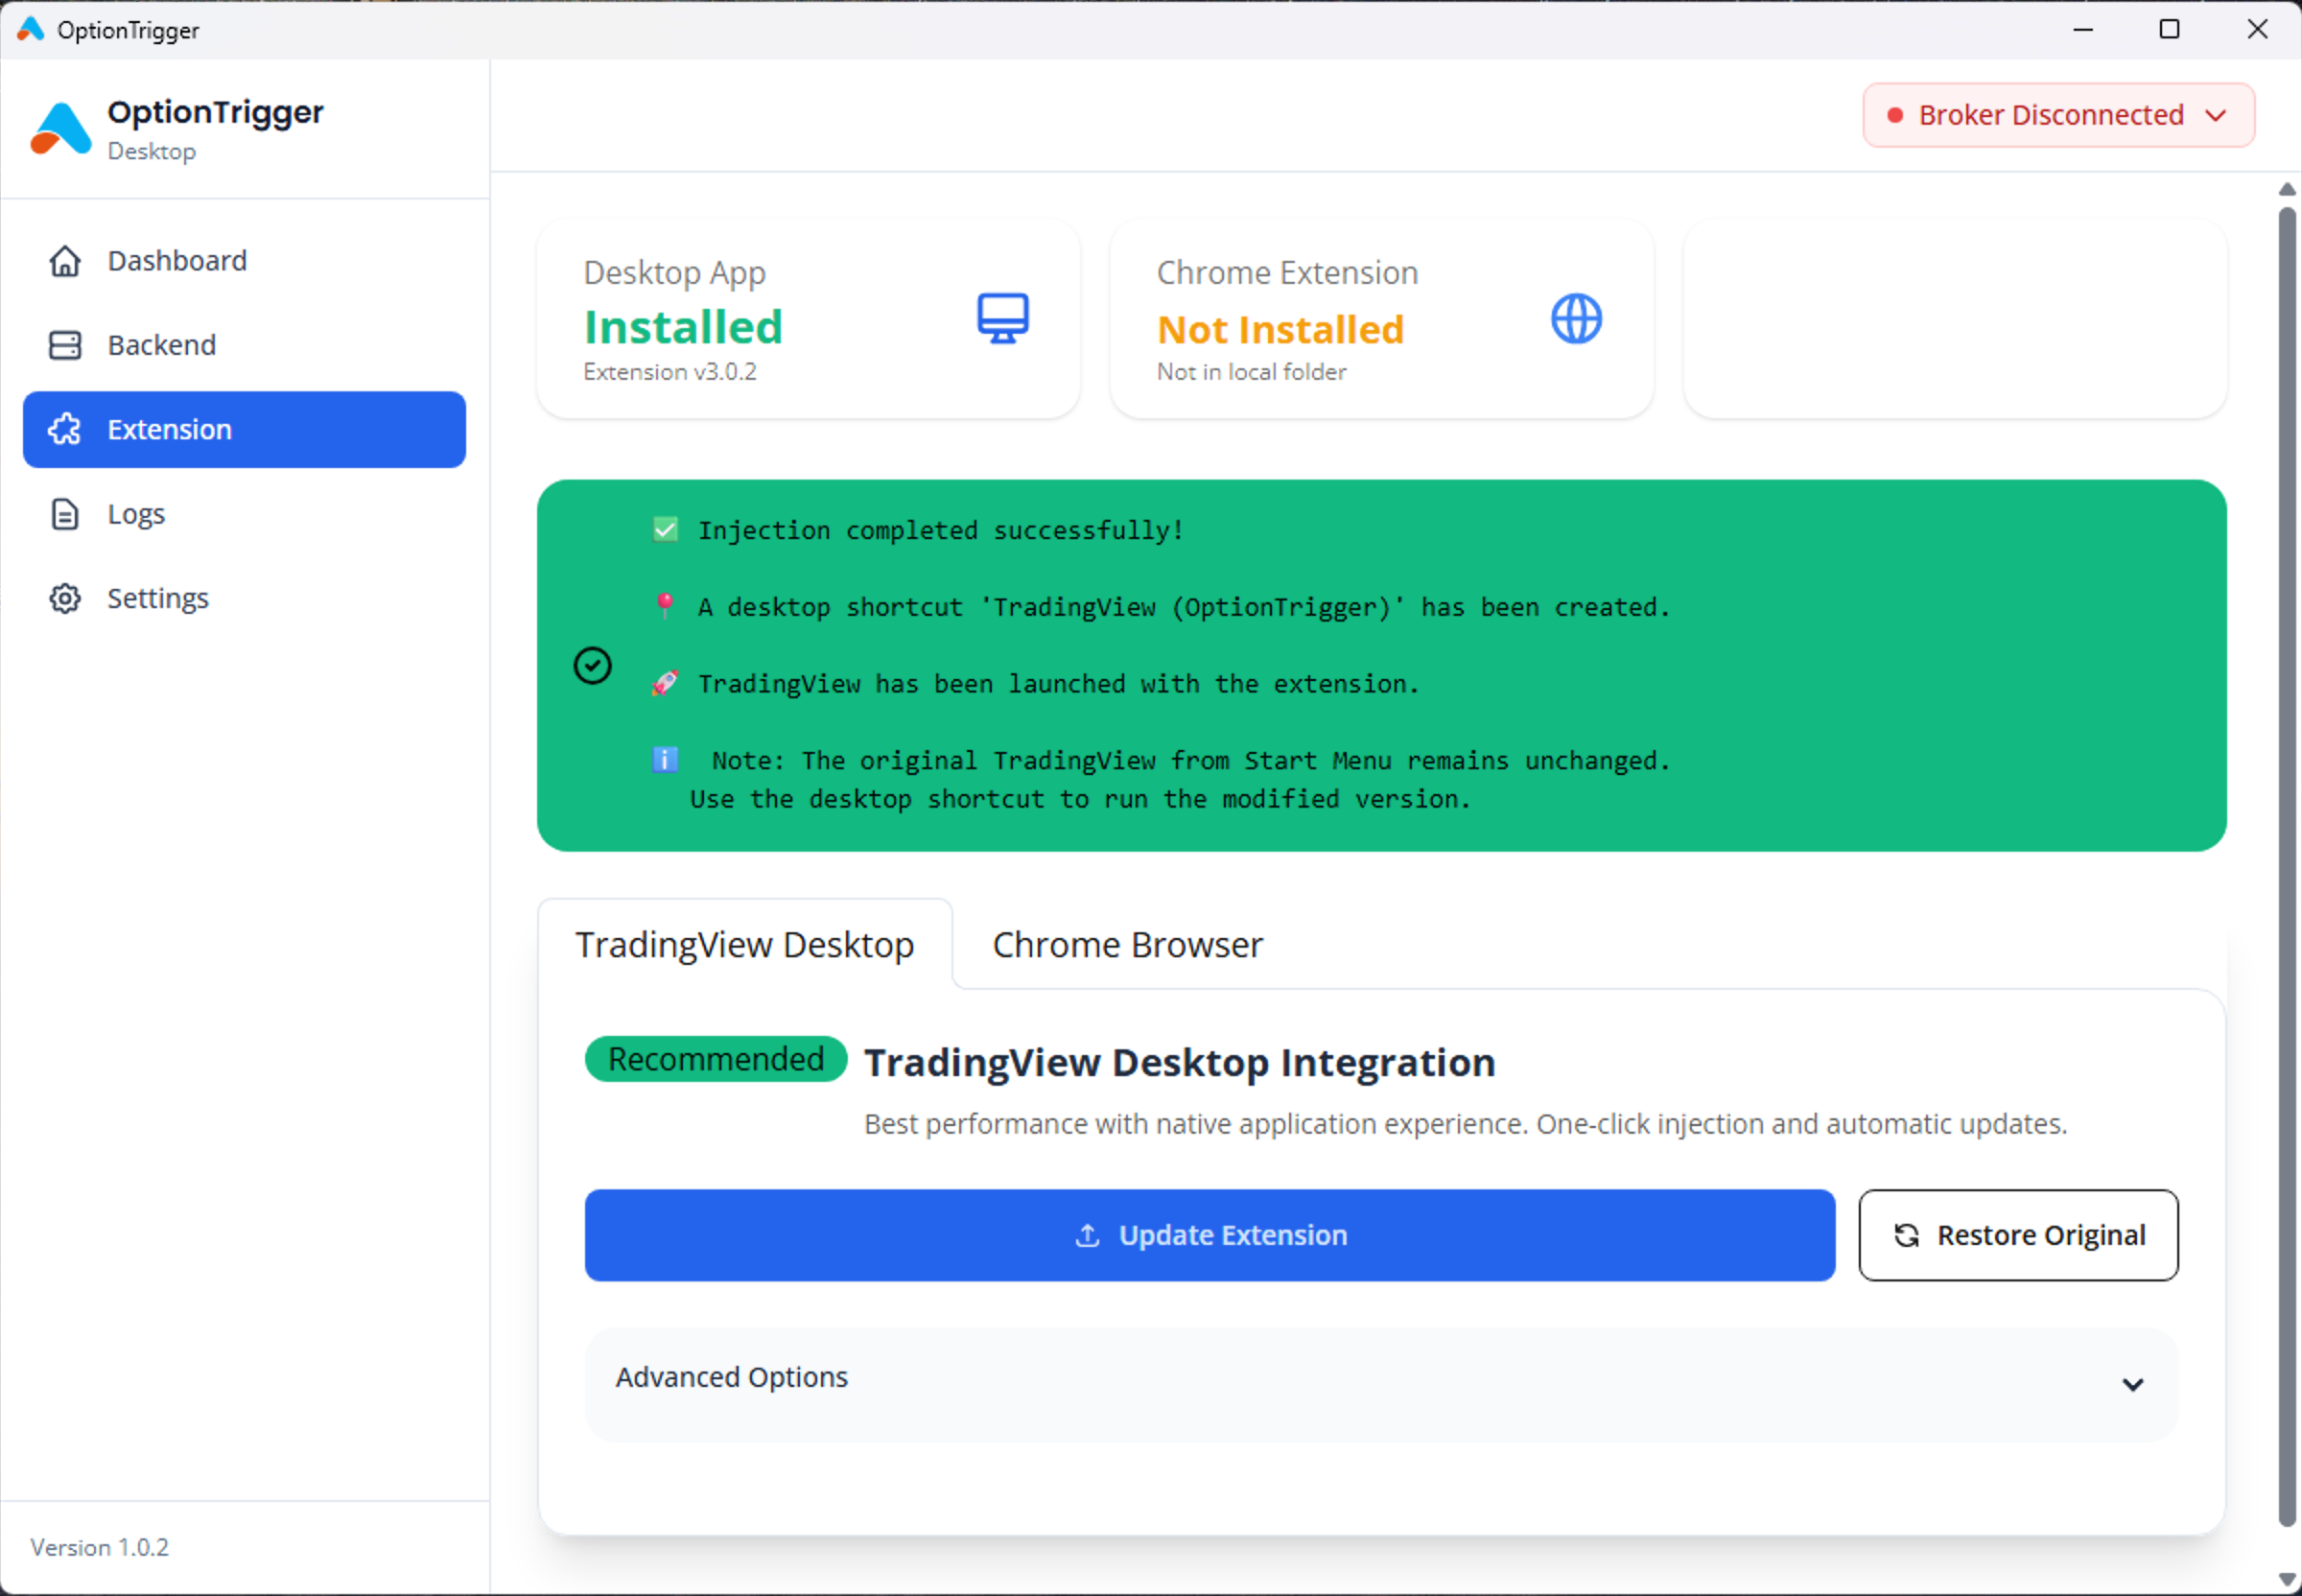
Launch TradingView Desktop
Click the TradingView with OptionTrigger shortcut on your desktop to launch TradingView.
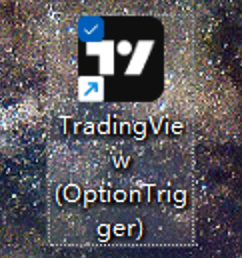
You must use this shortcut to launch TradingView. Opening the original TradingView app directly will not load the extension.
Verify Extension is Loaded
After opening TradingView, you should see the OptionTrigger Global Setting button (gear icon) in the top-right corner of the chart.
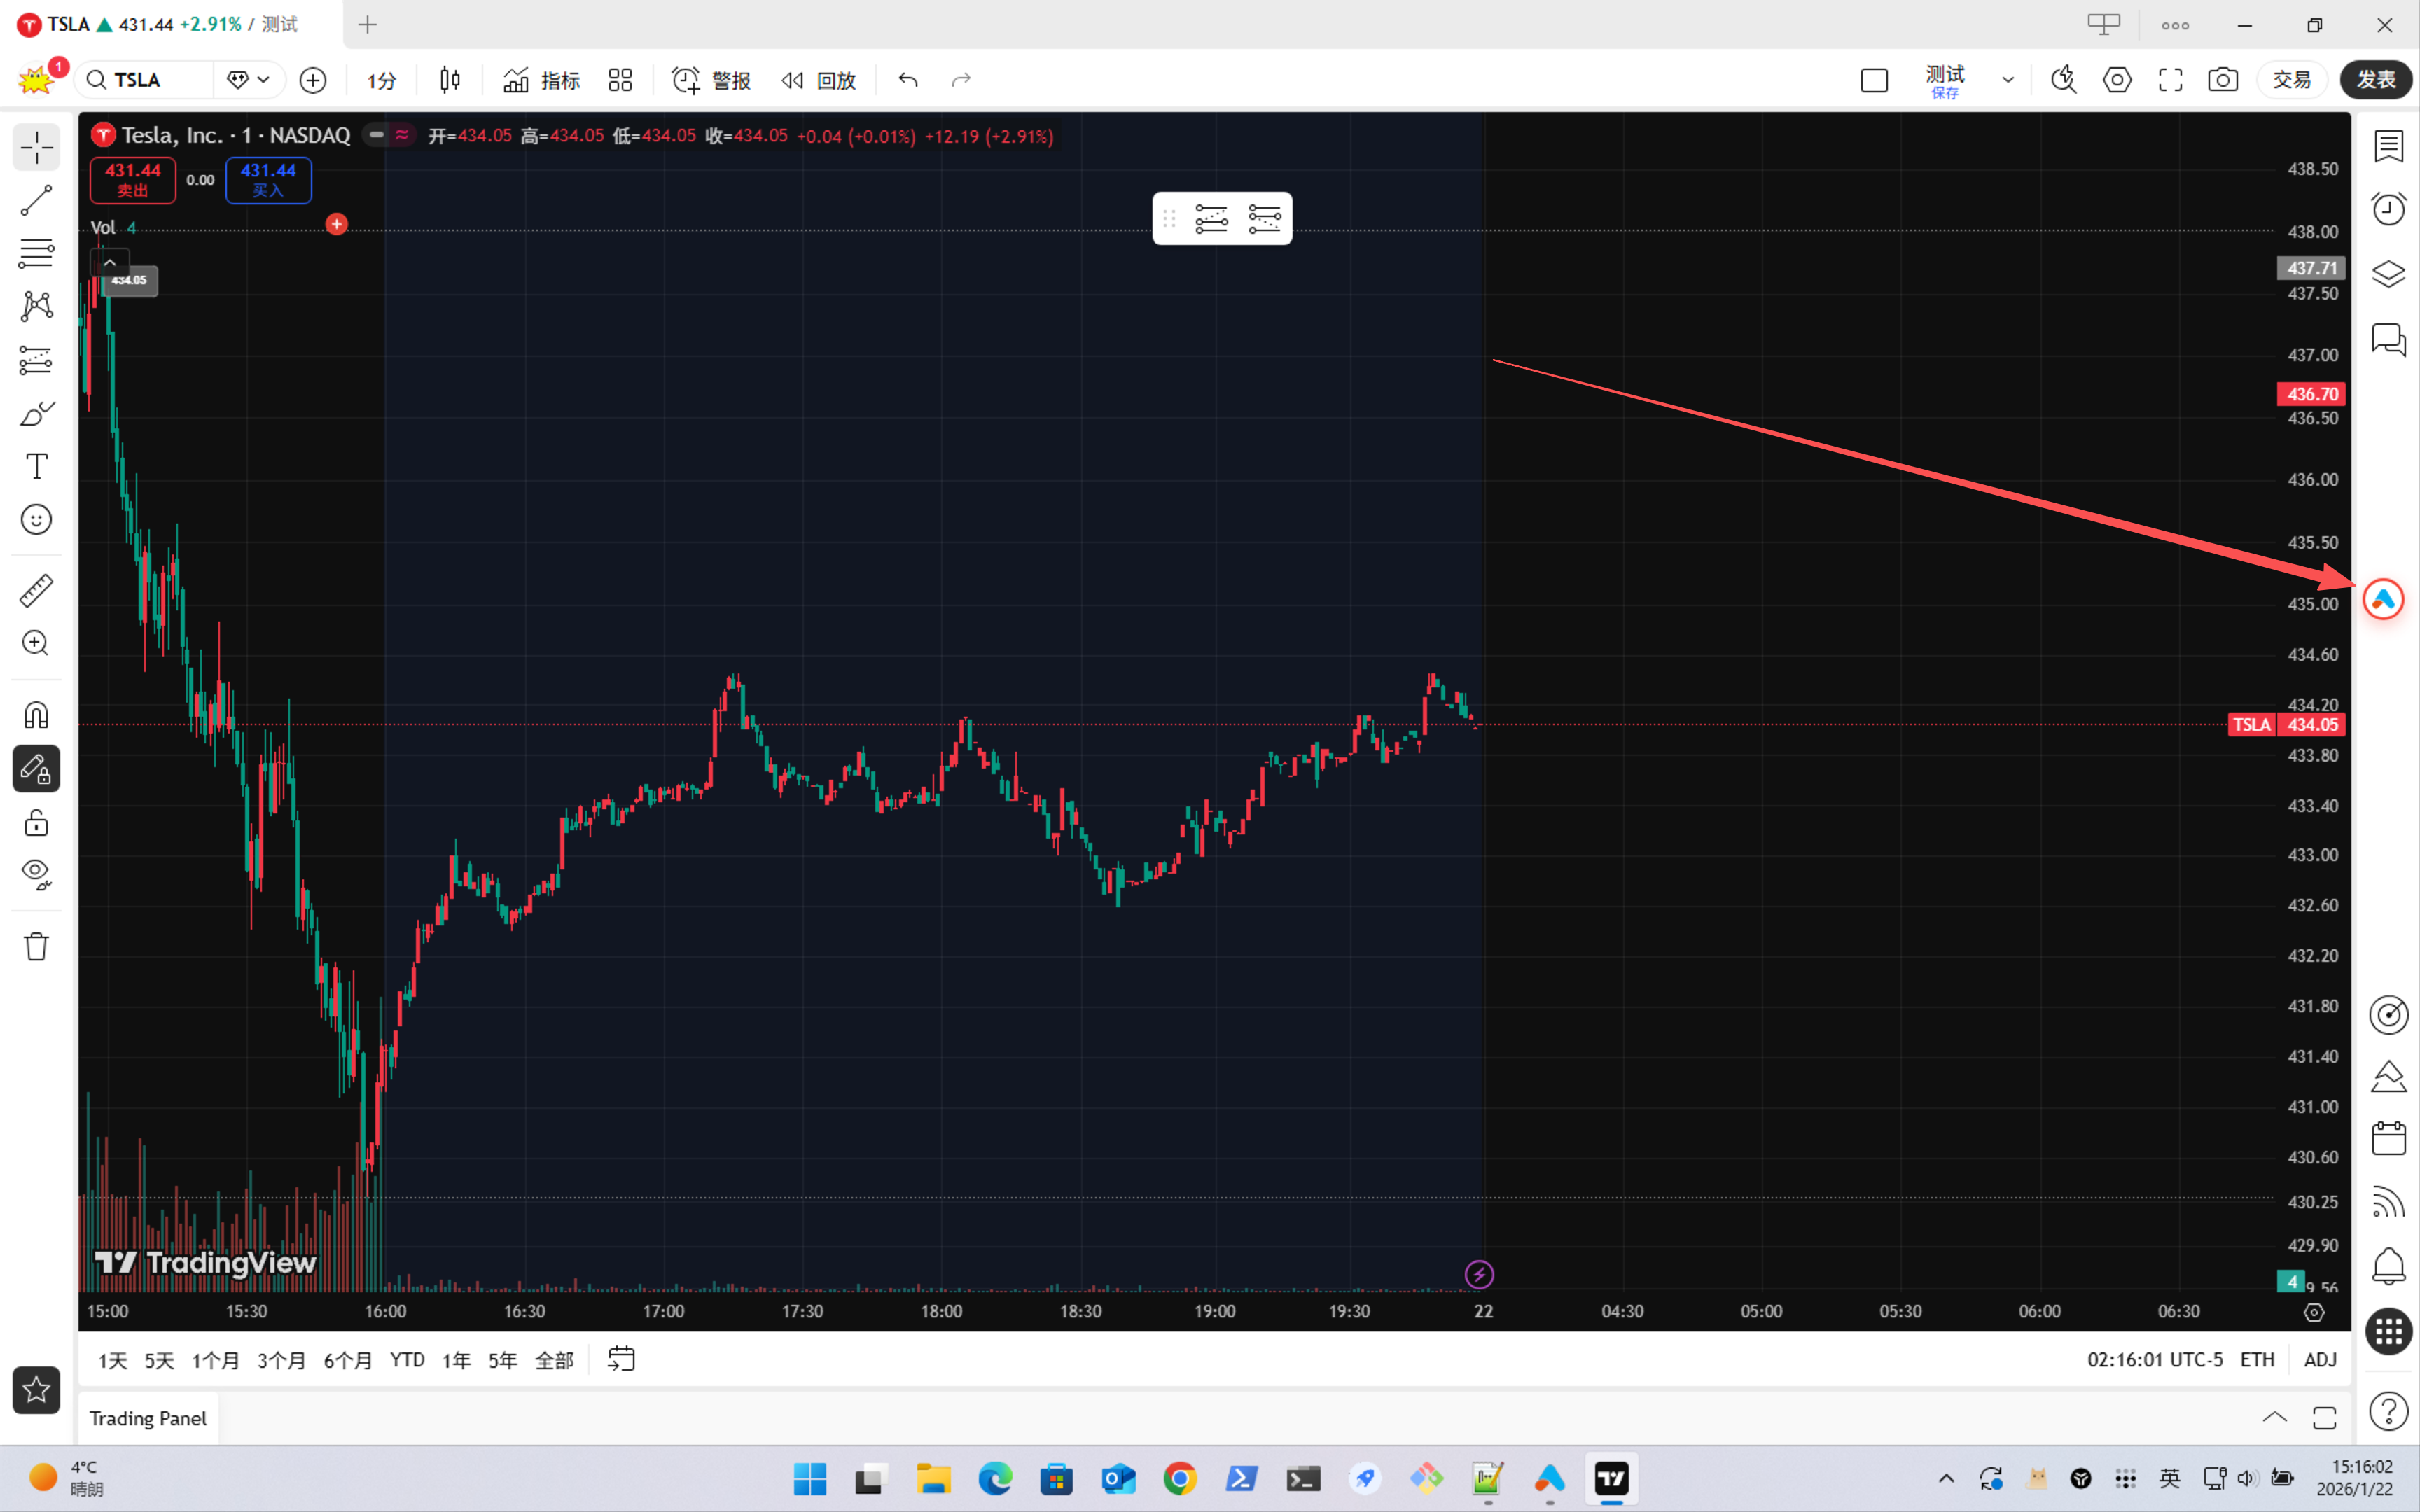
If you see this button, the extension has loaded successfully.
Part 4: Configuring Global Settings
Open Global Settings
Click the OptionTrigger Global Setting button (gear icon) in the top-right corner of the chart to open the settings panel.
General Settings
Configure basic preferences like language, theme, and display options.
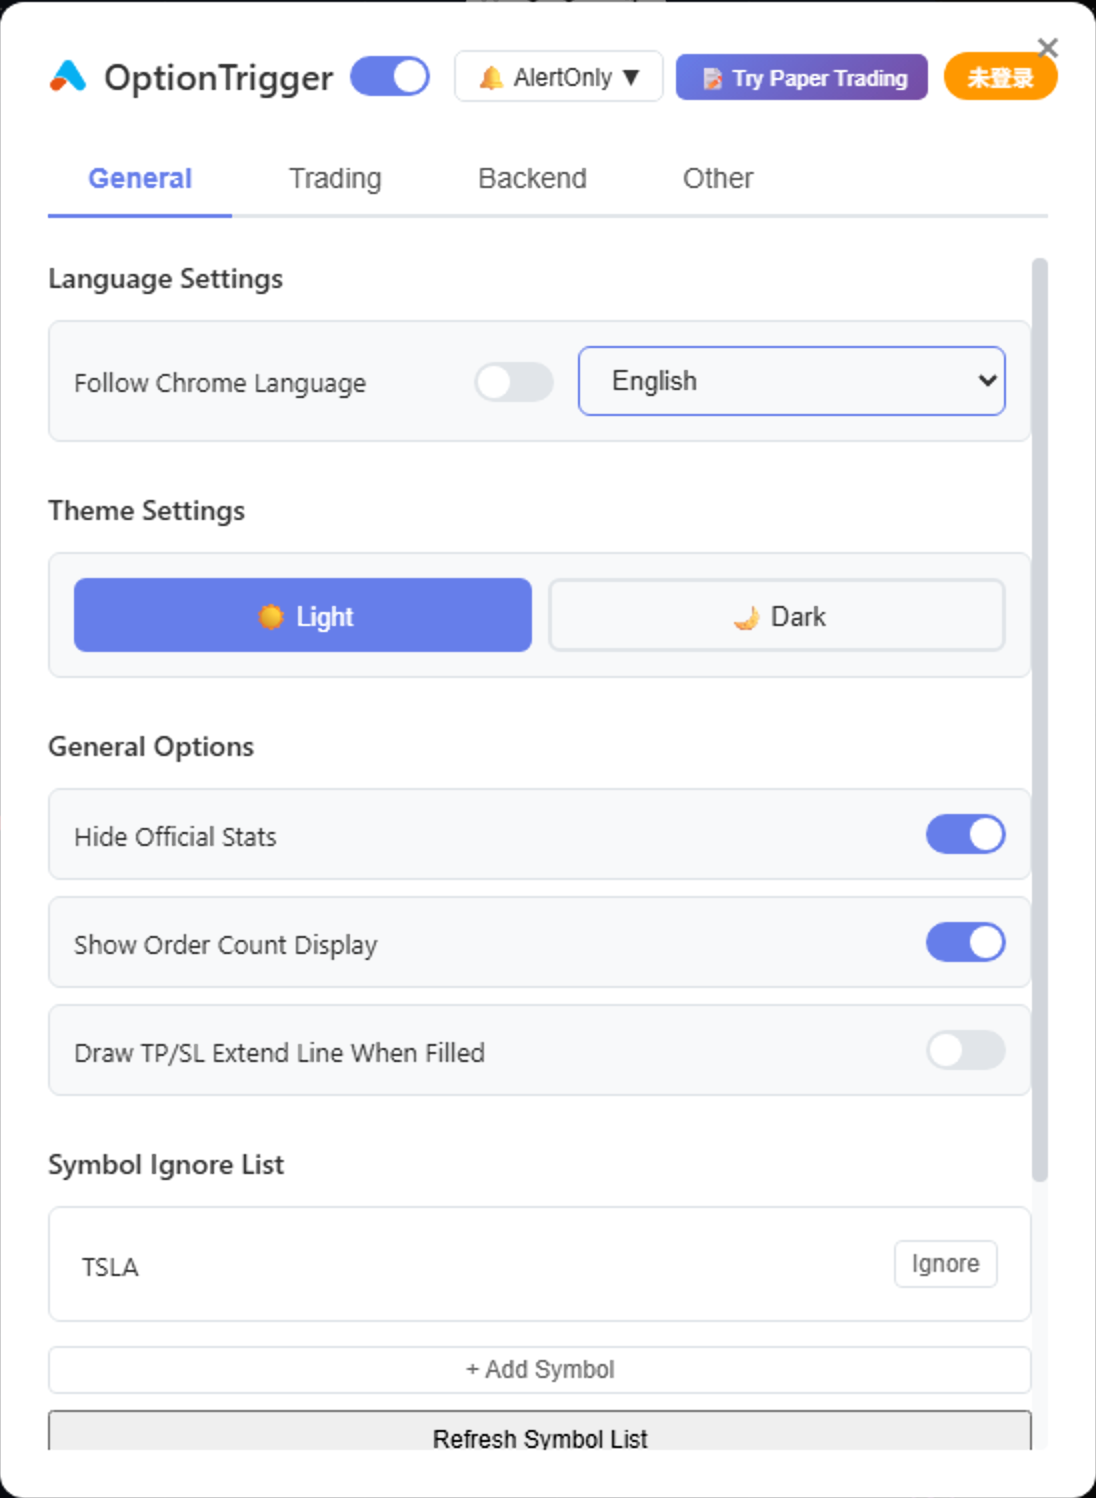
Configure Trading Settings (Part 1)
Set your default trading preferences including Order Mode (market/limit per entry path), quantity defaults, and risk management rules.
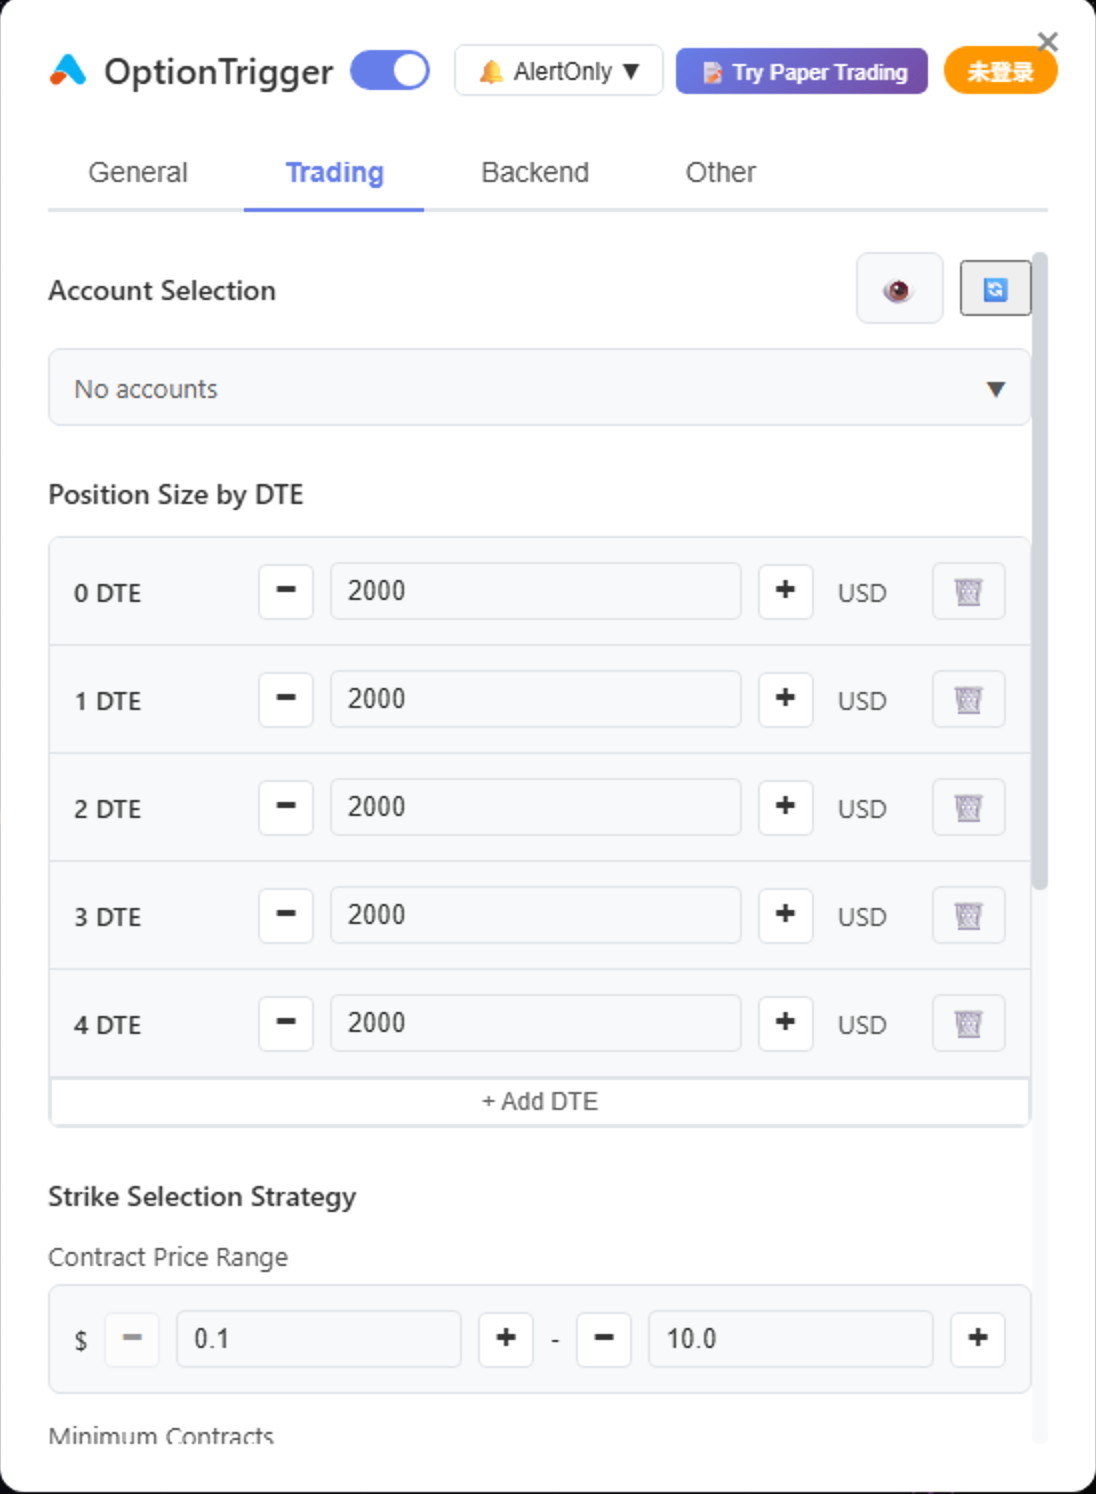
In Order Mode, configure defaults separately for:
| Row | Controls |
|---|---|
| Entry (Buy/Sell) | Opening orders from position tools |
| Take Profit | Default for new TP legs (overridable per TP) |
| Stop Loss | SL exit orders (pair with Wick/Body/Hybrid trigger modes) |
| Close Position | Portfolio / panel flatten |
For each Limit row, pick Mid, Aggressive, or Passive pricing from live bid/ask. Full reference: Market and Limit Order Modes.
These defaults apply to new trades. Individual TP lines and the SL dialog can override TP/SL order type without changing globals.
Configure Trading Settings (Part 2)
Continue configuring advanced trading options like auto-close rules, profit targets, and stop-loss defaults.
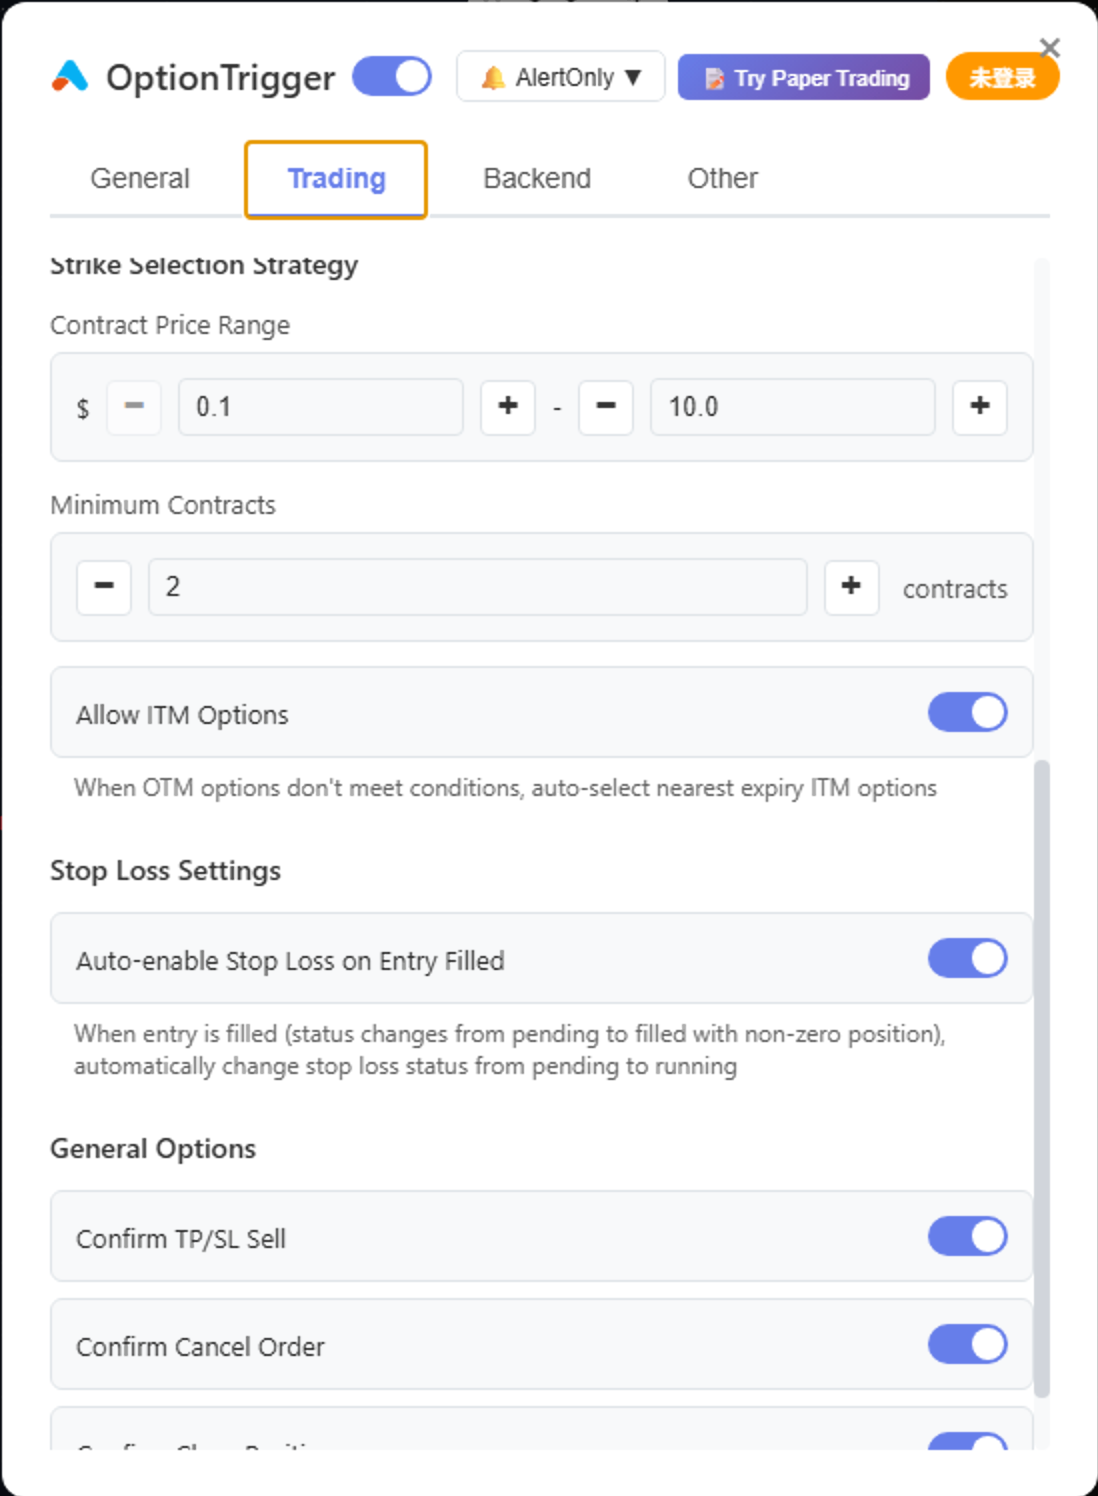
Configure Backend Connection
Verify the Backend connection settings. The default values should work for most users:
- Backend URL:
https://localhost:8111 - WebSocket URL:
wss://localhost:8111/ws
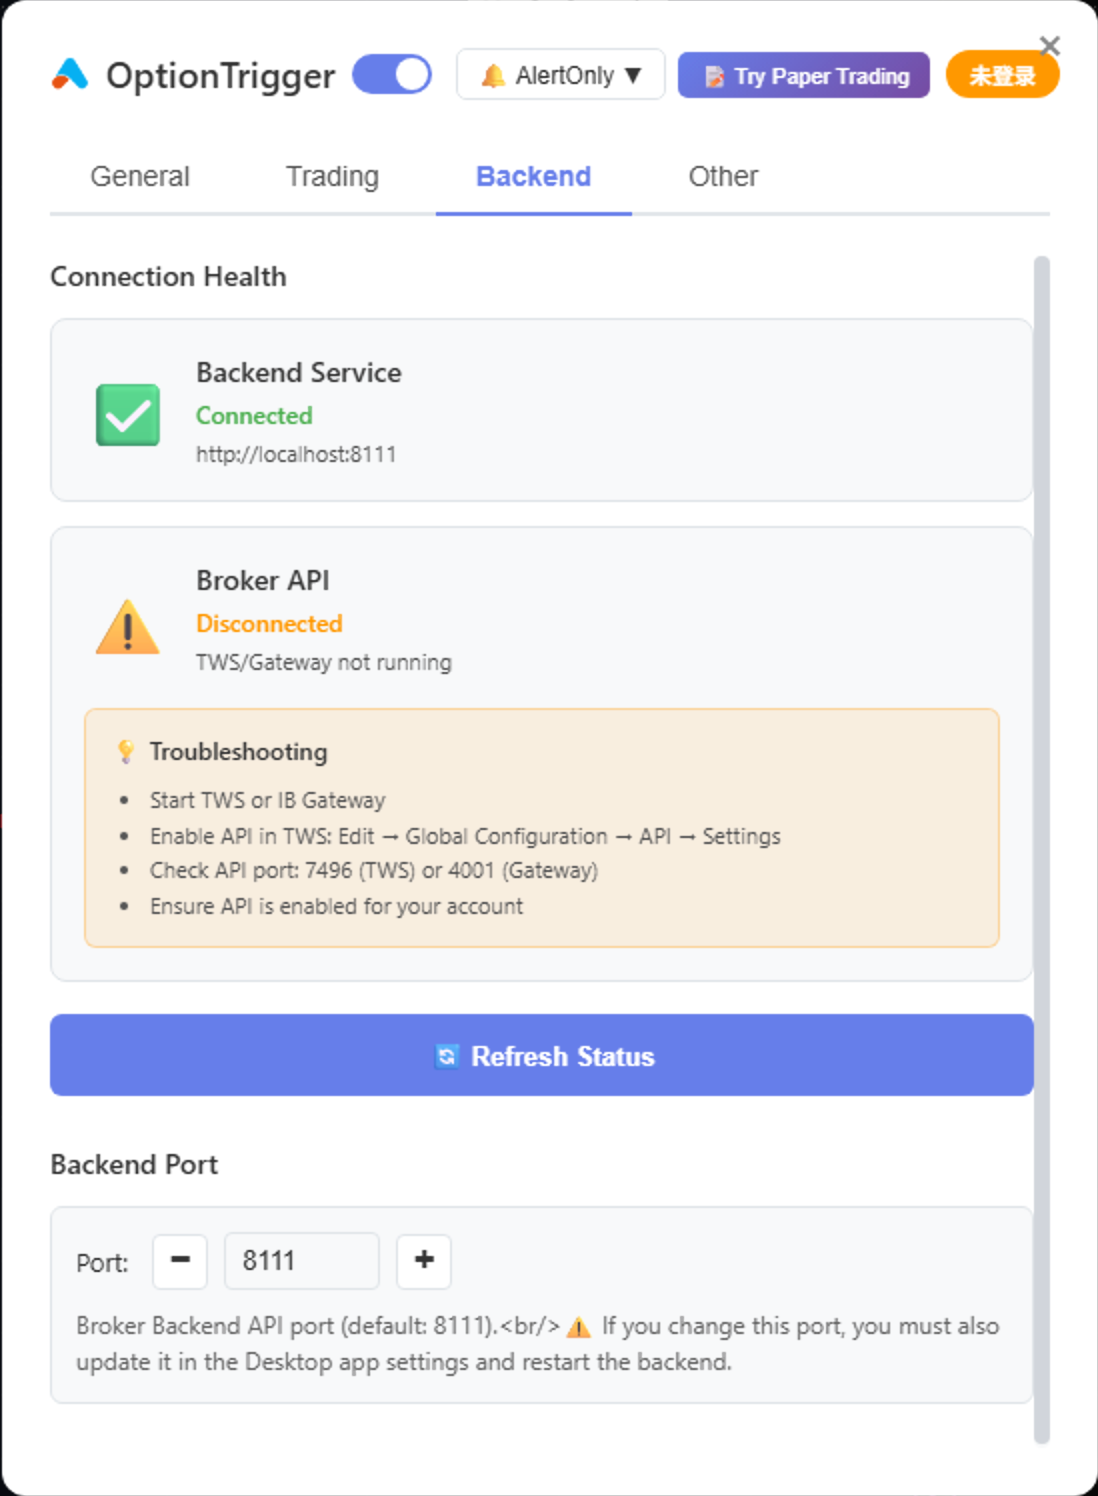
Only change these settings if you're running the Backend on a different port or remote server.
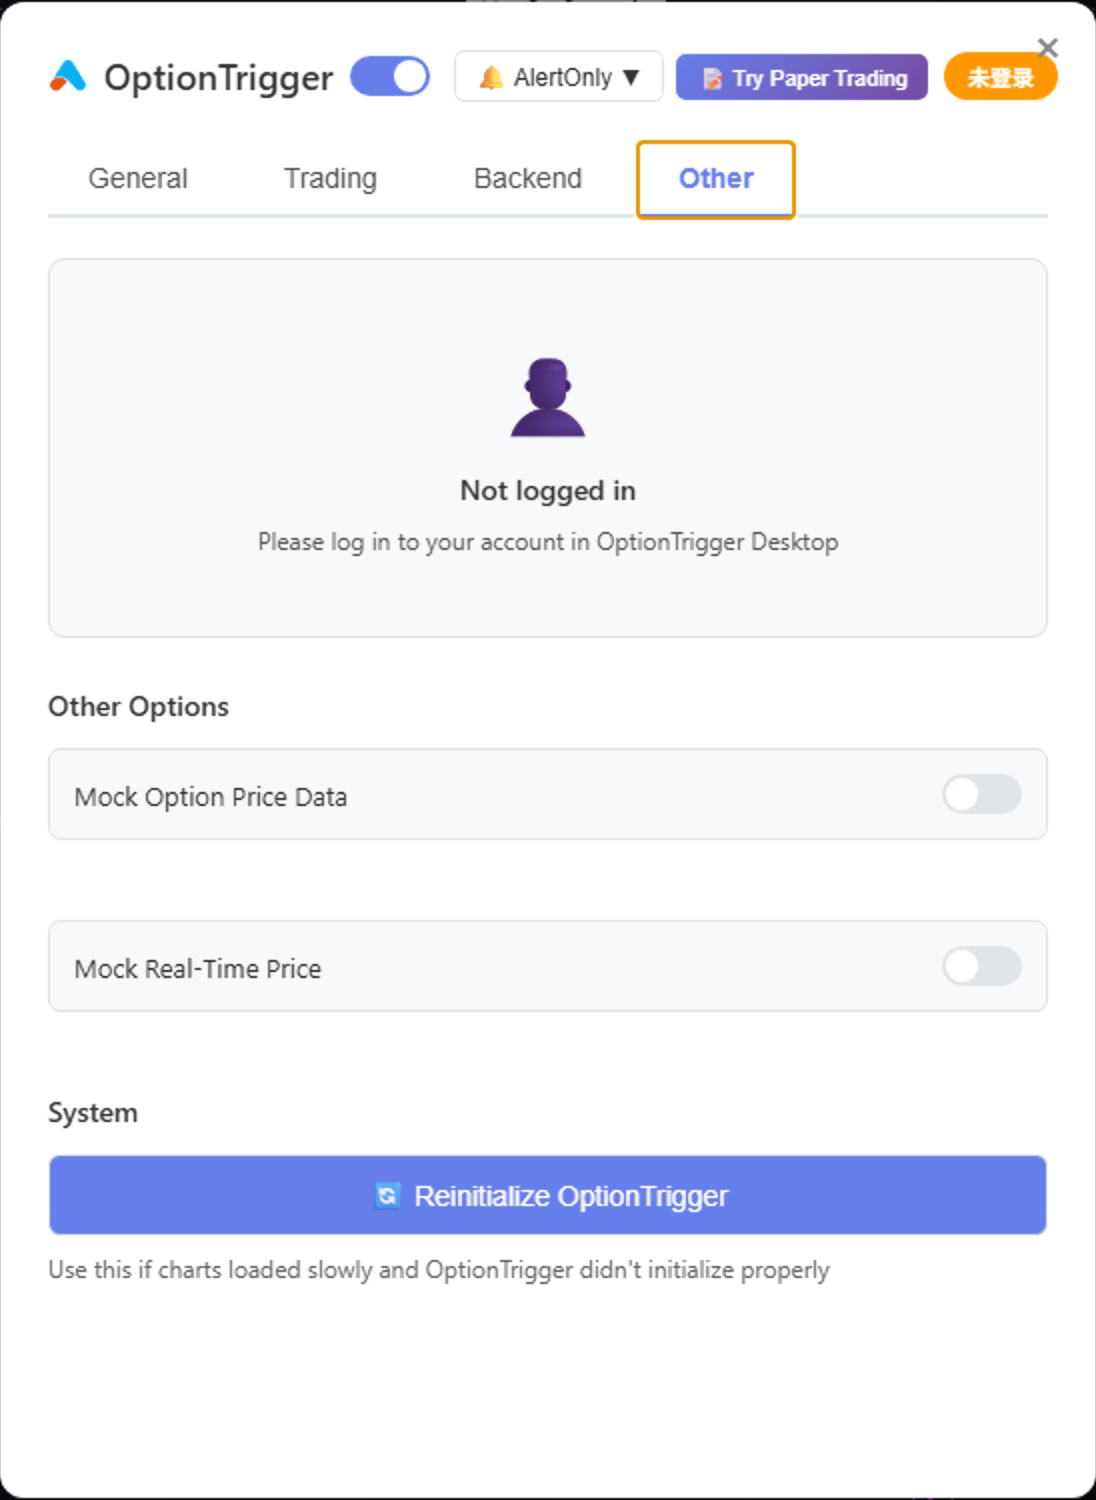
Configure Other Settings
Review and adjust other settings like notifications, keyboard shortcuts, and data preferences.
Part 5: Configuring Interactive Brokers TWS
Login to TWS
Open Interactive Brokers Trader Workstation (TWS) and log in with your account credentials.
.png)
You can also use IB Gateway instead of TWS. The configuration steps are similar.
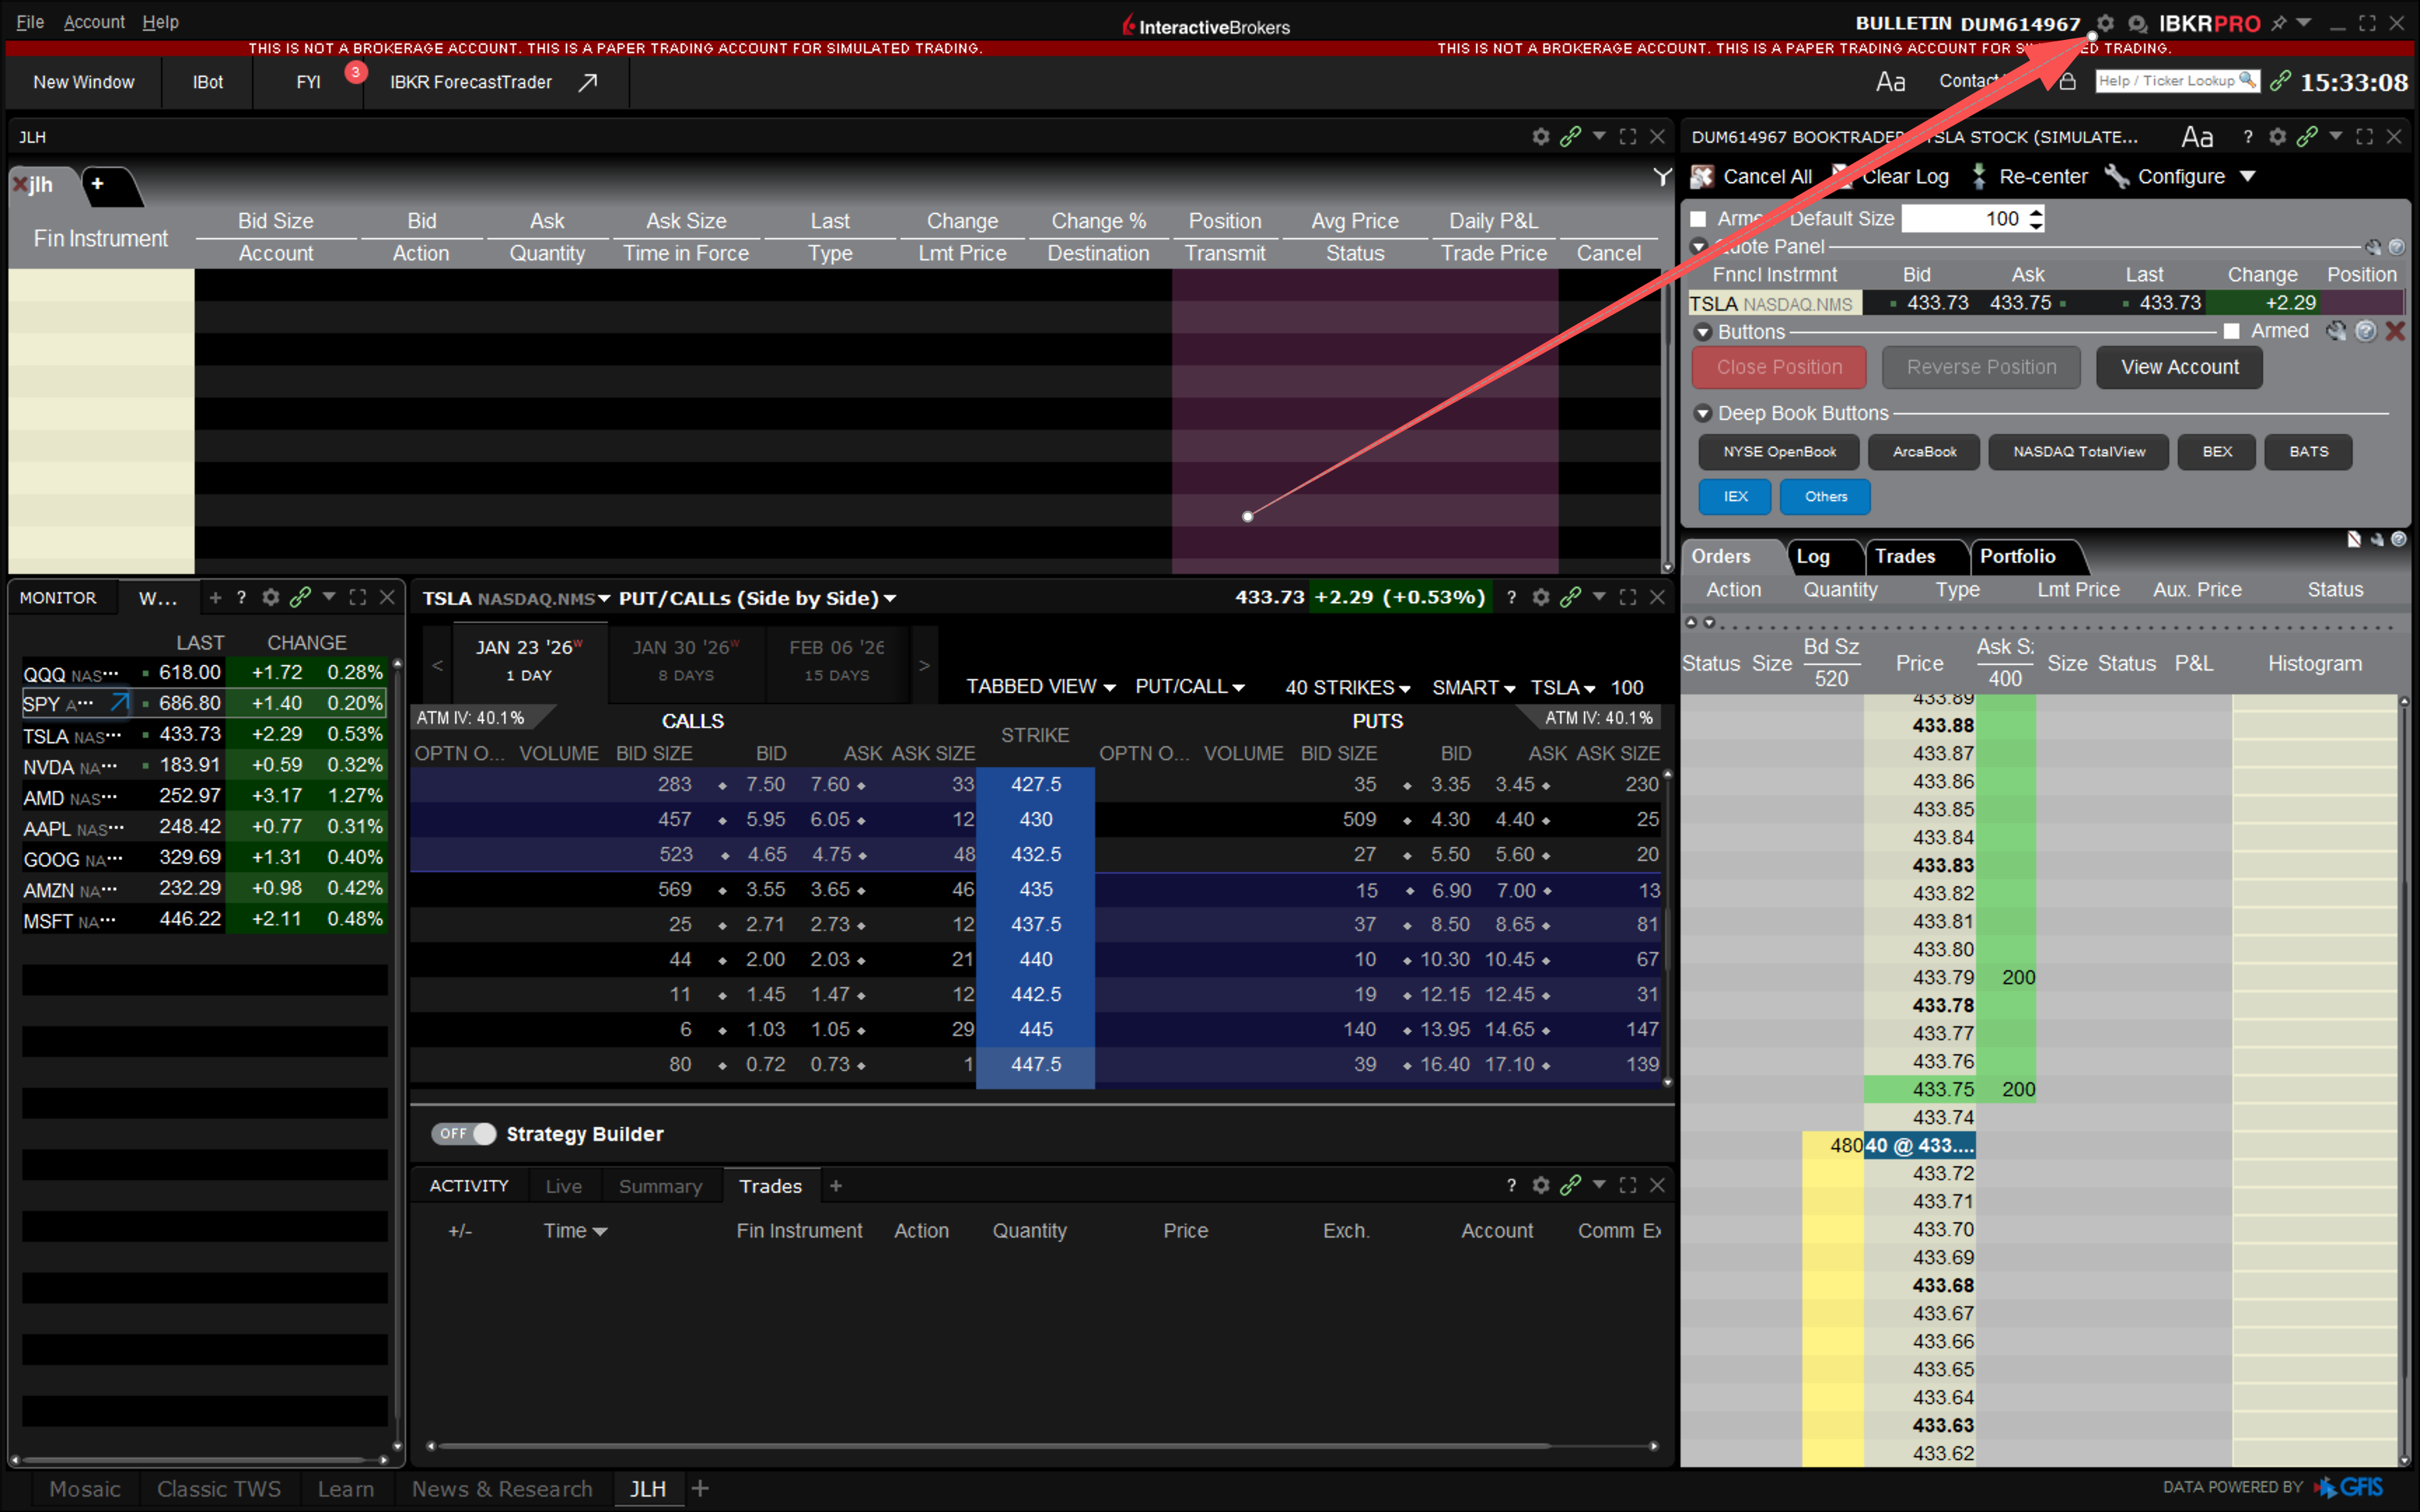
Open TWS Settings
Click the Settings button (gear icon) in the TWS toolbar to open the Global Configuration window.
Enable API Connections
In the Global Configuration window:
- Navigate to API → Settings
- Check Enable ActiveX and Socket Clients
- Set Socket port to
7496(OptionTrigger backend default) - Optionally check Read-Only API if you only want to view data without trading
- Click OK to save
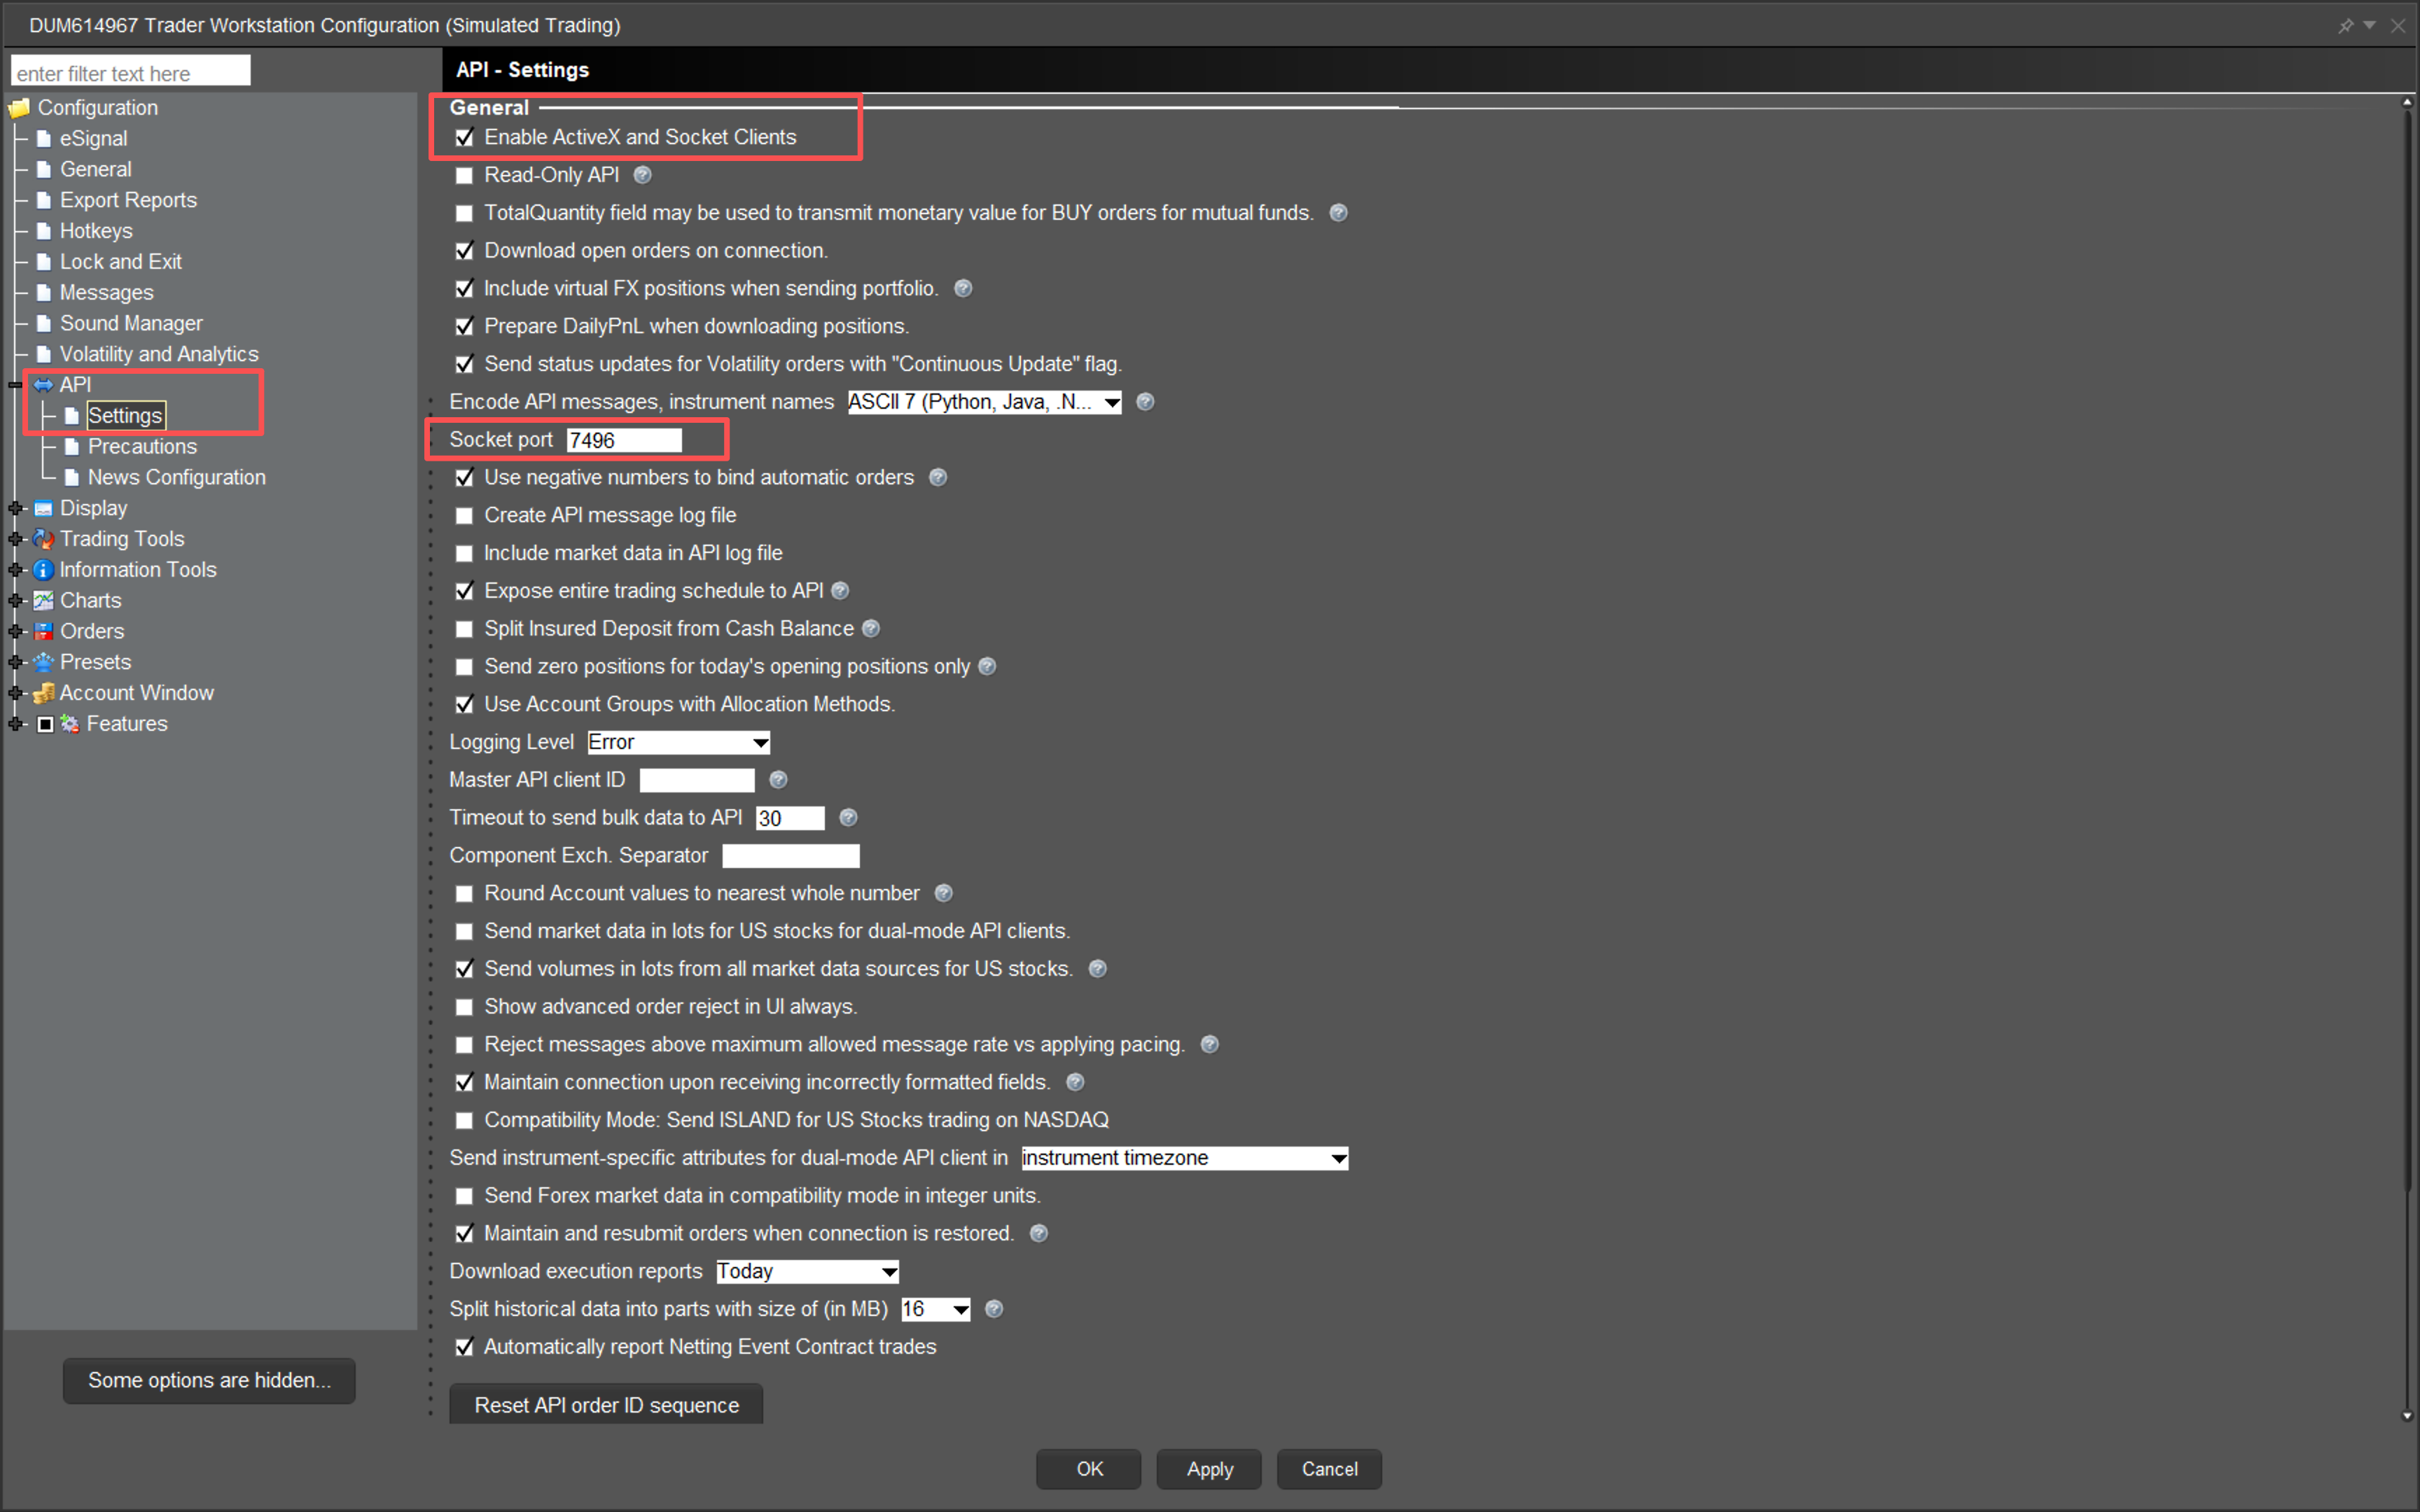
Important: OptionTrigger's backend defaults to port 7496. IBKR TWS paper may default to 7497, so either change TWS to 7496 (recommended by this guide) or make sure your backend configuration uses the same port as TWS/Gateway.
Part 6: Verifying Connection Status
Check Desktop Connection Status
Return to OptionTrigger Desktop and verify that all connections show as "Connected":
- Backend Status: Running
- TWS Connection: Connected
- Extension Status: Connected
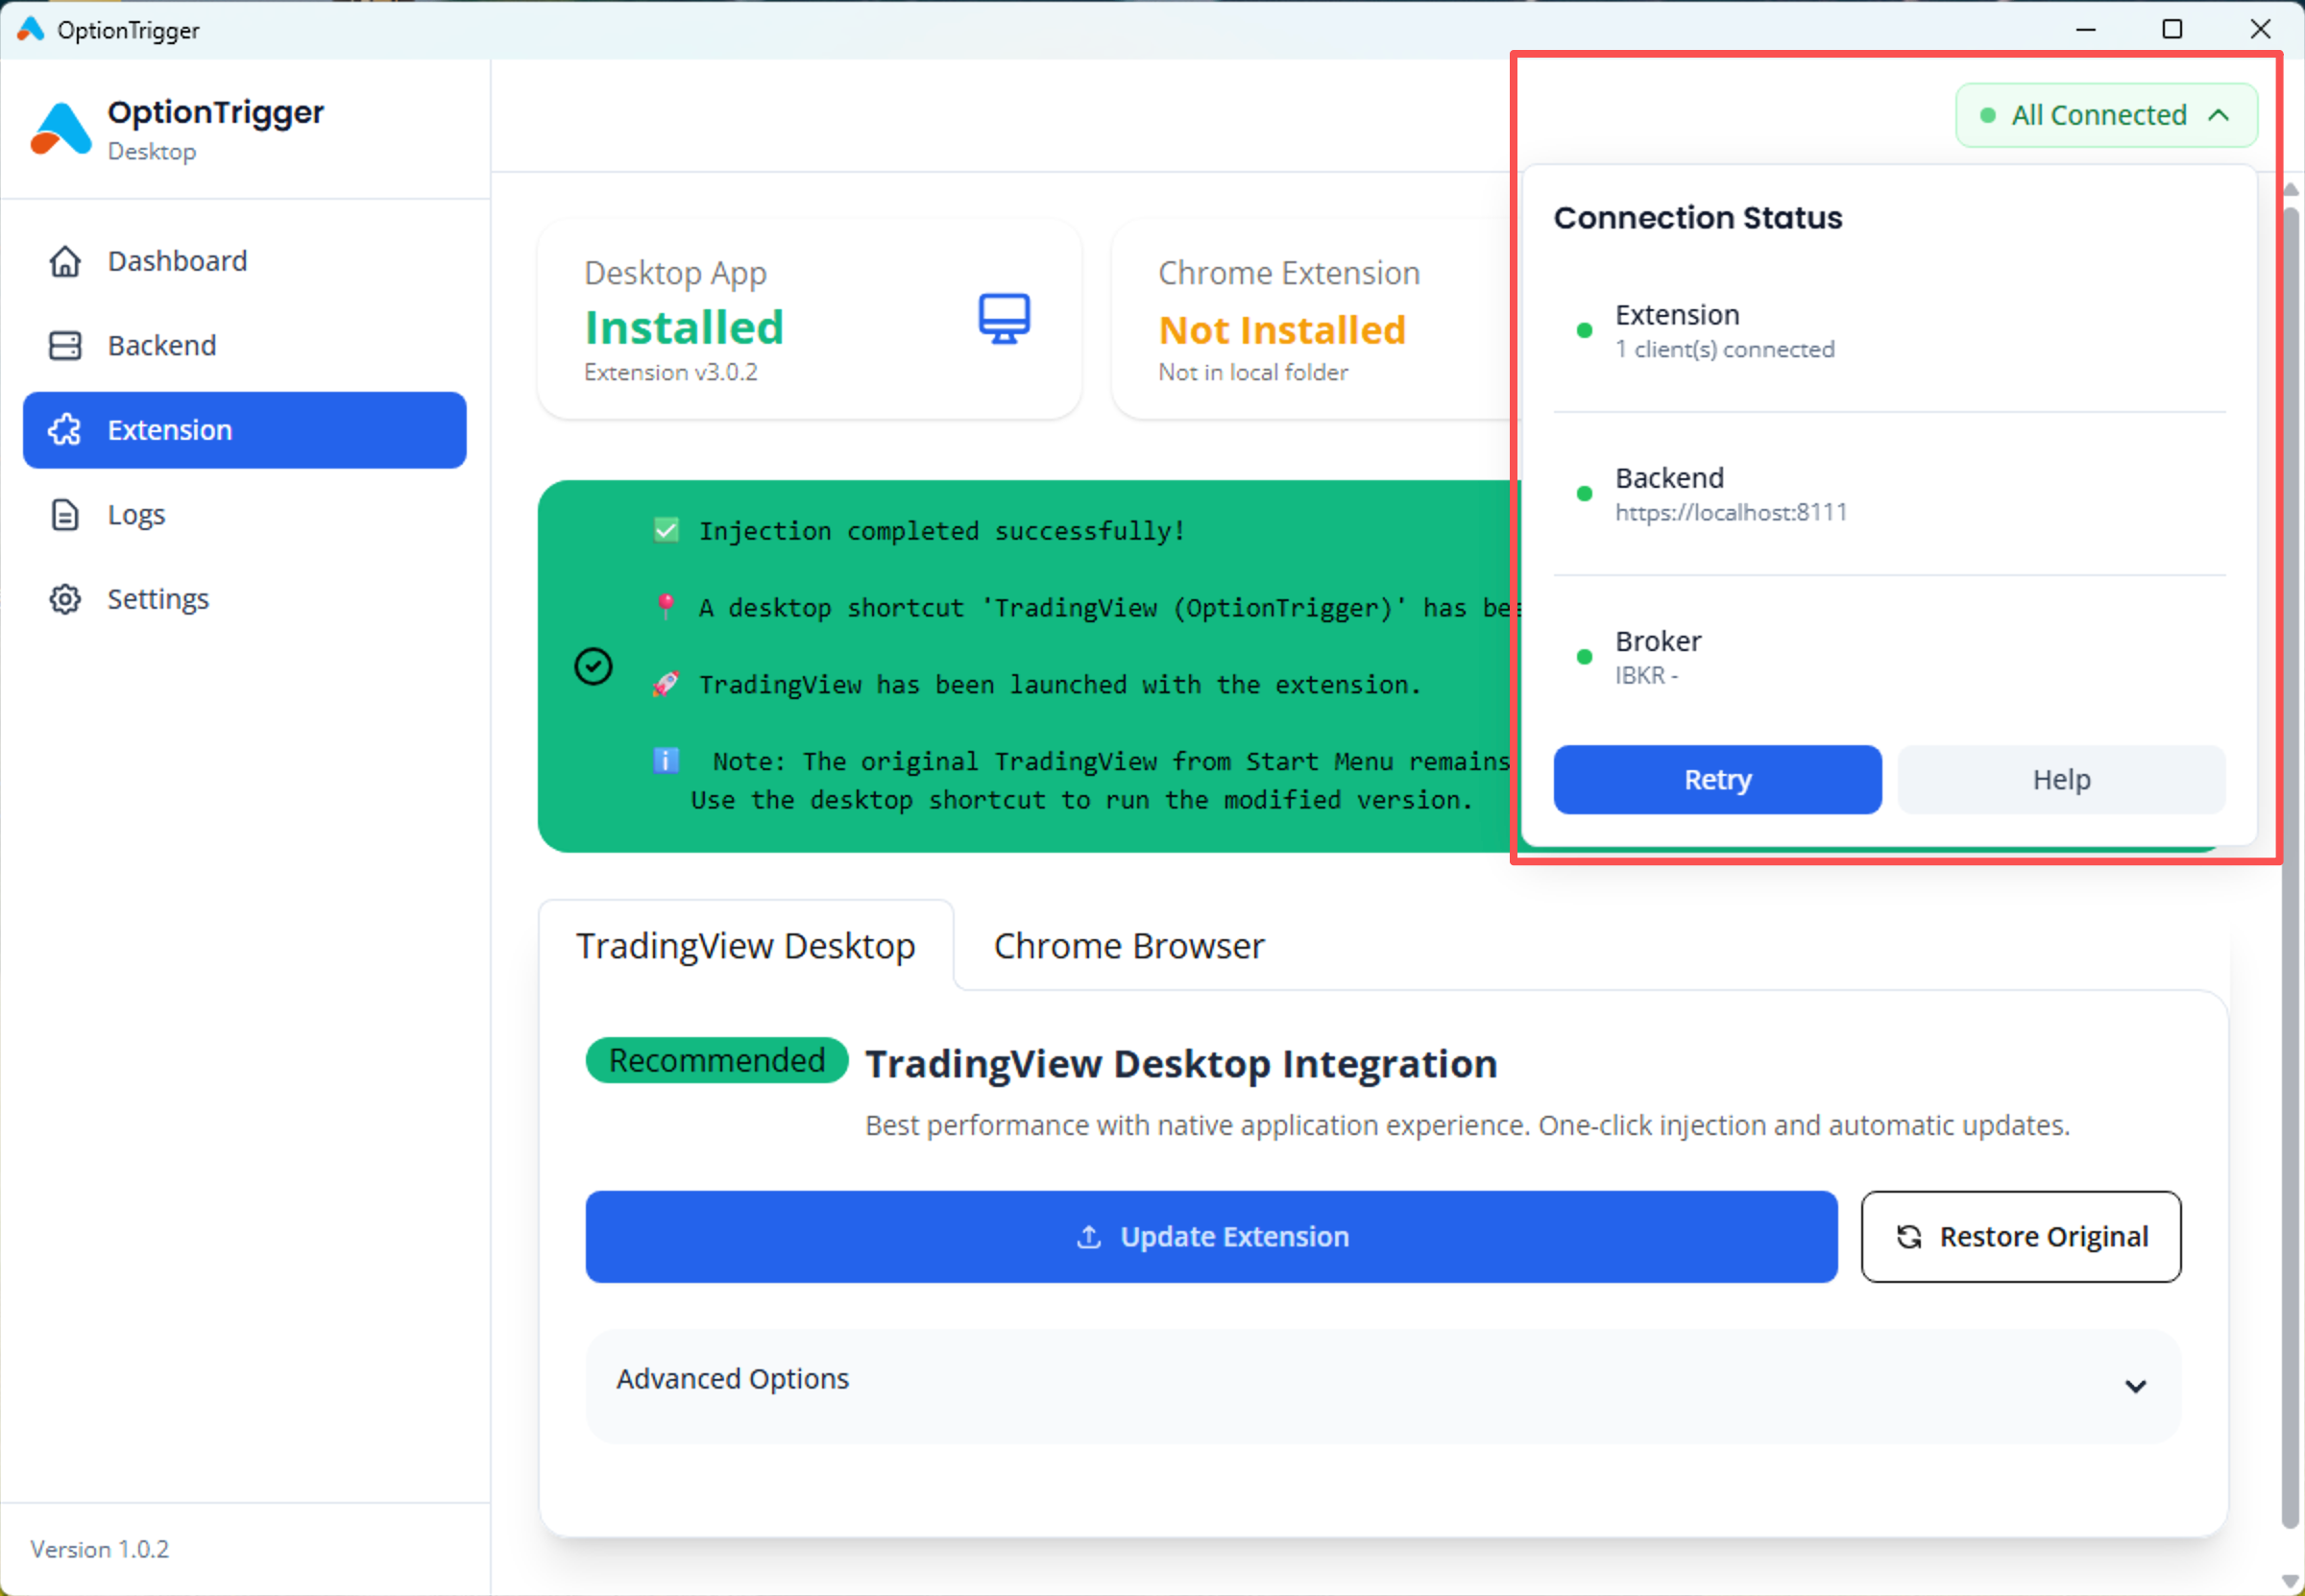
All green indicators mean your system is properly configured and ready to trade!
Verify Extension Connection
In TradingView, the OptionTrigger Global Setting button should have a green border, and the Backend status should show "Connected".
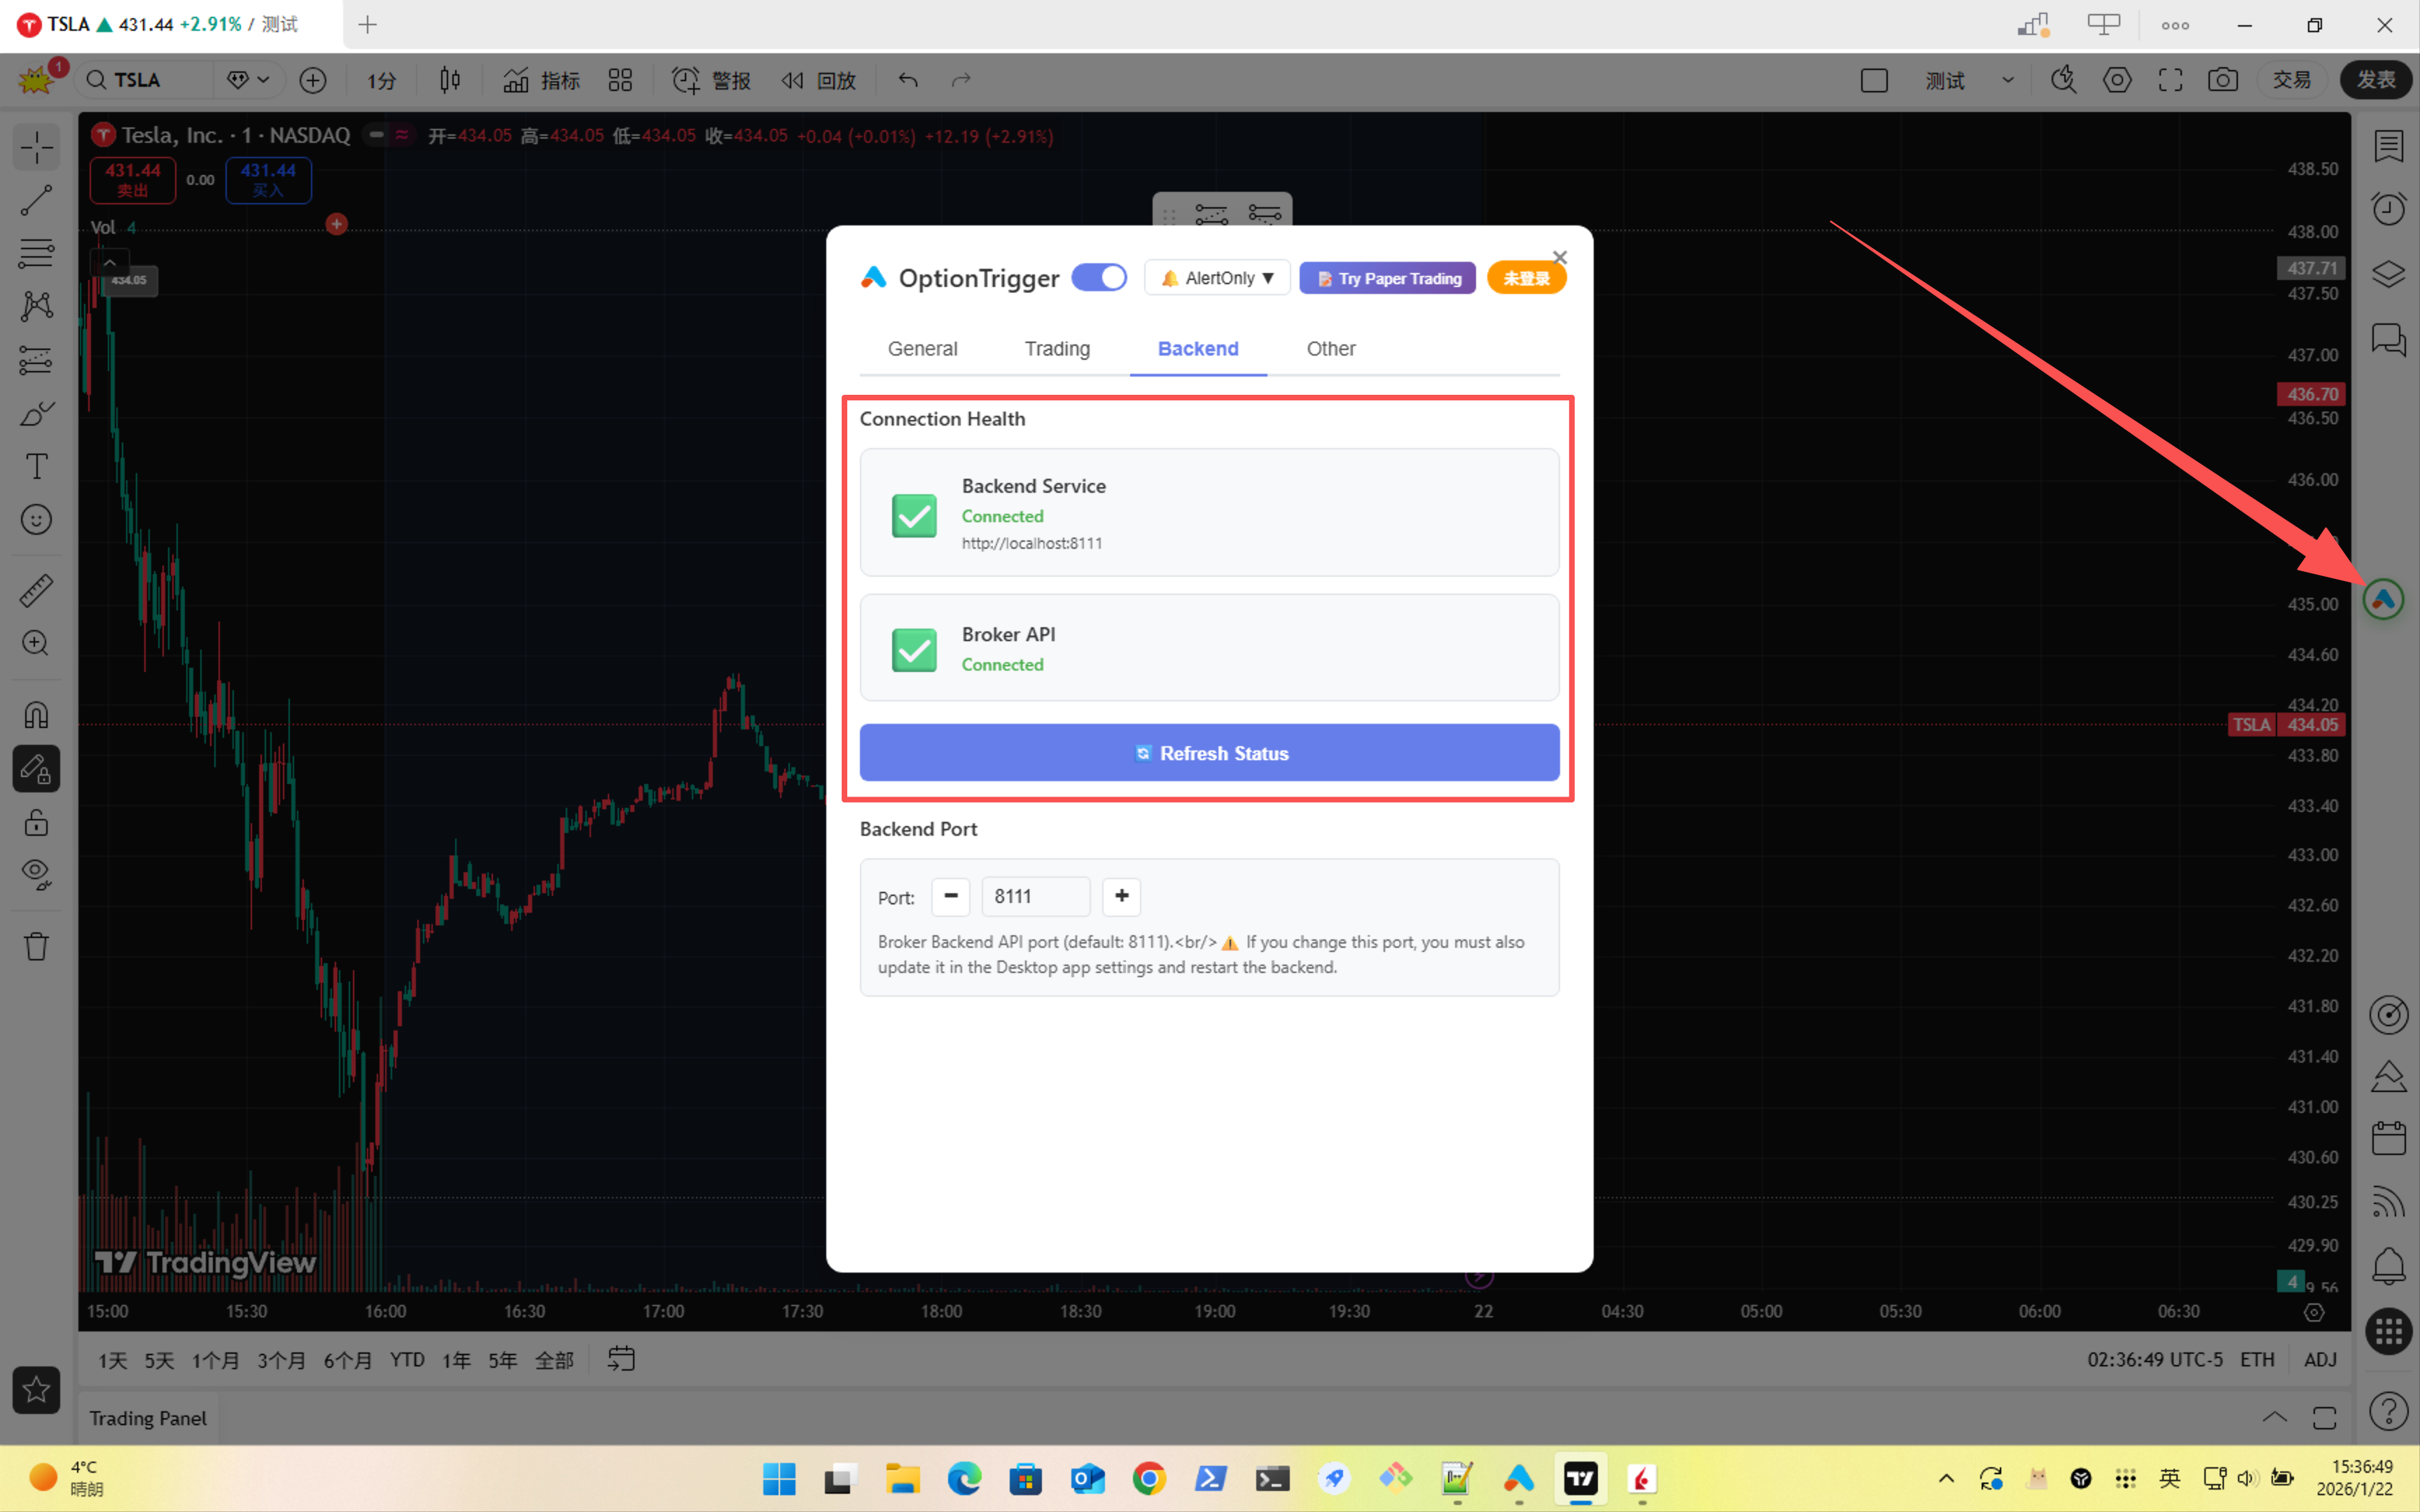
If you see a red border or "Disconnected" status, check:
- Backend is running in OptionTrigger Desktop
- TWS API is enabled and running
- Port numbers match between all components
Part 7: Authentication and Live Trading
Login to OptionTrigger Desktop
Click the Login button in OptionTrigger Desktop and sign in with your OptionTrigger account credentials.
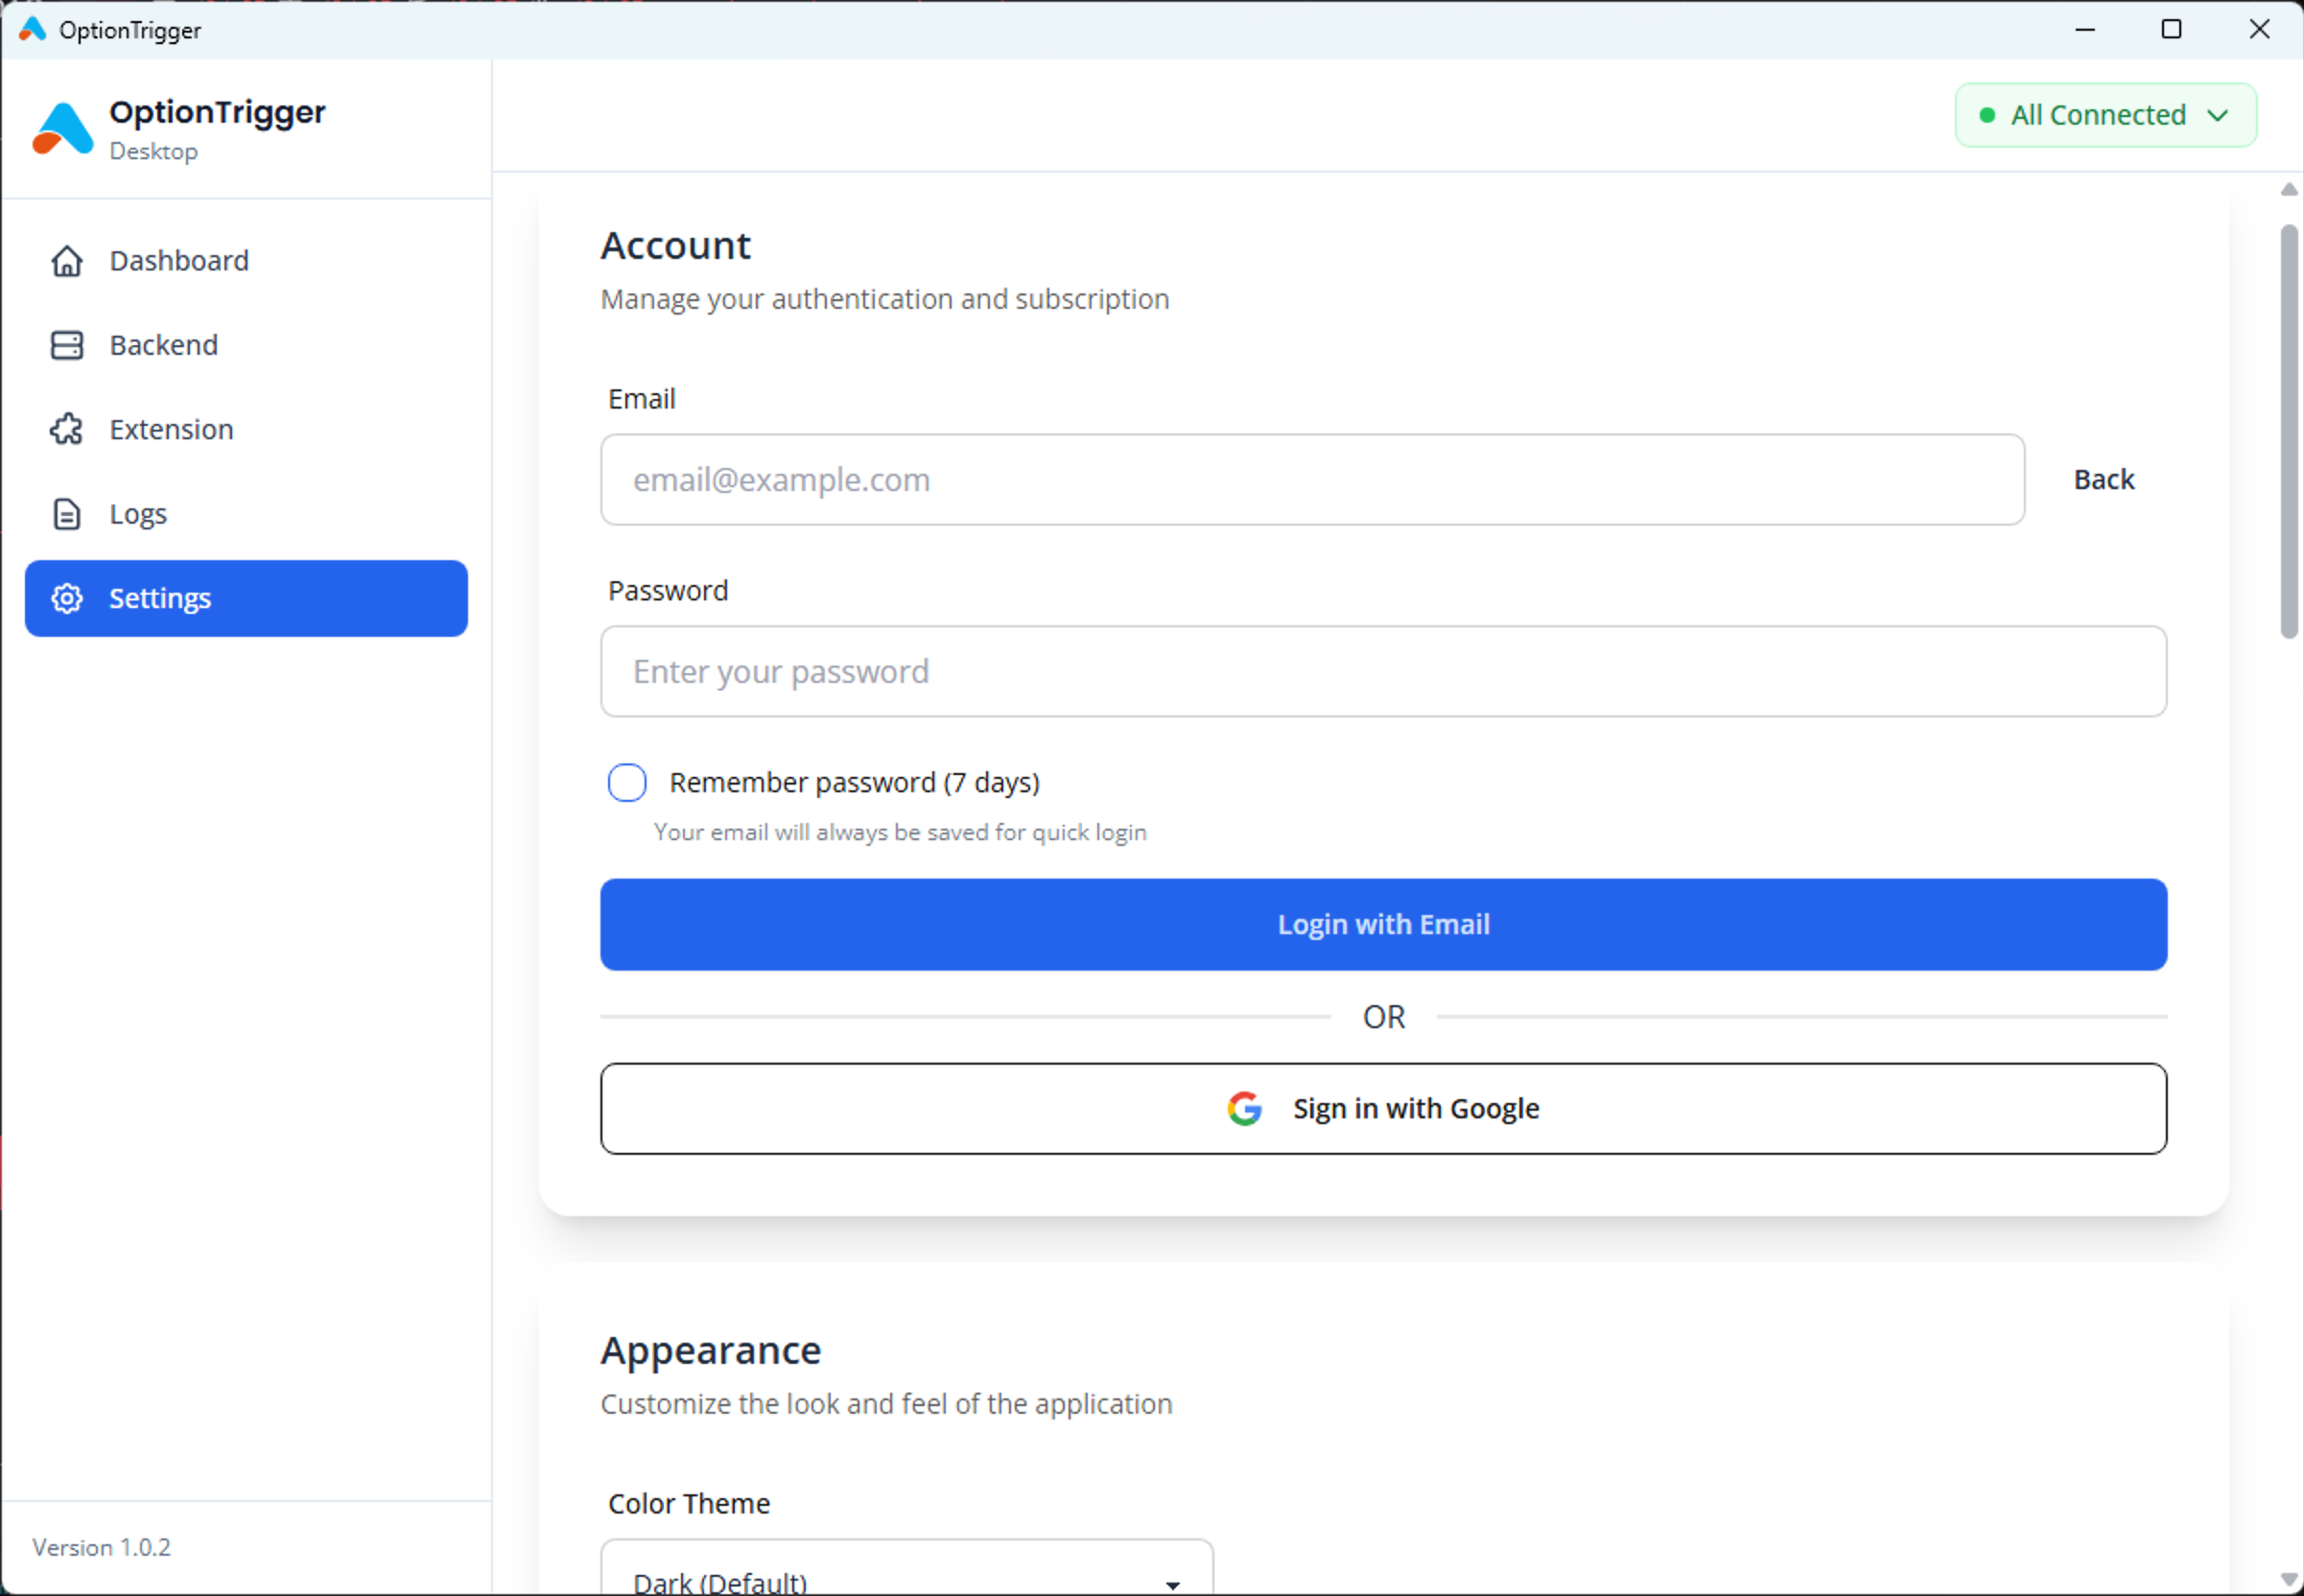
If you don't have an account yet, visit optiontrigger.com to register.
Switch to Live Mode
After logging in, you can switch from Paper Trading mode to Live Trading mode in the Chrome Extension settings:
- Click the OptionTrigger Settings button (gear icon) in TradingView
- Navigate to the Trading tab
- Select your preferred trading mode
Important: Live mode requires a Premium subscription. Make sure you understand the risks of live trading before switching from paper trading.
Troubleshooting
Backend Won't Start
- Check if port 8111 is already in use by another application
- Try restarting OptionTrigger Desktop
- Check firewall settings to ensure the port is not blocked
TWS Connection Failed
- Verify TWS is running and logged in
- Confirm API is enabled in TWS settings
- Check that the port number matches between TWS/Gateway and OptionTrigger (this guide uses 7496)
- Restart both TWS and OptionTrigger Desktop
Extension Not Loading
- Ensure you're using the "TradingView with OptionTrigger" shortcut
- Try re-injecting the extension from OptionTrigger Desktop
- Clear browser cache and restart TradingView
SSL Certificate Issues
- Run the certificate installation again
- On macOS, check Keychain Access to verify the certificate is trusted
- On Windows, check Certificate Manager (certmgr.msc)
Next Steps
Congratulations! You've successfully set up OptionTrigger Desktop. Here's what to do next:
- Practice with Paper Trading: Test strategies risk-free before going live
- Join the Community: Connect with other traders in our Discord server
- Visit Help Center: Browse more guides at our Help Center
- Trade Options on TradingView — brokers, tools, workflows
- Options Trading Automation Playbook — webhooks vs chart-native execution
- IBKR + TradingView for Options — permissions, TWS, troubleshooting
Need help? Join our Discord community for quick support and connect with other traders. You can also email us at [email protected].