Placing Your First Order
Step-by-step guide to execute your first options trade using OptionTrigger - from trade plan to order confirmation
This guide walks you through placing your first options order using OptionTrigger. You'll learn how to go from a trade plan on your chart to a live order with your broker.
Premium Feature: Order placement requires a Premium subscription. Free users can use all planning tools but cannot execute trades.
Prerequisites
Before placing an order, ensure you have:
- OptionTrigger Desktop running with Backend started
- IBKR TWS or IB Gateway connected (green status)
- Logged in to your OptionTrigger account
- A trade plan drawn on your TradingView chart
New to OptionTrigger? Complete the Quick Start Guide first.
Step 1: Verify Connection Status
Before placing any order, confirm all systems are connected.
Check OptionTrigger Desktop
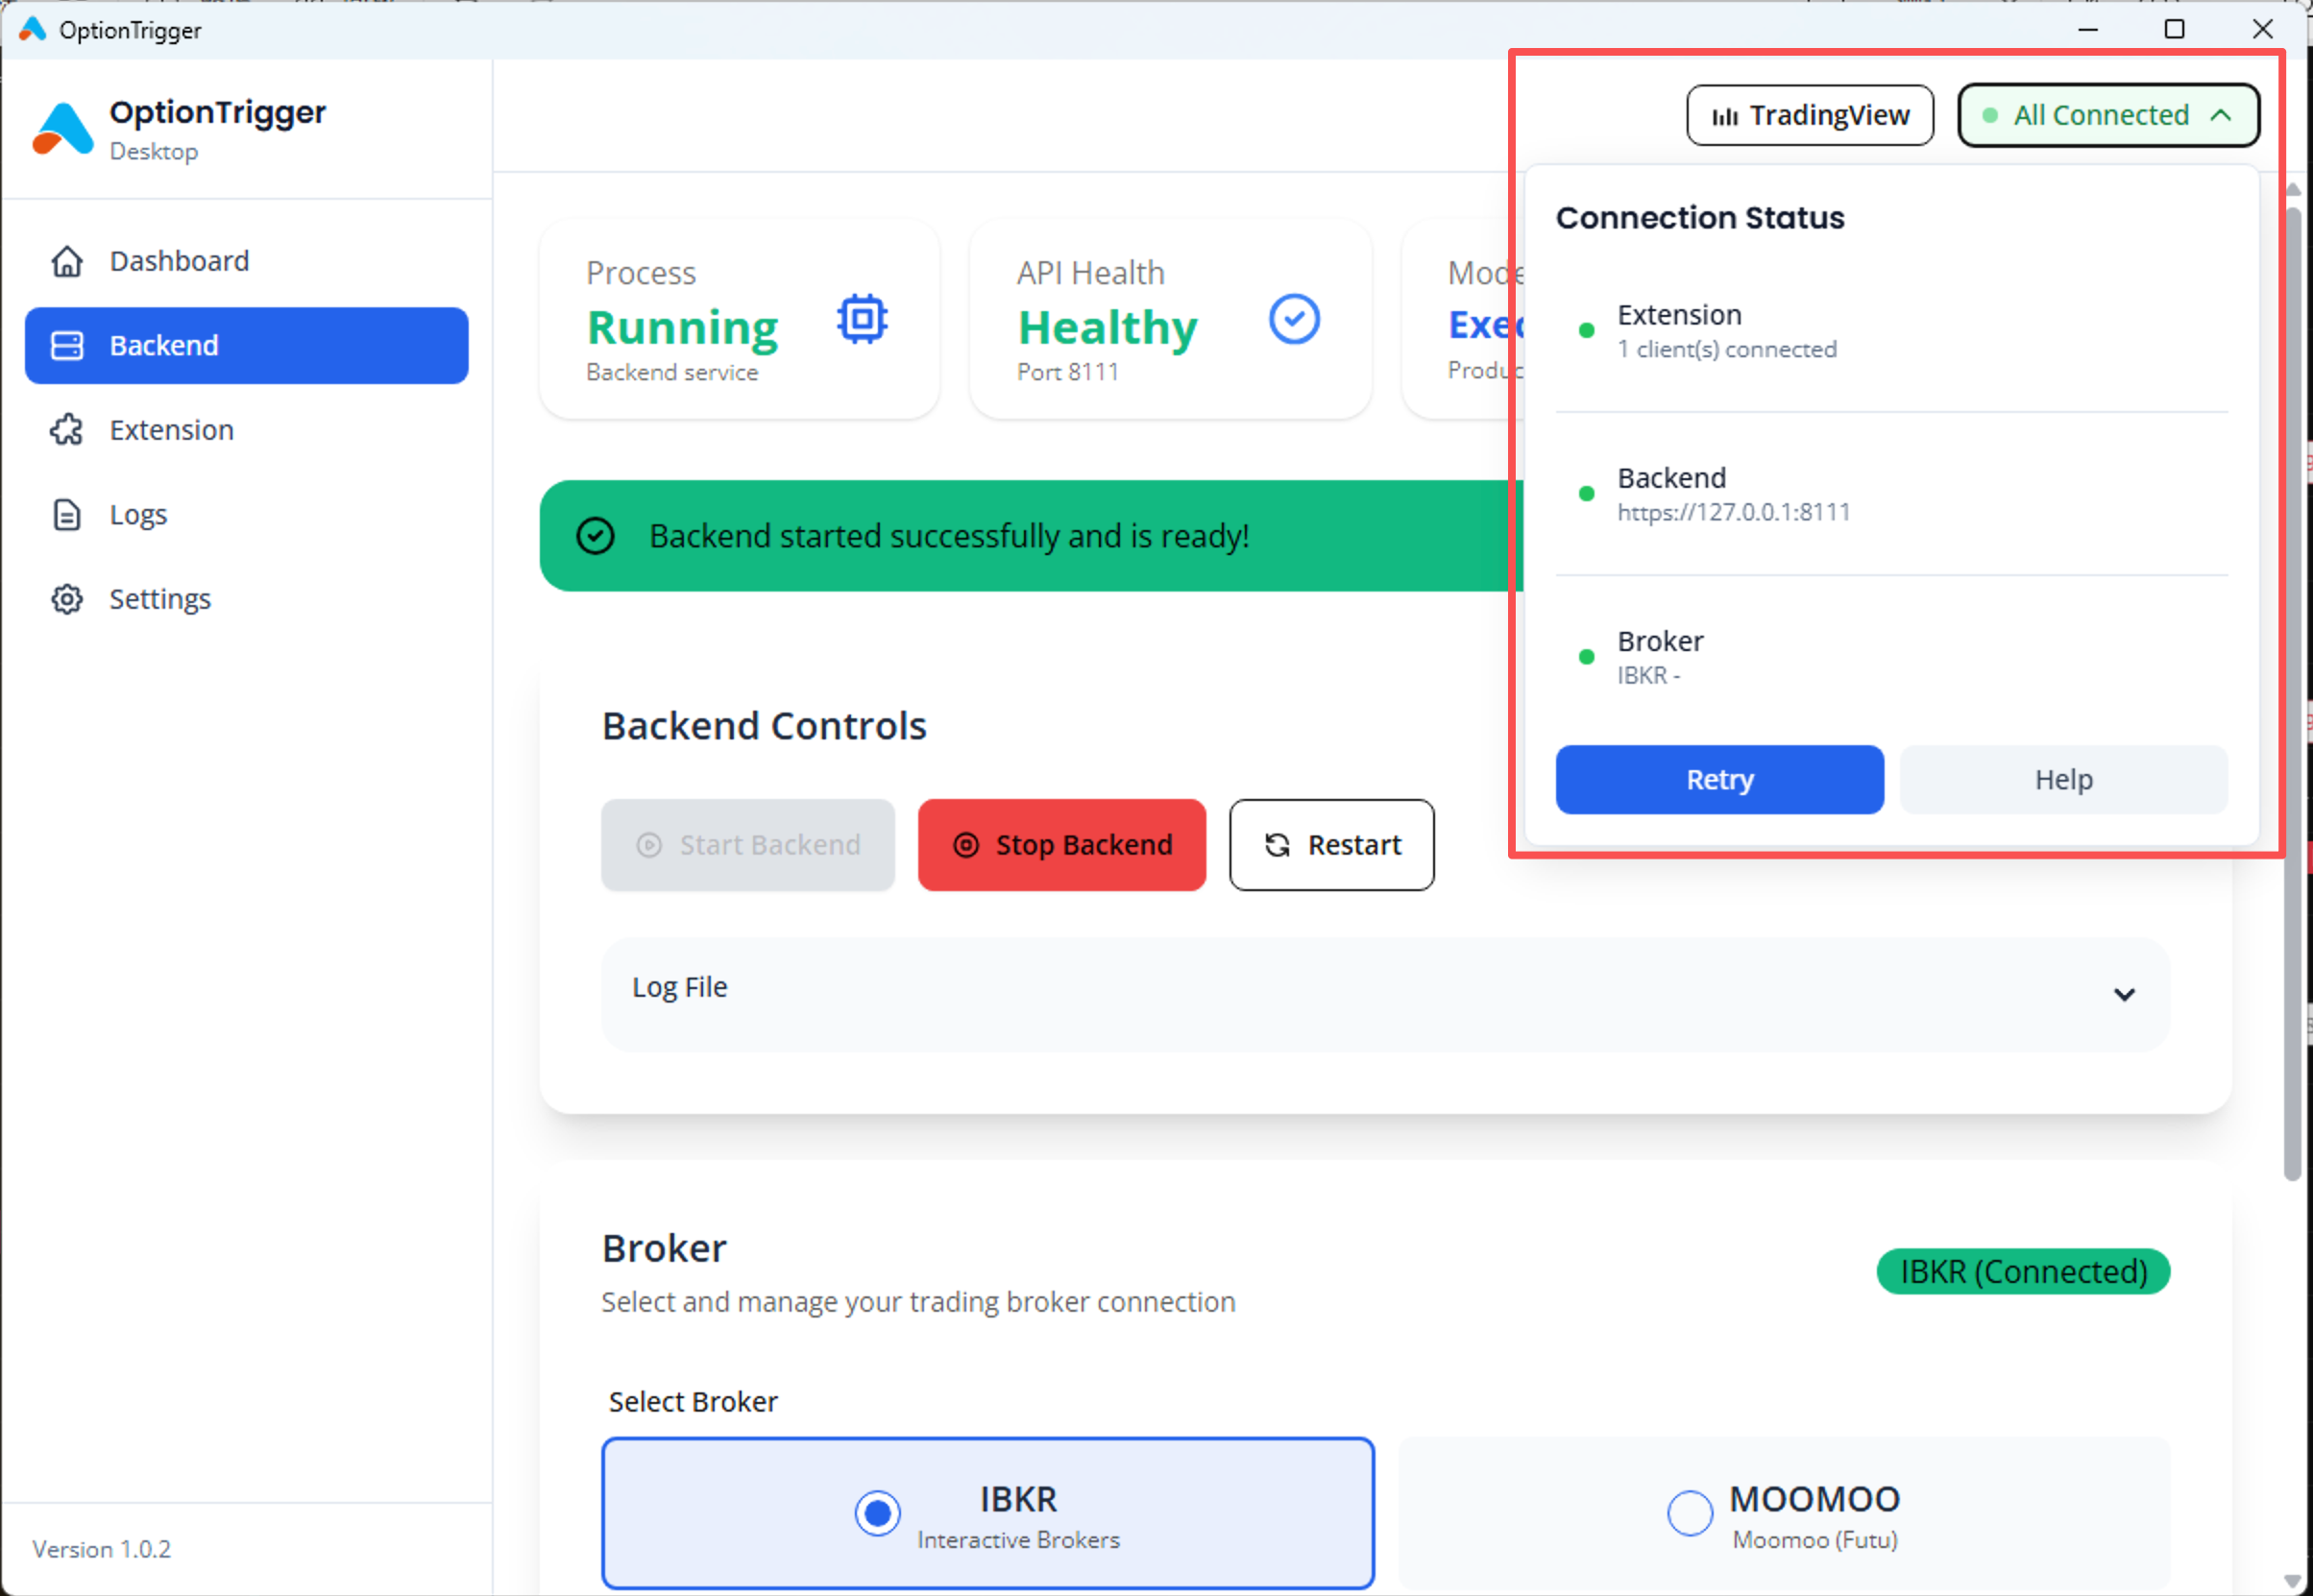
Open OptionTrigger Desktop and verify:
- Backend Status: Running (green)
- TWS Connection: Connected (green)
Check Extension Status
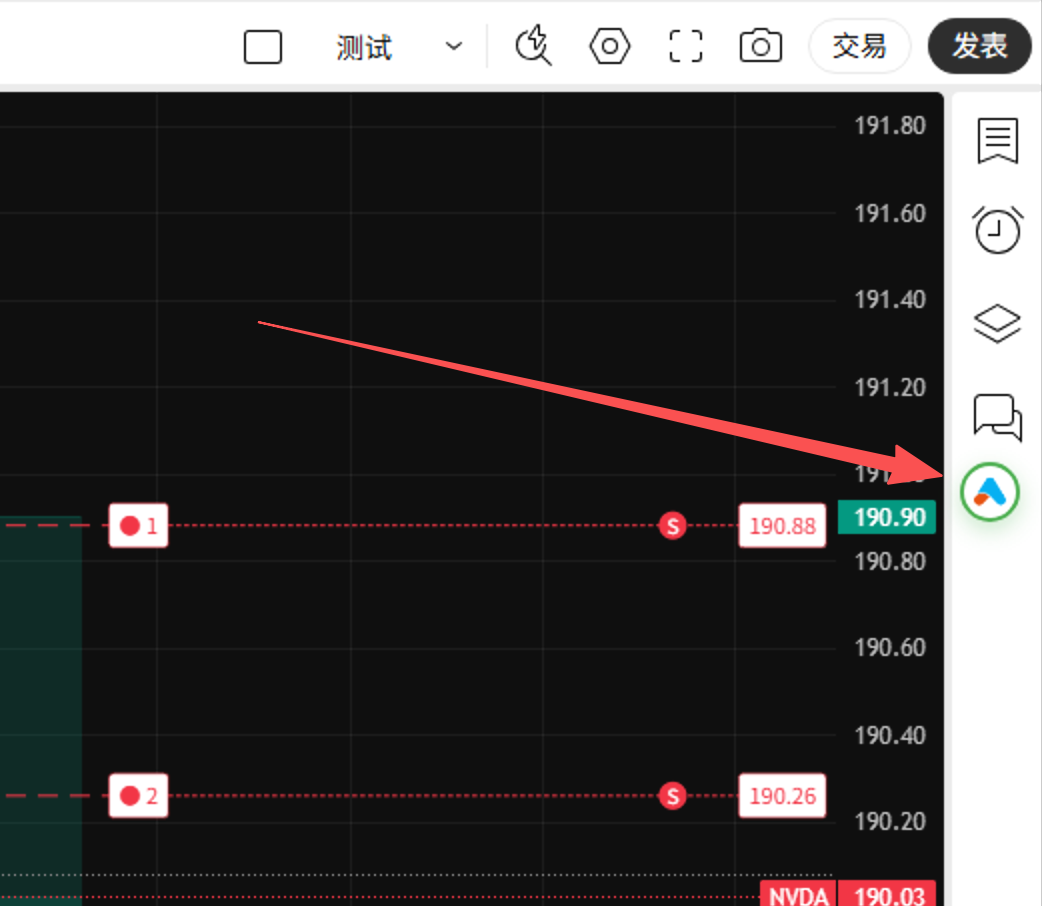
In TradingView, the OptionTrigger settings button should have a green border, indicating the extension is connected to the backend.
Step 2: Create Your Trade Plan
Select a Symbol
Navigate to the stock or ETF you want to trade options on. For this example, we'll use SPY.
Choose Long or Short Position Tool
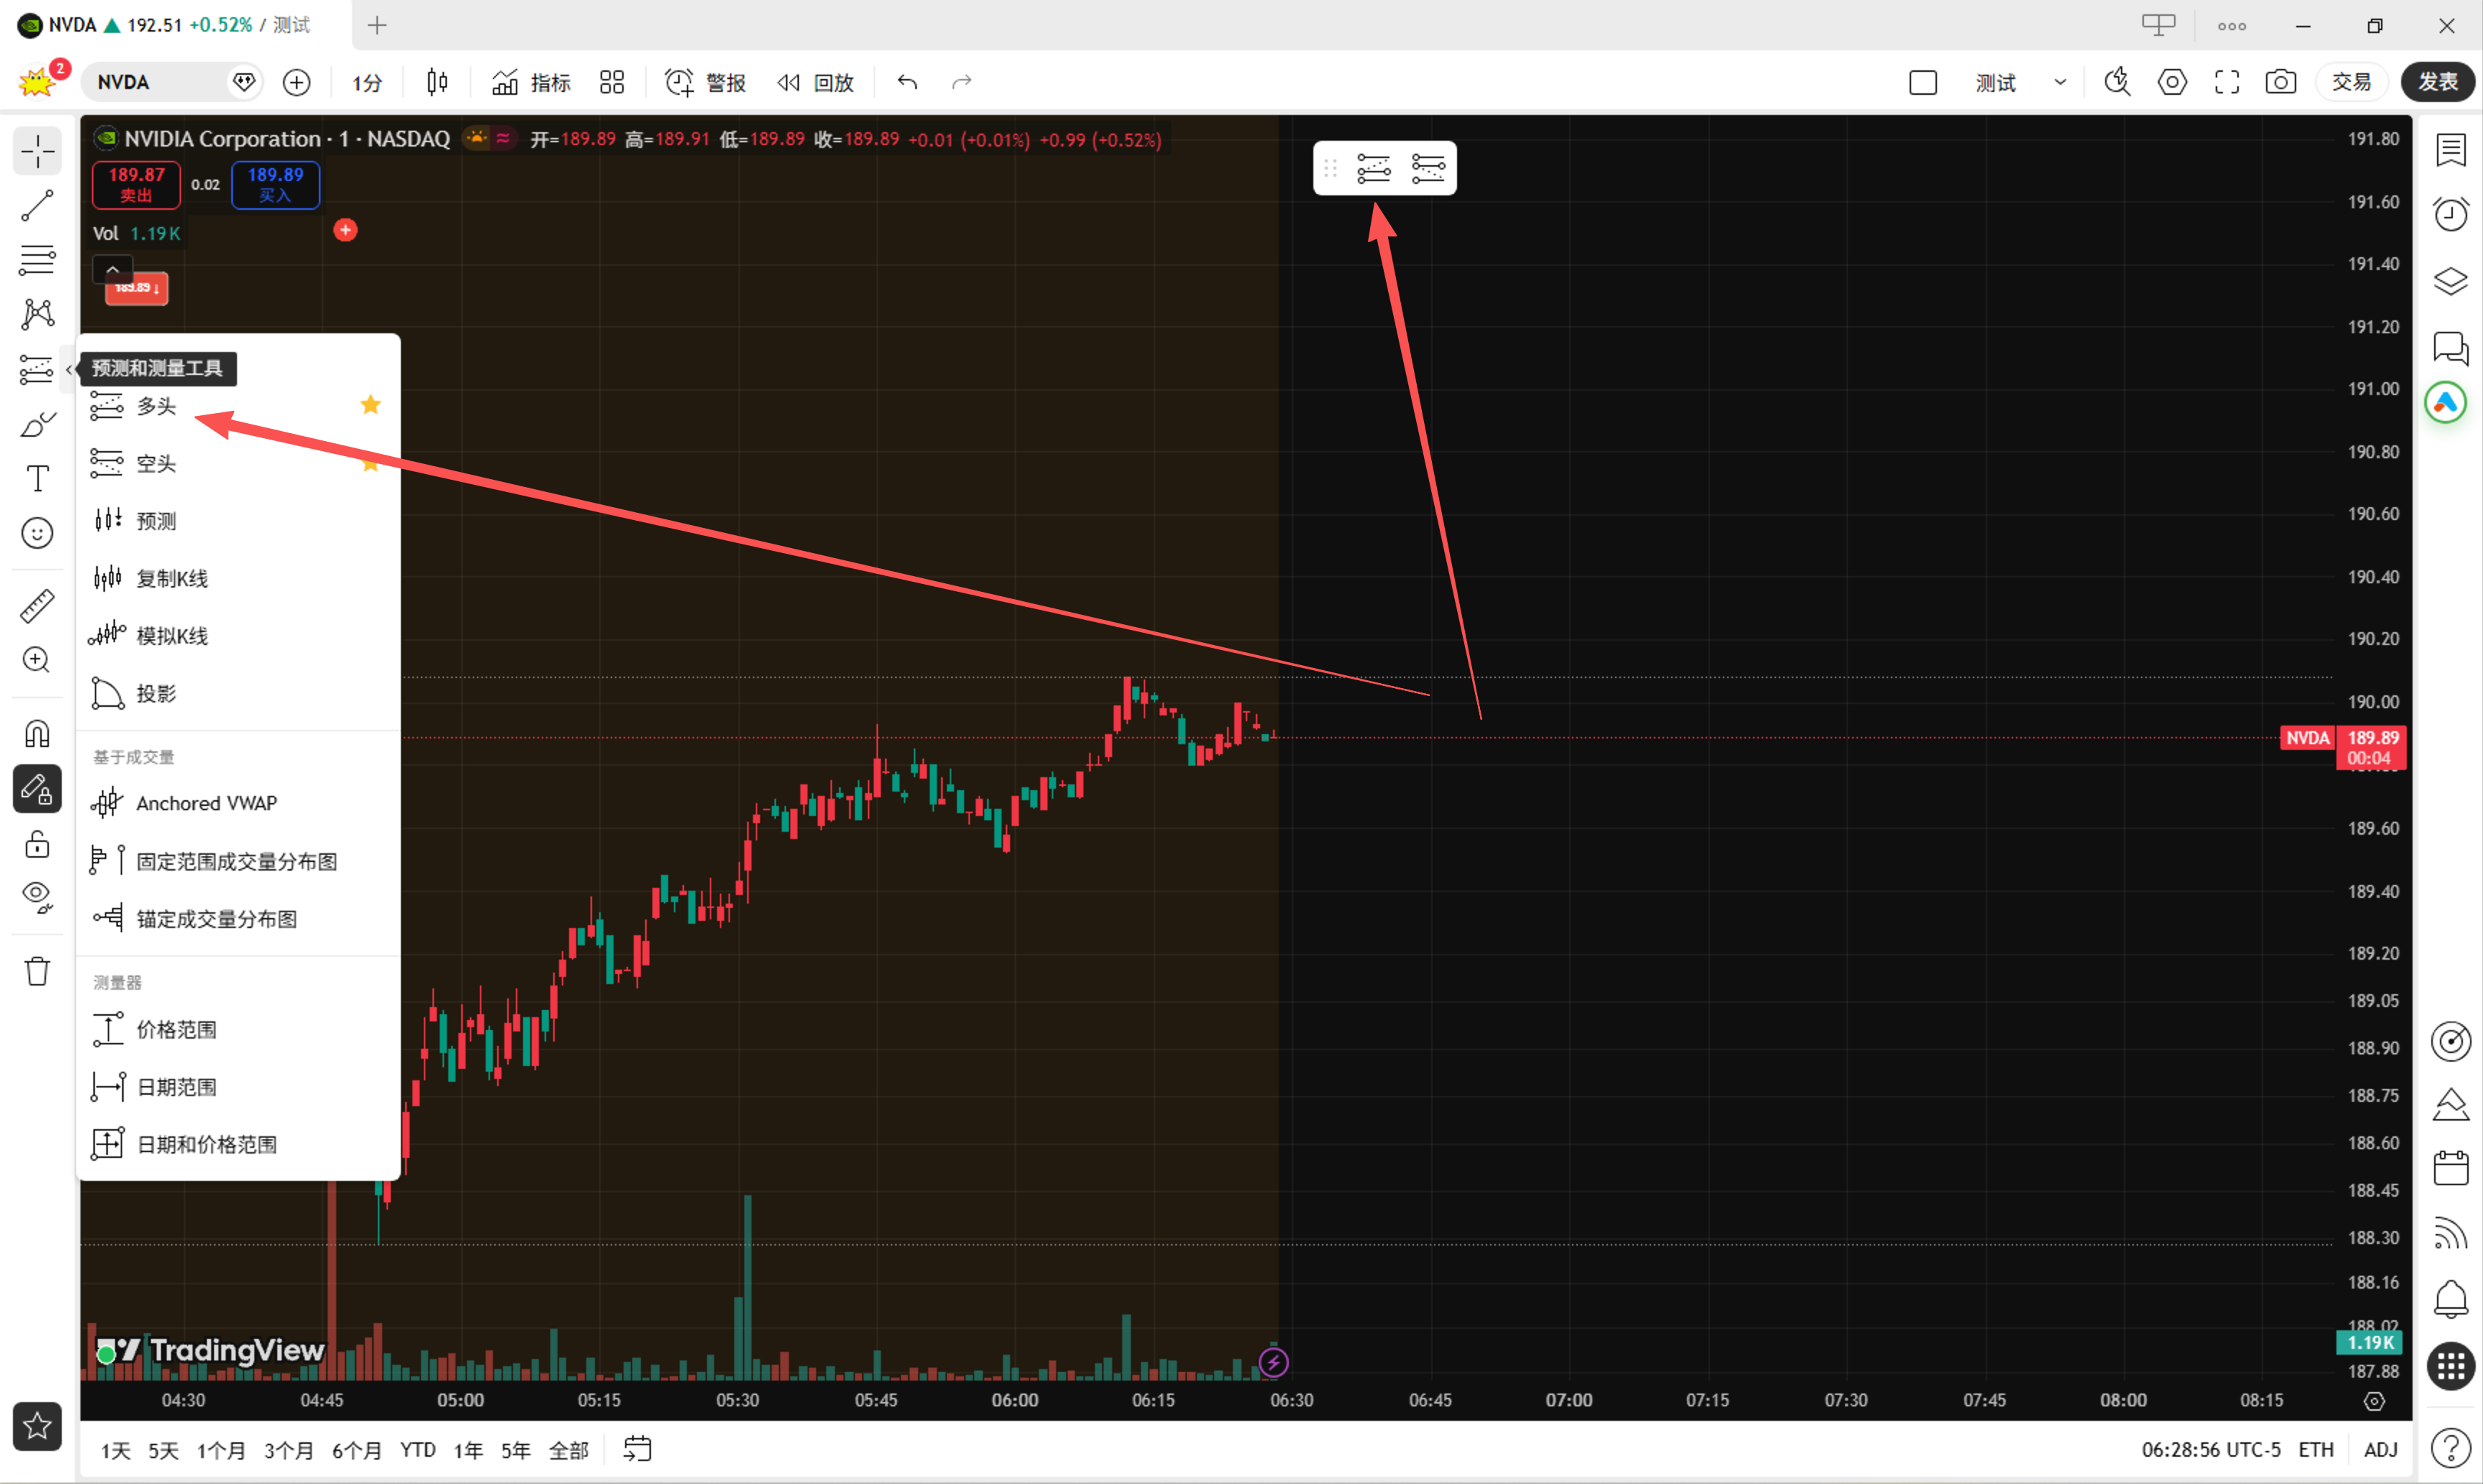
From TradingView's toolbar, select the Long Position tool (for bullish trades) or Short Position tool (for bearish trades).
Draw Your Entry and Targets
Click on the chart to set your entry point, then drag to define your take profit and stop loss levels.
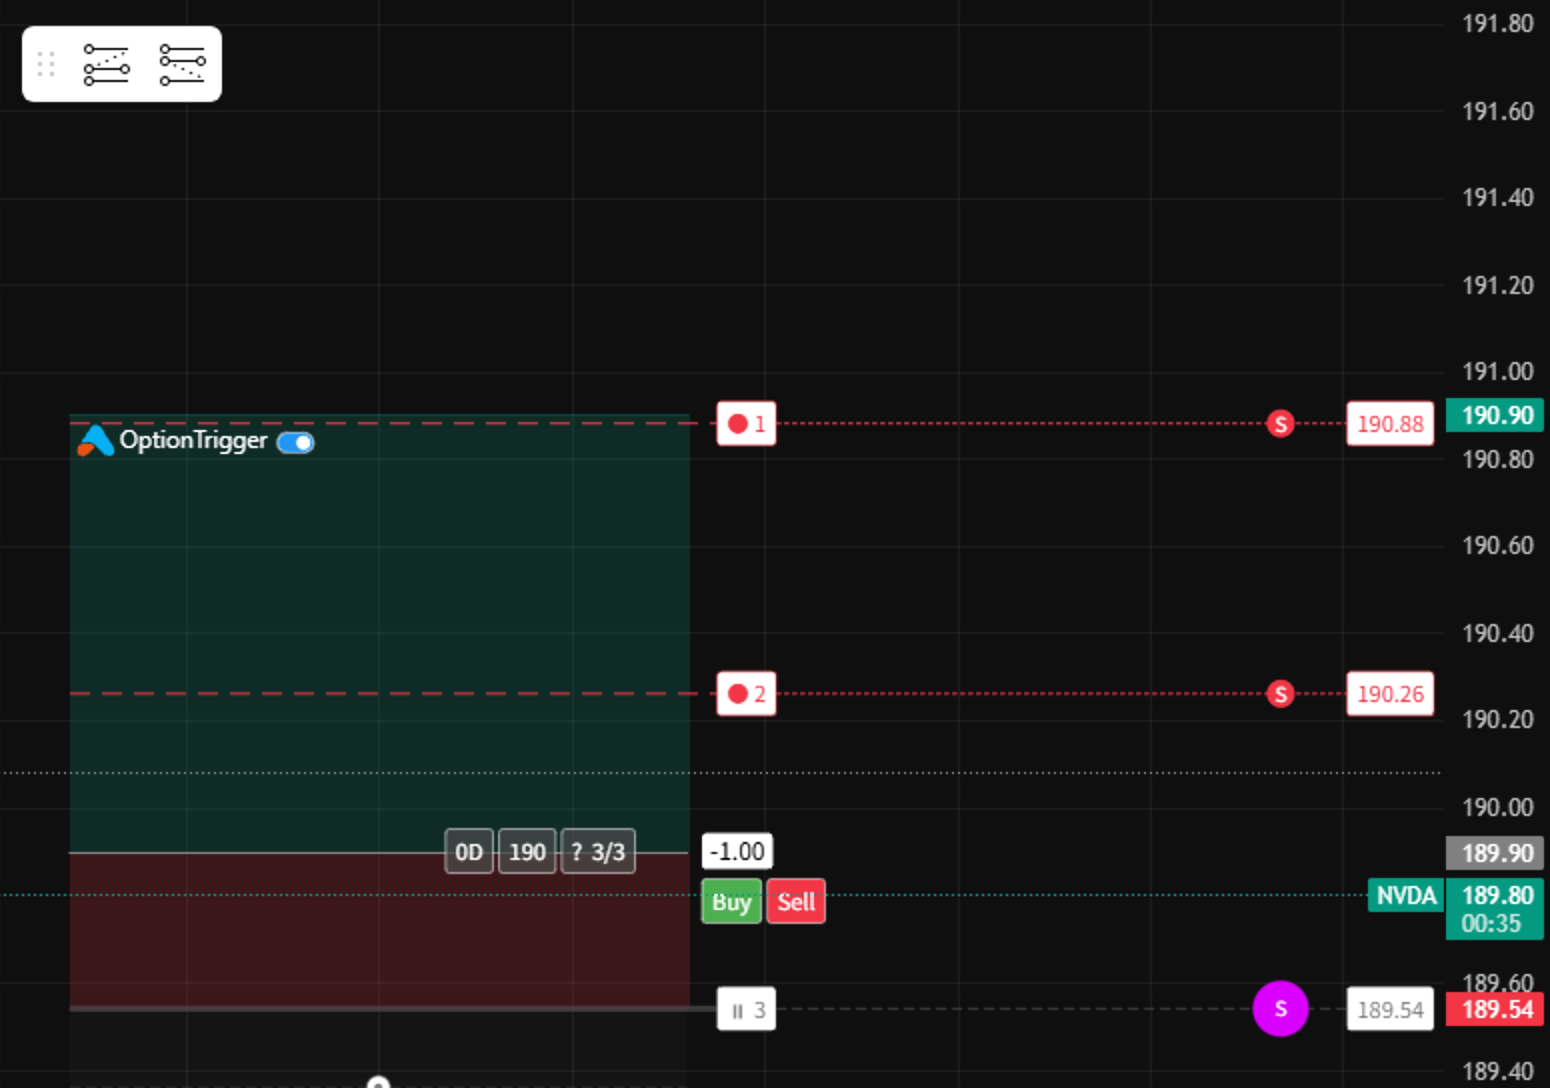
OptionTrigger will automatically display:
- Entry price and option prices
- Take profit targets with option prices
- Stop loss level with option prices
- Risk/reward ratio
Step 3: Configure Order Settings
Open the Order Panel
Click on the Entry Circle of your trade plan to open the order configuration panel.
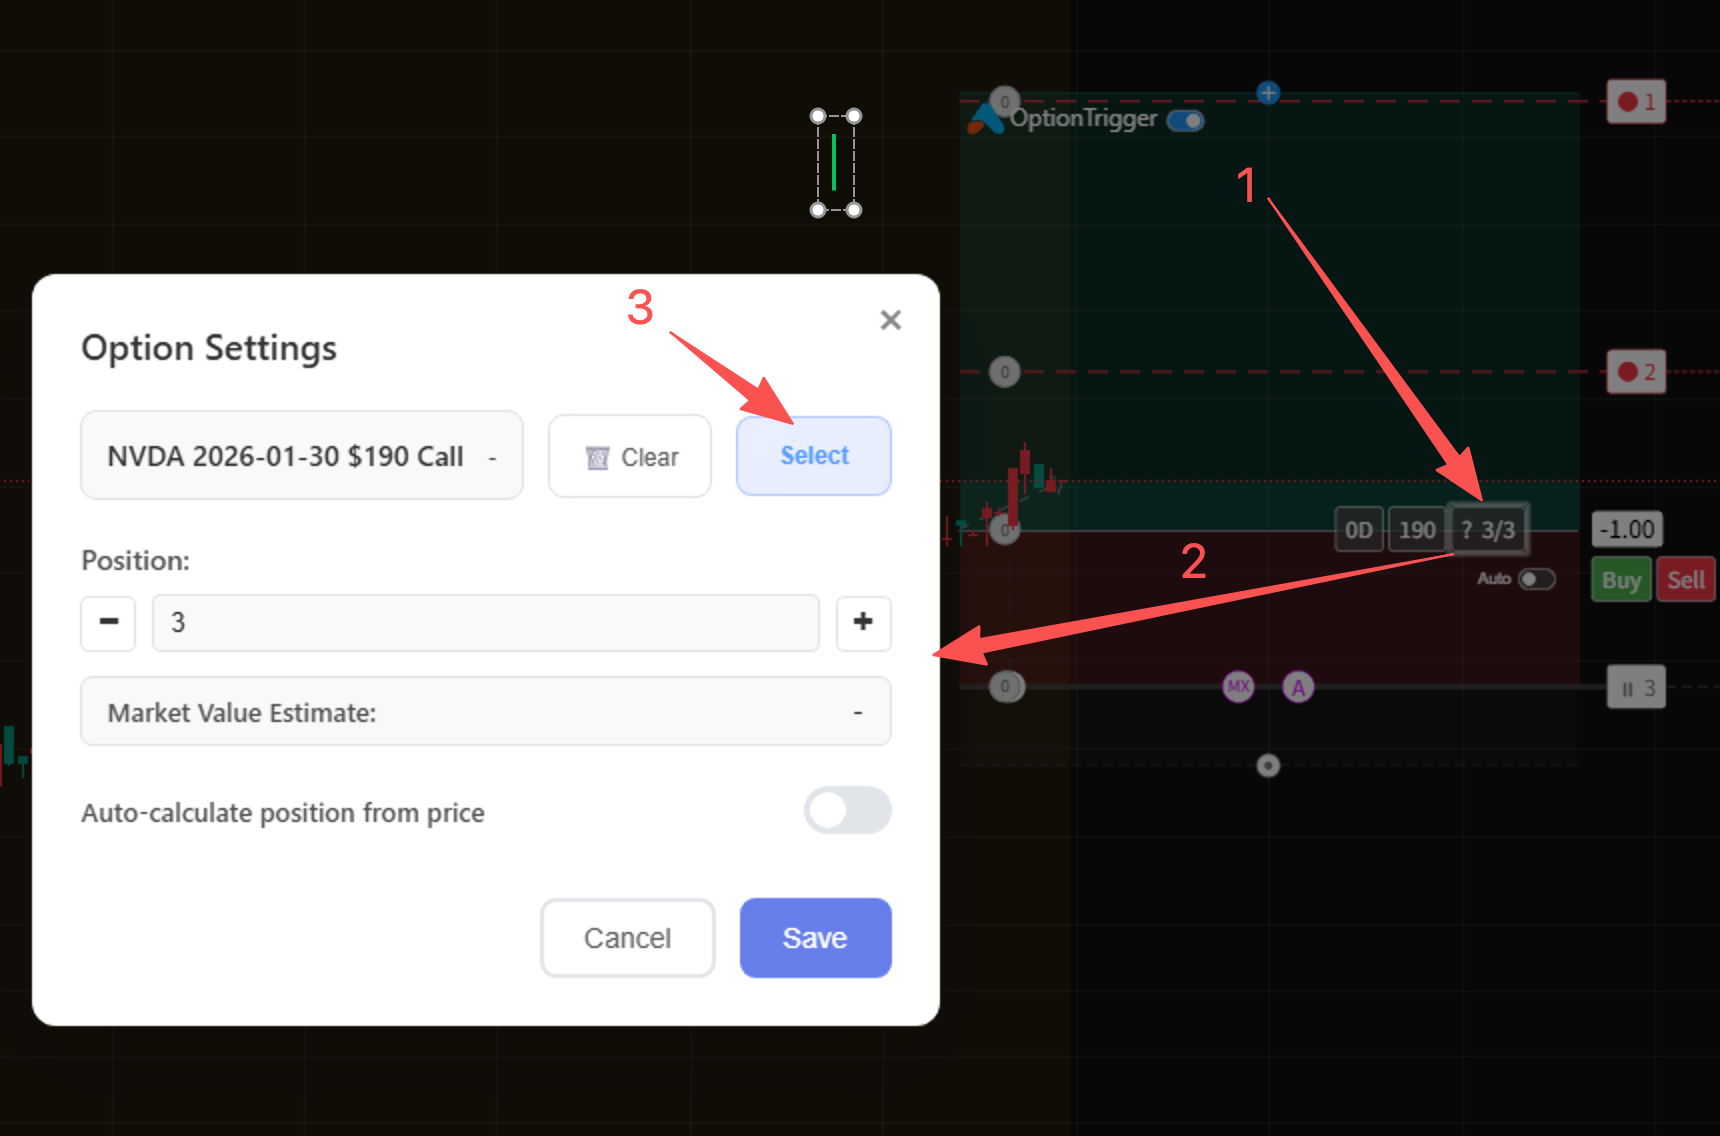
Select Option Contract
Choose your preferred option contract:
- Expiration Date: Select from available expirations
- Strike Price: Choose your strike (or use AutoSize)
- Contract Type: Call (for Long) or Put (for Short)
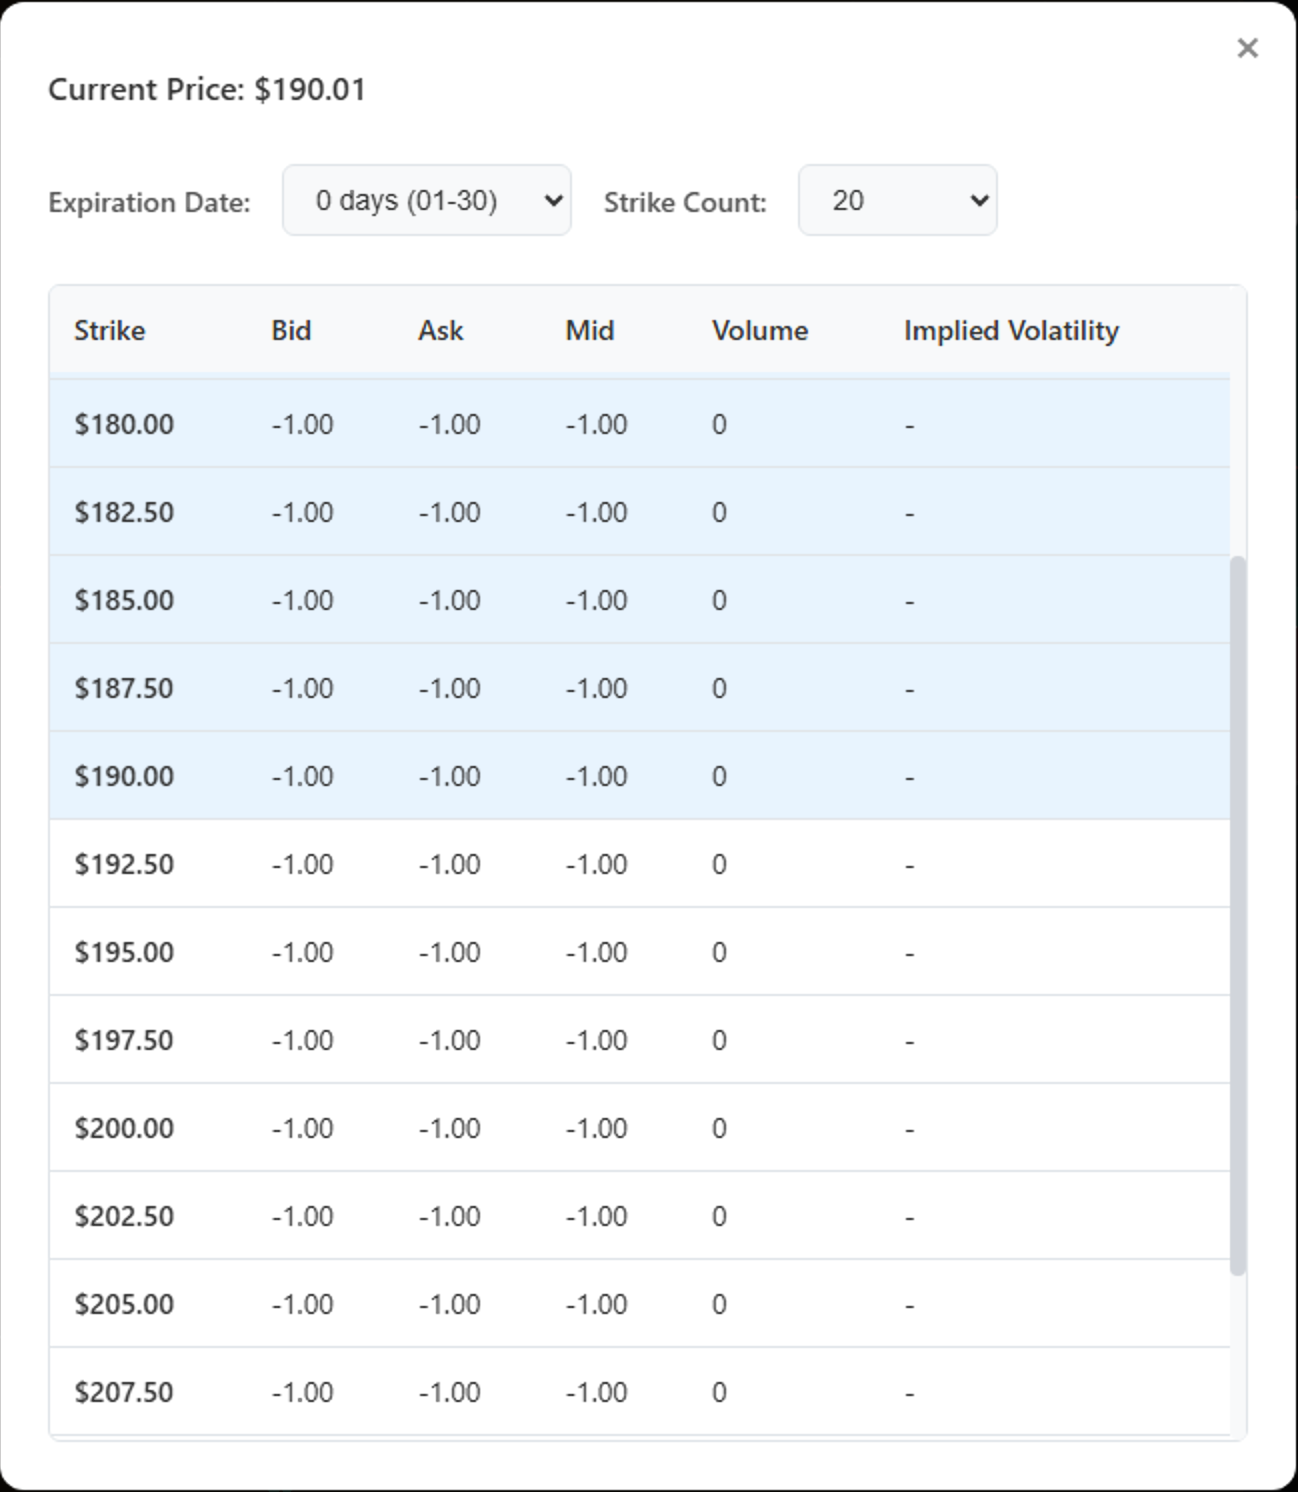
AutoSize (Premium): Let OptionTrigger automatically select the optimal contract based on your risk parameters.
Set Quantity
Enter the number of contracts you want to trade. The panel shows:
- Total cost/premium
- Maximum risk
- Potential profit at each TP level
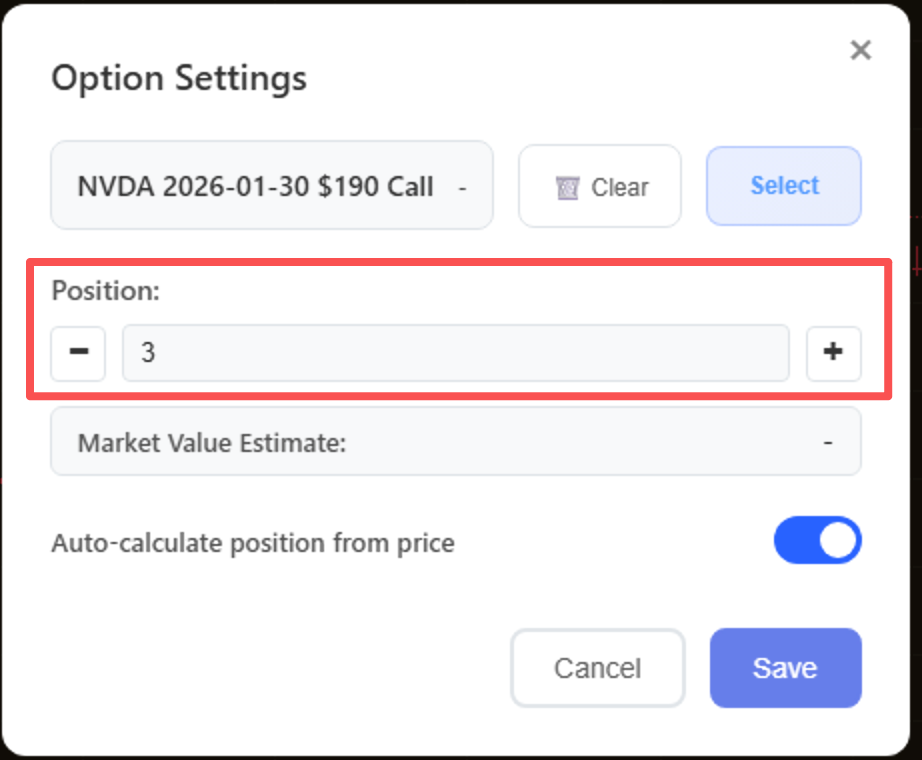
Step 4: Review and Place Order
Review Order Details
Before placing, carefully review:
- Symbol and contract details
- Order mode — Market or Limit (+ Mid / Aggressive / Passive when limit). Set global defaults under Settings → Trading → Order Mode; the order panel can override Entry for this click. See Market and Limit Order Modes.
- Quantity and total cost
- Take profit and stop loss levels (TP/SL use their own order-mode rows in settings)
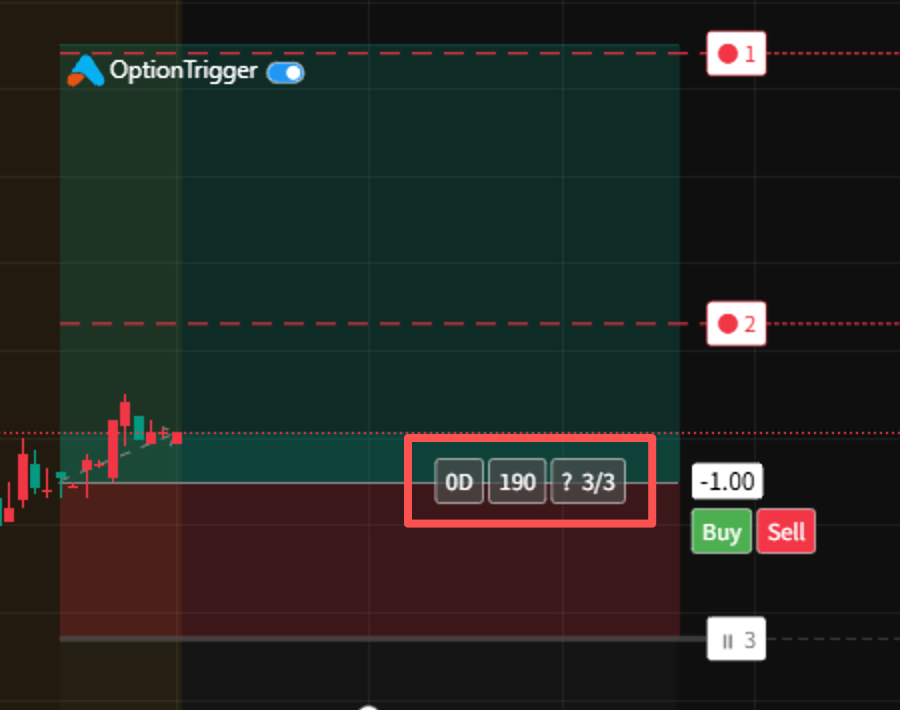
Click Place Order
When ready, click the Place Order button. A confirmation dialog will appear.
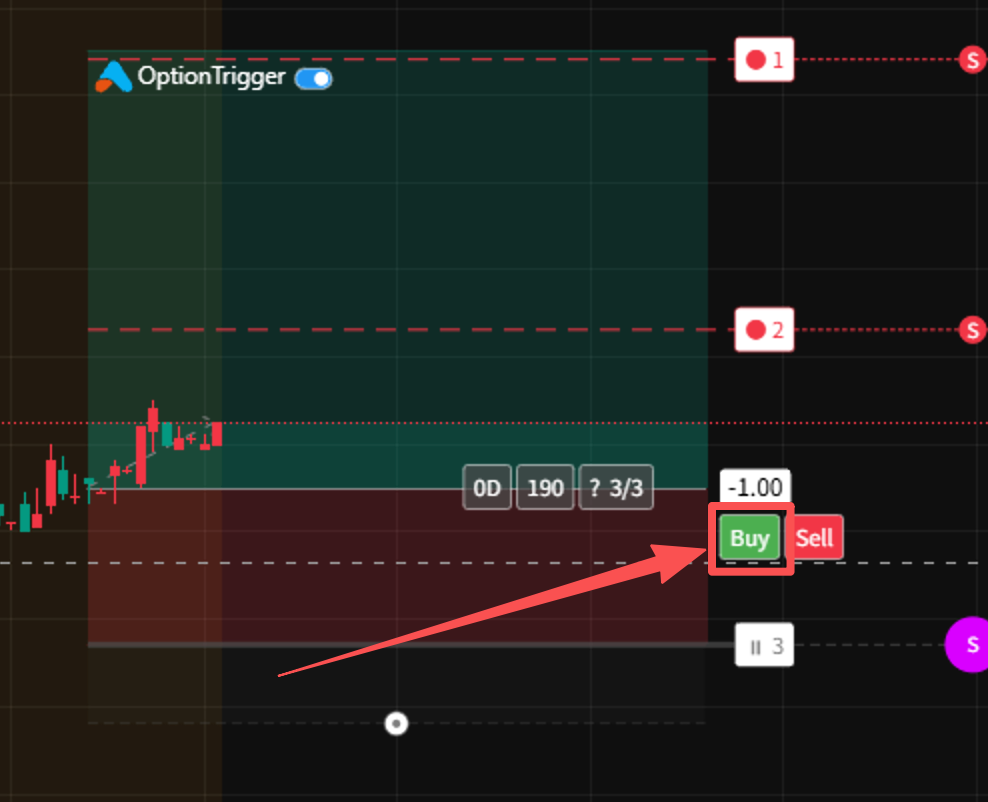
Double-check everything before confirming. Once submitted, orders may execute immediately.
Confirm Execution
Click Confirm to submit the order to your broker. You'll see a success message when the order is accepted.
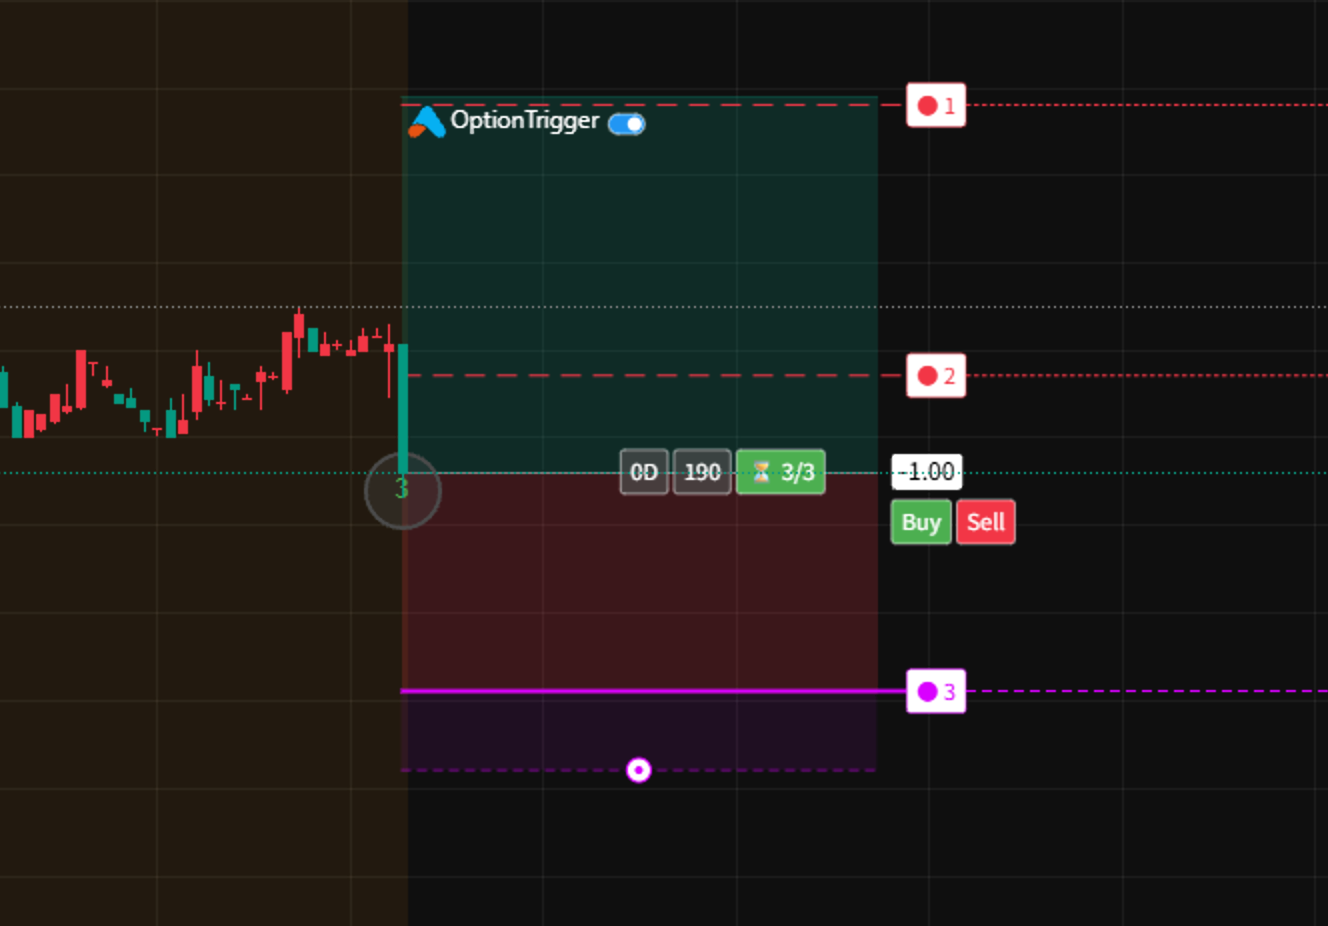
Step 5: Monitor Your Order
After placing an order, you can monitor its status directly on the chart.
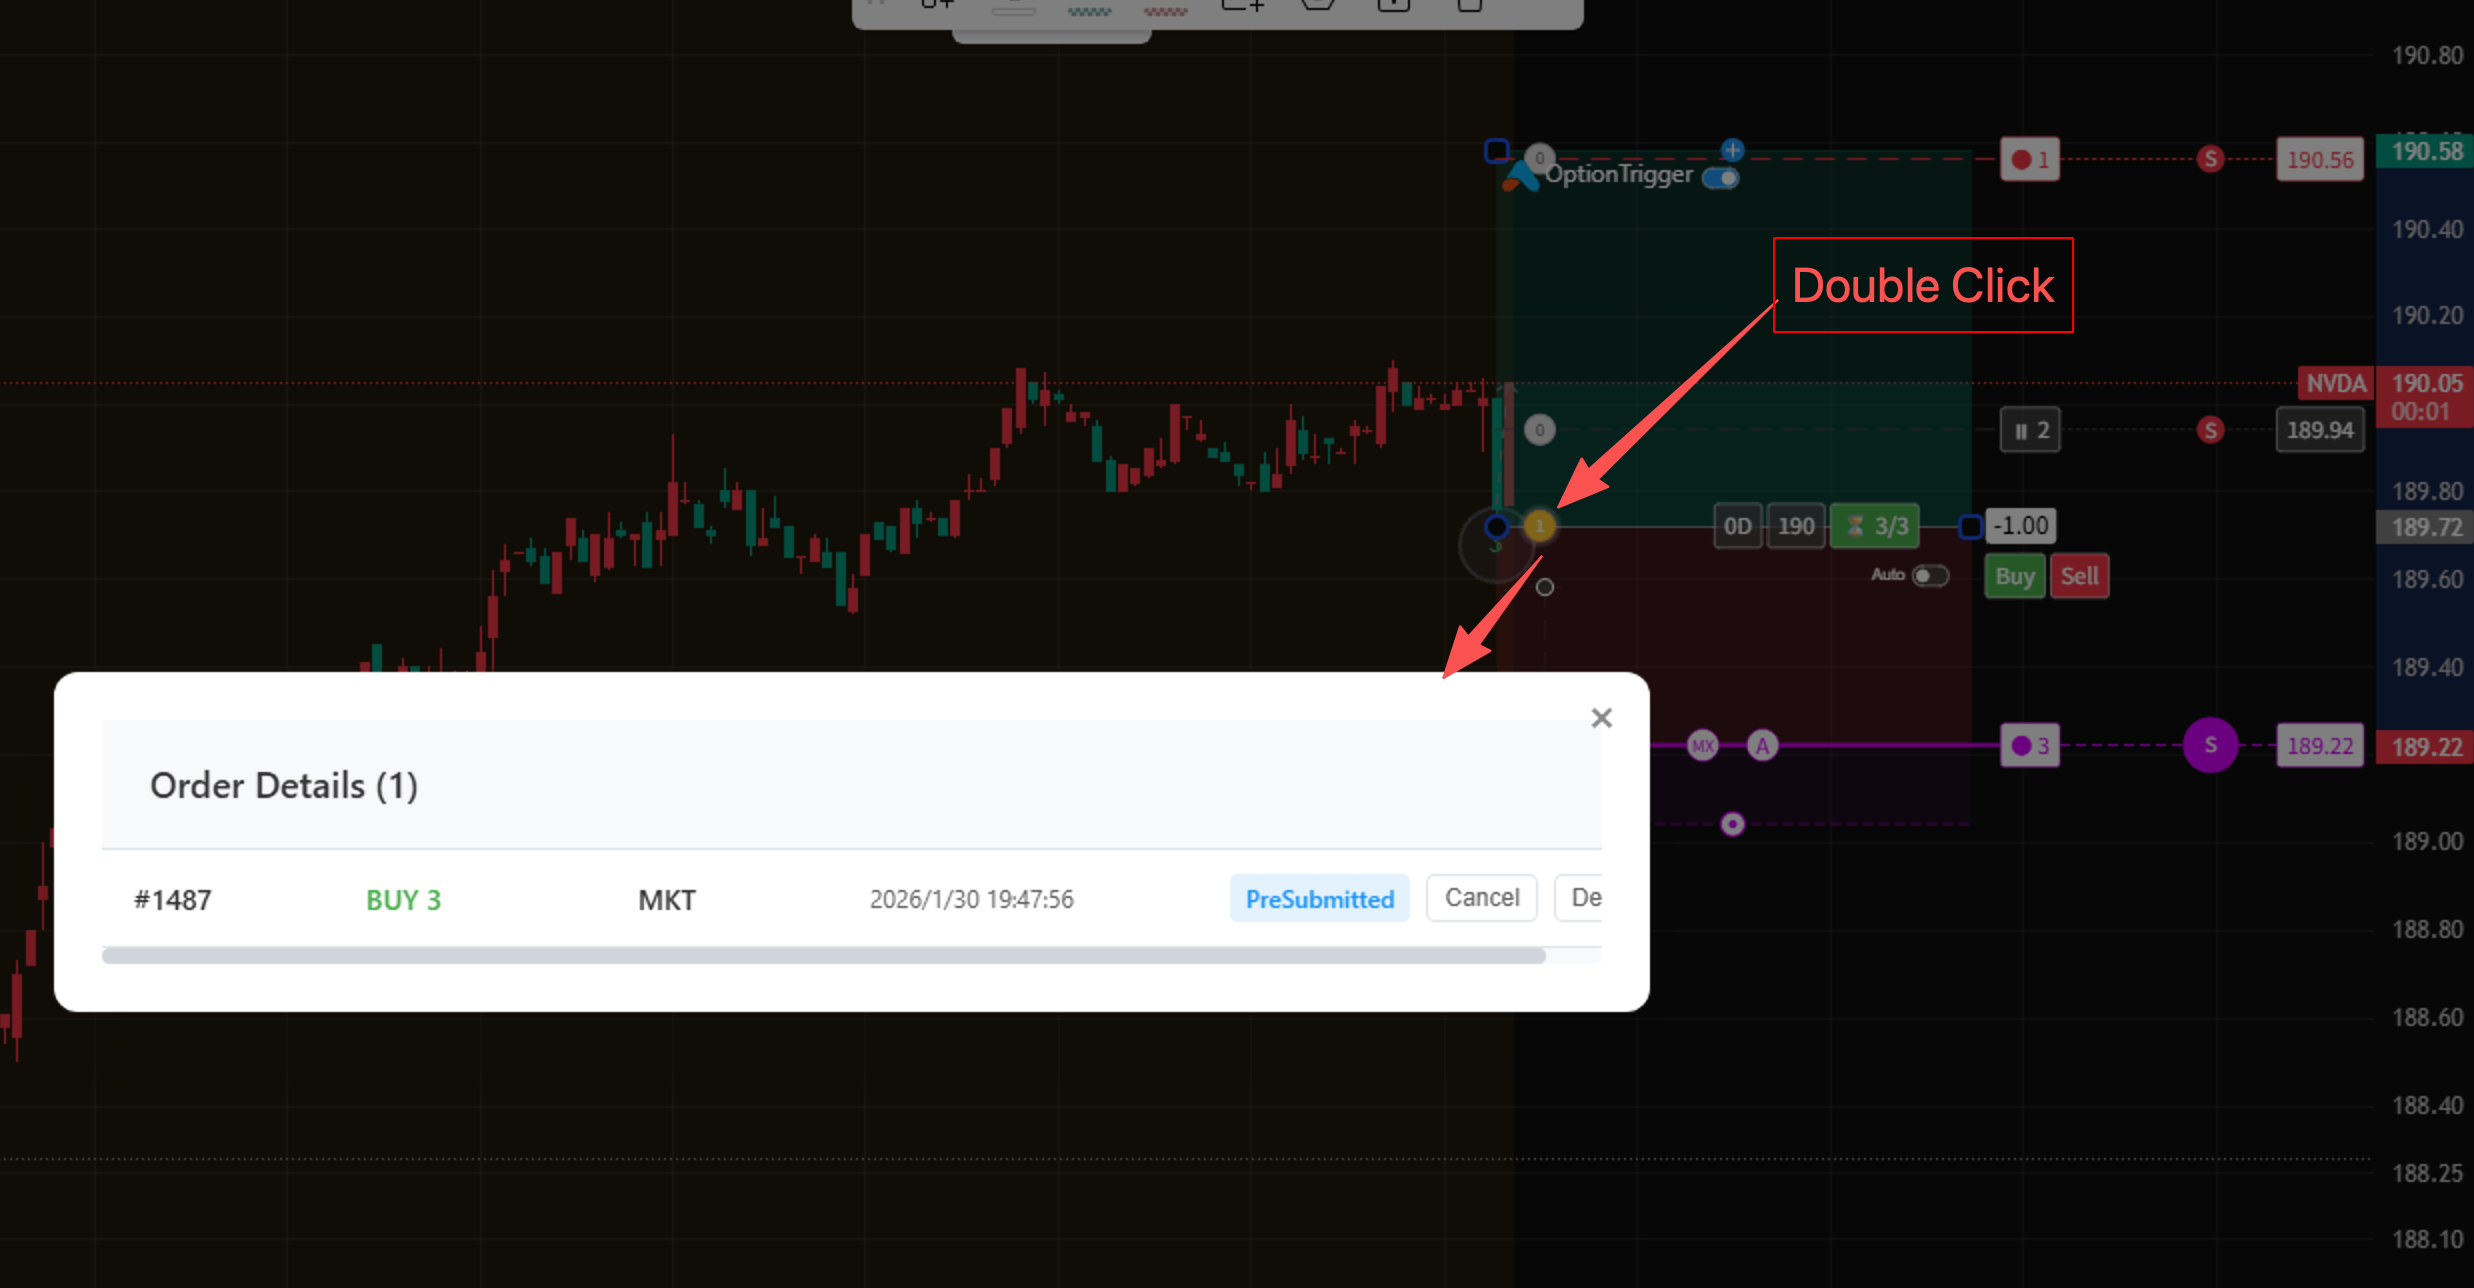
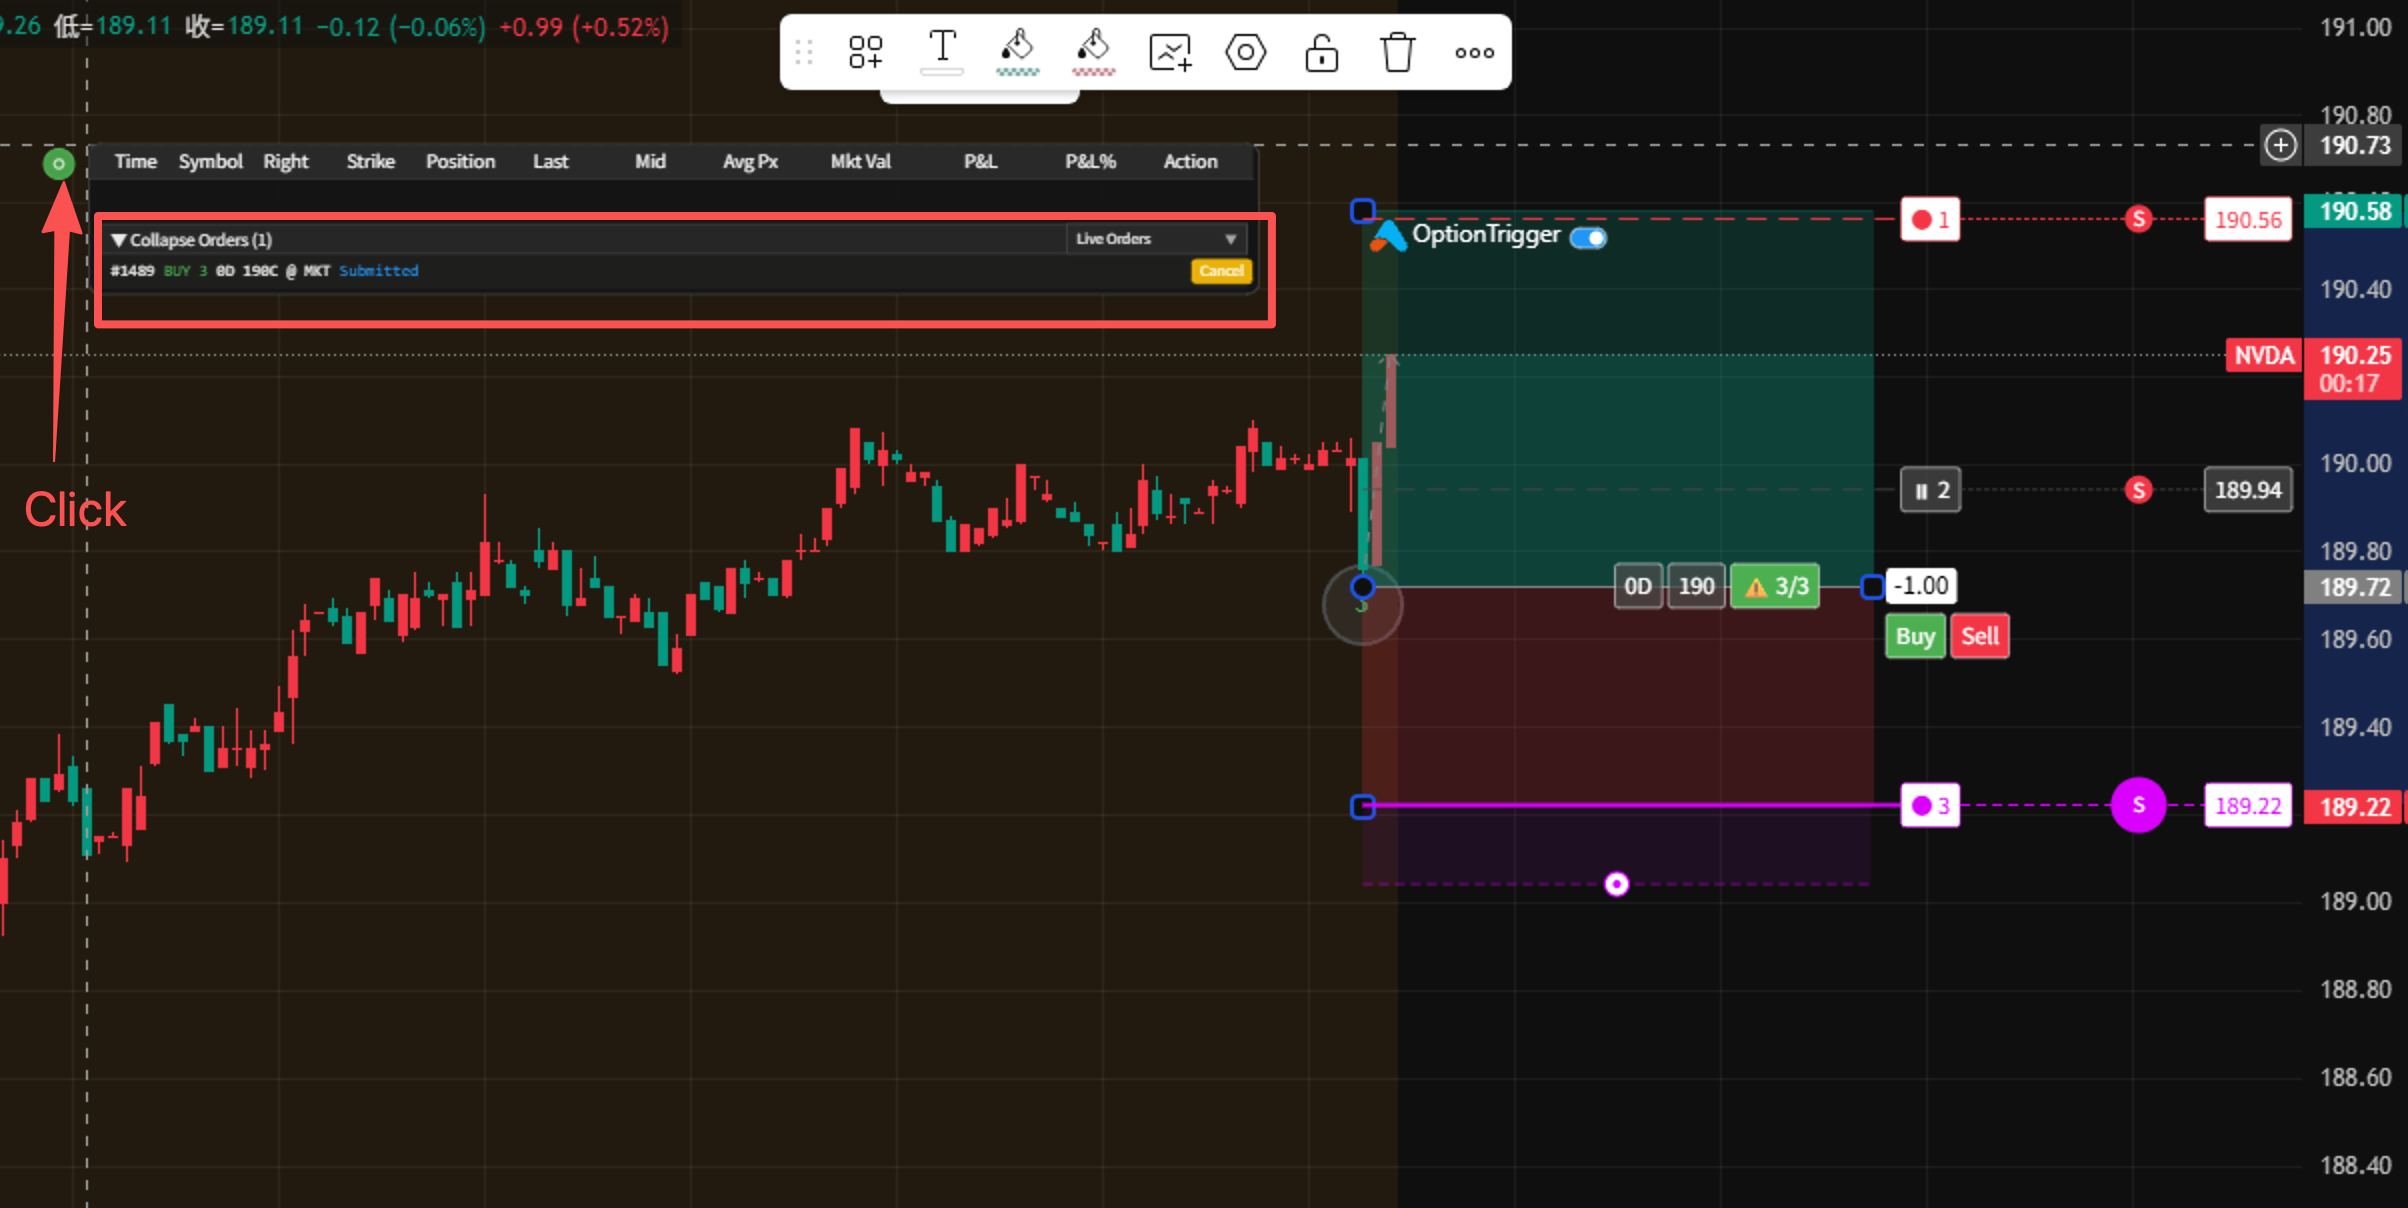
View Order Status on Chart
The trade plan on your chart will update to show the order status:
- Pending: Order submitted, waiting to fill
- Filled: Order executed
- Partial: Partially filled
What Happens After Order Fills?
Once your order is filled:
- Position appears in Portfolio: View real-time P&L
- Chart updates: Shows your live position with current prices
- TP/SL monitoring: OptionTrigger tracks your targets
- Close from chart: Click to close position when ready
Troubleshooting
Order Rejected
Common reasons for order rejection:
- Insufficient buying power
- Market closed
- Invalid contract (expired or delisted)
- TWS connection lost
Order Not Appearing
If your order doesn't appear:
- Check TWS is still connected
- Verify the order in TWS directly
- Refresh TradingView page
- Check the Portfolio Panel
Price Slippage
Market orders may fill at different prices than displayed. For entries, try Limit + Mid in Order Mode when the option spread is wide.
Limit Order Not Filling
Limit entries wait for price. If you need immediate entry, switch the panel to Market or use Aggressive limit strategy. TP/SL limits may also delay exits — see the order-mode guide for SL market vs limit tradeoffs.
Next Steps
Now that you've placed your first order, explore these features:
| Feature | Description |
|---|---|
| Multi-Level Take Profit | Set multiple TP targets |
| Market and Limit Order Modes | Entry / TP / SL / Close order types |
| Stop-Loss Modes | Choose your SL trigger strategy |
| Portfolio Panel | Manage all positions |
| AutoSize Feature | Smart contract selection |
- Trade Options on TradingView — brokers, tools, workflows
- Options Trading Automation Playbook — webhooks vs chart-native execution
- IBKR + TradingView for Options — permissions, TWS, troubleshooting
Congratulations! You've placed your first order with OptionTrigger. Practice with paper trading before going live.